Channels
Same brain, same memory, everywhere your team works.
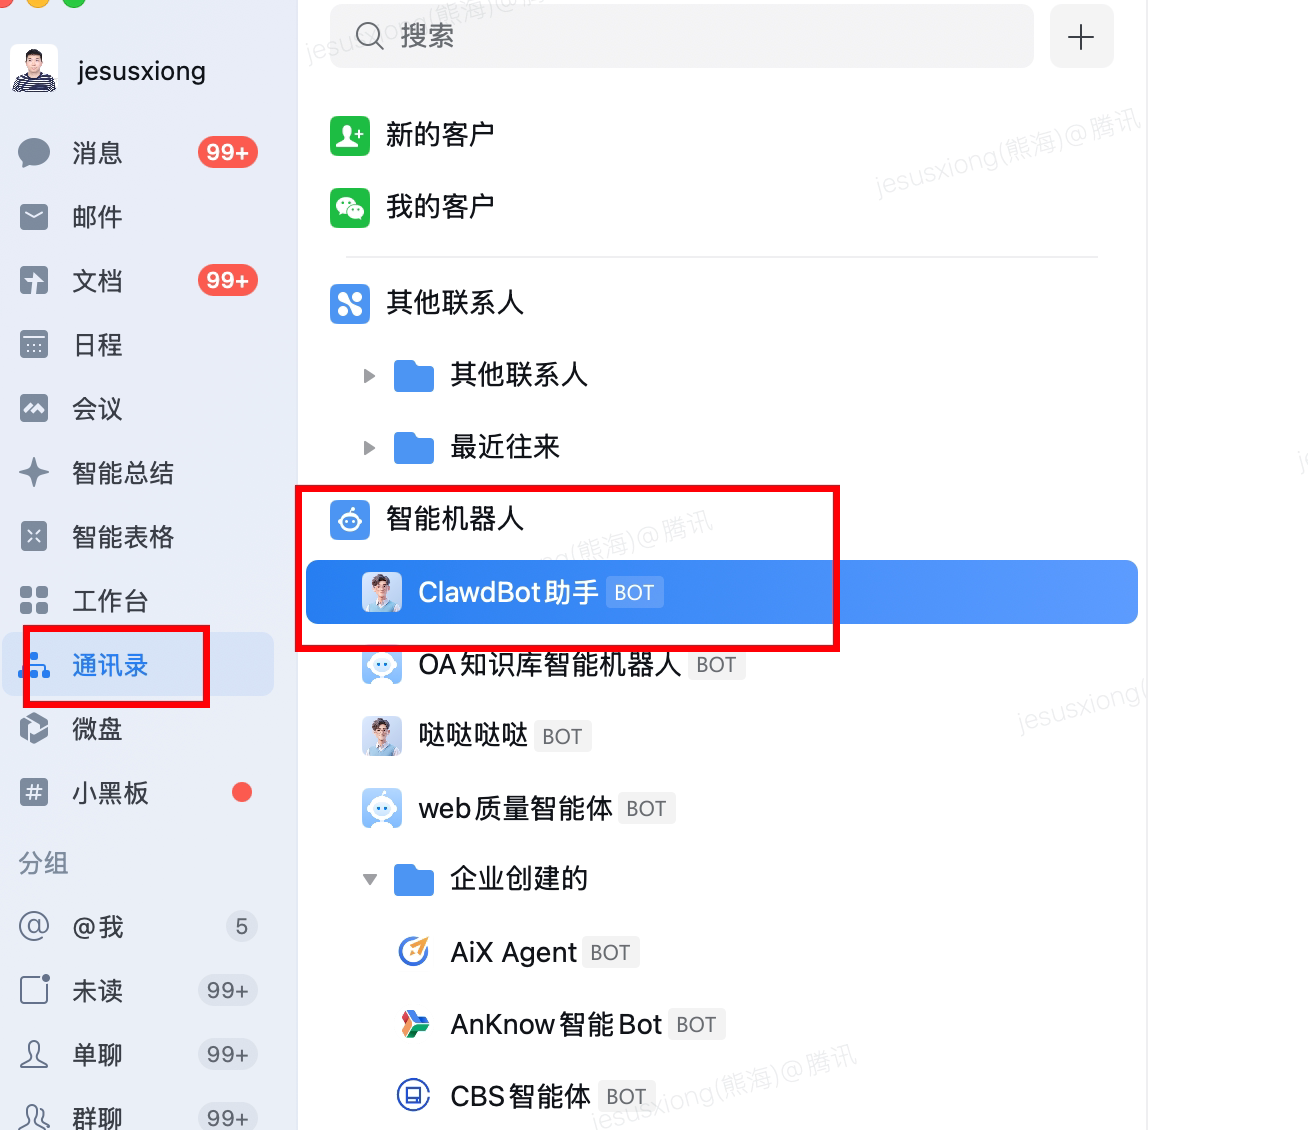
A channel in MateClaw is a different door into the same agent. Your team chats in Feishu? Put an agent in Feishu. Someone prefers Telegram? Same agent, same memory, in Telegram. Web console for the operators, DingTalk for the field, Slack for engineering — one deployment, nine doors.
Every channel is an adapter. Underneath the adapter, the agent doesn't know (or care) which door the message came through.
1.3.0 channel-layer hardening
v1.3.0 lands a wave of long-run stability and group-collaboration work in the channel layer:
- Reply queue + lifecycle gate — separates "channel connection ready" from "messages dispatchable"; events received during a reconnect window are no longer dropped
- WS / long-polling channels run on a leader lease — in multi-instance deployments, only the lease holder replies; the same inbound message no longer gets answered twice by different nodes
- Group-chat per-sender attribution + debounce boundary — two people talking in the same group no longer get their messages mixed up
- Adaptive debounce window for paste-split long messages — a long paste broken into five messages auto-merges back into one
- WeCom approval cards + keepalive + chunk dedup — long-task cards survive upstream session timeouts
- Async tool results forward back to the originating channel — employee runs a long task, the result lands in Feishu / DingTalk / WeCom / Slack with files uploaded per-channel
- Scrubbed fake generated-file URLs — employees no longer hand back
https://example.com/file.docx-style fictitious links
WeCom-specific tuning lives in WeCom deep tuning.
1.4.0 channel-layer hardening
v1.4.0 makes Feishu a first-class channel — interactive cards, streaming cards, approval cards, native tools, media in/out — plus QR binding for QQ:
- Feishu interactive cards (Schema 2.0) — structured replies auto-render as Feishu interactive cards; short plain text stays text
- Feishu approval cards — tool-guard approval flows arrive as an Approve / Deny button card; one tap runs the tool to completion
- Feishu streaming cards (CardKit) — replies stream char-by-char into a single card
- Feishu inbound voice transcription — voice messages go through STT and reach the agent as text
- Feishu inbound file / audio / video download — no longer images only;
media_download_enablednow defaults to true in 1.4.0 - Feishu channel-native tools — calendar lookup and doc read / write, no MCP server required
- QQ QR binding — QQ gets the same scan-to-bind onboarding as DingTalk / Feishu
- Per-conversation model selection across all IM channels — IM conversations remember a per-conversation model, just like web
Feishu specifics are spelled out in the Feishu section below.
1.5.0 channel improvements
- Shared inbound media pipeline — WeChat and WeCom are currently wired onto a shared inbound-media downloader + magic-byte type detection + exponential-backoff retry (other IM channels to follow). File types are decided from content bytes (no more hardcoded
image/*); HEIC / WEBP / DOCX / XLSX and friends are detected correctly, with automatic retry on download failure. - Feishu: follow-up text auto-carries recent files (#201) — send a file in a Feishu chat first (even without @-mentioning the employee), then a text message, and the cached files are auto-attached as content parts for the employee — 5 files per chat, 60-minute TTL.
The nine channels
| Channel | Transport | Streaming | Notes |
|---|---|---|---|
| Web | SSE | ✅ | Built in, no setup |
| DingTalk | Stream (WebSocket) / Webhook | ✅ AI Card | No public IP in stream mode |
| Feishu (Lark) | WebSocket / Webhook | — | WebSocket needs no public IP |
| WeCom (WeChat Work) | Long connection / Webhook | — | Long connection preferred |
| WeChat Personal | HTTP long polling (iLink) | — | Experimental / beta |
| Telegram | Long-Polling / Webhook | Typing | Long-Polling needs no public IP |
| Discord | Gateway WebSocket (JDA) | Typing | Auto-reconnect |
| WebSocket / Callback | — | Official bot platform | |
| Slack | Events API / Socket mode | — | Socket mode needs no public IP |
How a channel actually works
┌──────┐ ┌─────────┐ ┌──────┐ ┌──────┐ ┌──────┐ ┌───────┐ ┌────┐ ┌──────┐ ┌──────┐
│ Web  │ │DingTalk │ │Feishu│ │WeCom │ │ TG   │ │Discord│ │ QQ │ │WeChat│ │Slack │
└──┬───┘ └────┬────┘ └──┬───┘ └──┬───┘ └──┬───┘ └──┬────┘ └─┬──┘ └──┬───┘ └──┬───┘
   │          │         │        │        │        │        │        │       │
   └──────────┴─────────┴────┬───┴────────┴────────┴────────┴────────┴───────┘
                             │
                    ┌────────┴─────────┐
                    │  Channel adapter  │  ← unifies multiple protocols
                    │  layer (+ health) │
                    └────────┬─────────┘
                             │
                    ┌────────┴─────────┐
                    │   Agent engine    │
                    └──────────────────┘
Every channel implements a unified adapter shape — translating platform-specific events into messages the agent can consume. Adding a new channel is a developer task; see Architecture.
Channel health monitor
Every active IM channel adapter is watched by a health monitor. When an adapter fails to connect or loses its long connection, the monitor kicks off exponential backoff reconnect (2s → 4s → 8s → … capped at 30s). Transient blips self-heal; persistent failures surface in the health view on the admin console.
This is why MateClaw channels don't sit silent after a hiccup: they come back on their own.
Channel configuration basics
Channels are managed through Channel Management in the admin UI. The underlying row in mate_channel:
| Column | What it is |
|---|---|
name | Display name |
type | Channel type (dingtalk, feishu, telegram, …) |
agent_id | Which agent handles messages |
config | JSON object with channel-specific credentials |
enabled | On/off switch |
All credentials encrypted at rest. One agent can have many channels; different channels can talk to different agents.
Web Channel (SSE)
Built in. No setup, no credentials. Uses Server-Sent Events for real-time streaming.
POST /api/v1/chat/stream
Content-Type: application/json
Accept: text/event-stream

{"agentId": 1, "message": "...", "conversationId": "..."}
Event format documented in Chat & Messaging.
DingTalk
Two connection modes (Stream / Webhook) and two message formats (markdown / card).
One-click QR binding (recommended, v1.1.0+)
No developer console login. No "add Robot capability." No "create version." Open the channel form, scan a QR, done.
Channels → New → choose type: DingTalk- In the form, click Bind DingTalk App via QR — a DingTalk-blue QR code unfolds
- Scan it with the DingTalk app and confirm authorization
- Back in the form, Client ID and Client Secret are auto-filled
Sessions are valid for 7 minutes; expired sessions auto-invalidate and regenerate. Fill in the rest (connection mode, agent, message format) as you'd like.
What's happening under the hood
DingTalk's OAuth Device Flow. MateClaw requests a device code from oapi.dingtalk.com, encodes it as a QR; once you confirm, credentials land in the form via the polling endpoint. No webhook, no public IP required.
Manual app creation (fallback)
If the QR flow can't reach DingTalk on your network, or you need finer control over the app config, the open-platform path still works:
Open DingTalk Developer Console, App Development > Internal Apps > Create App
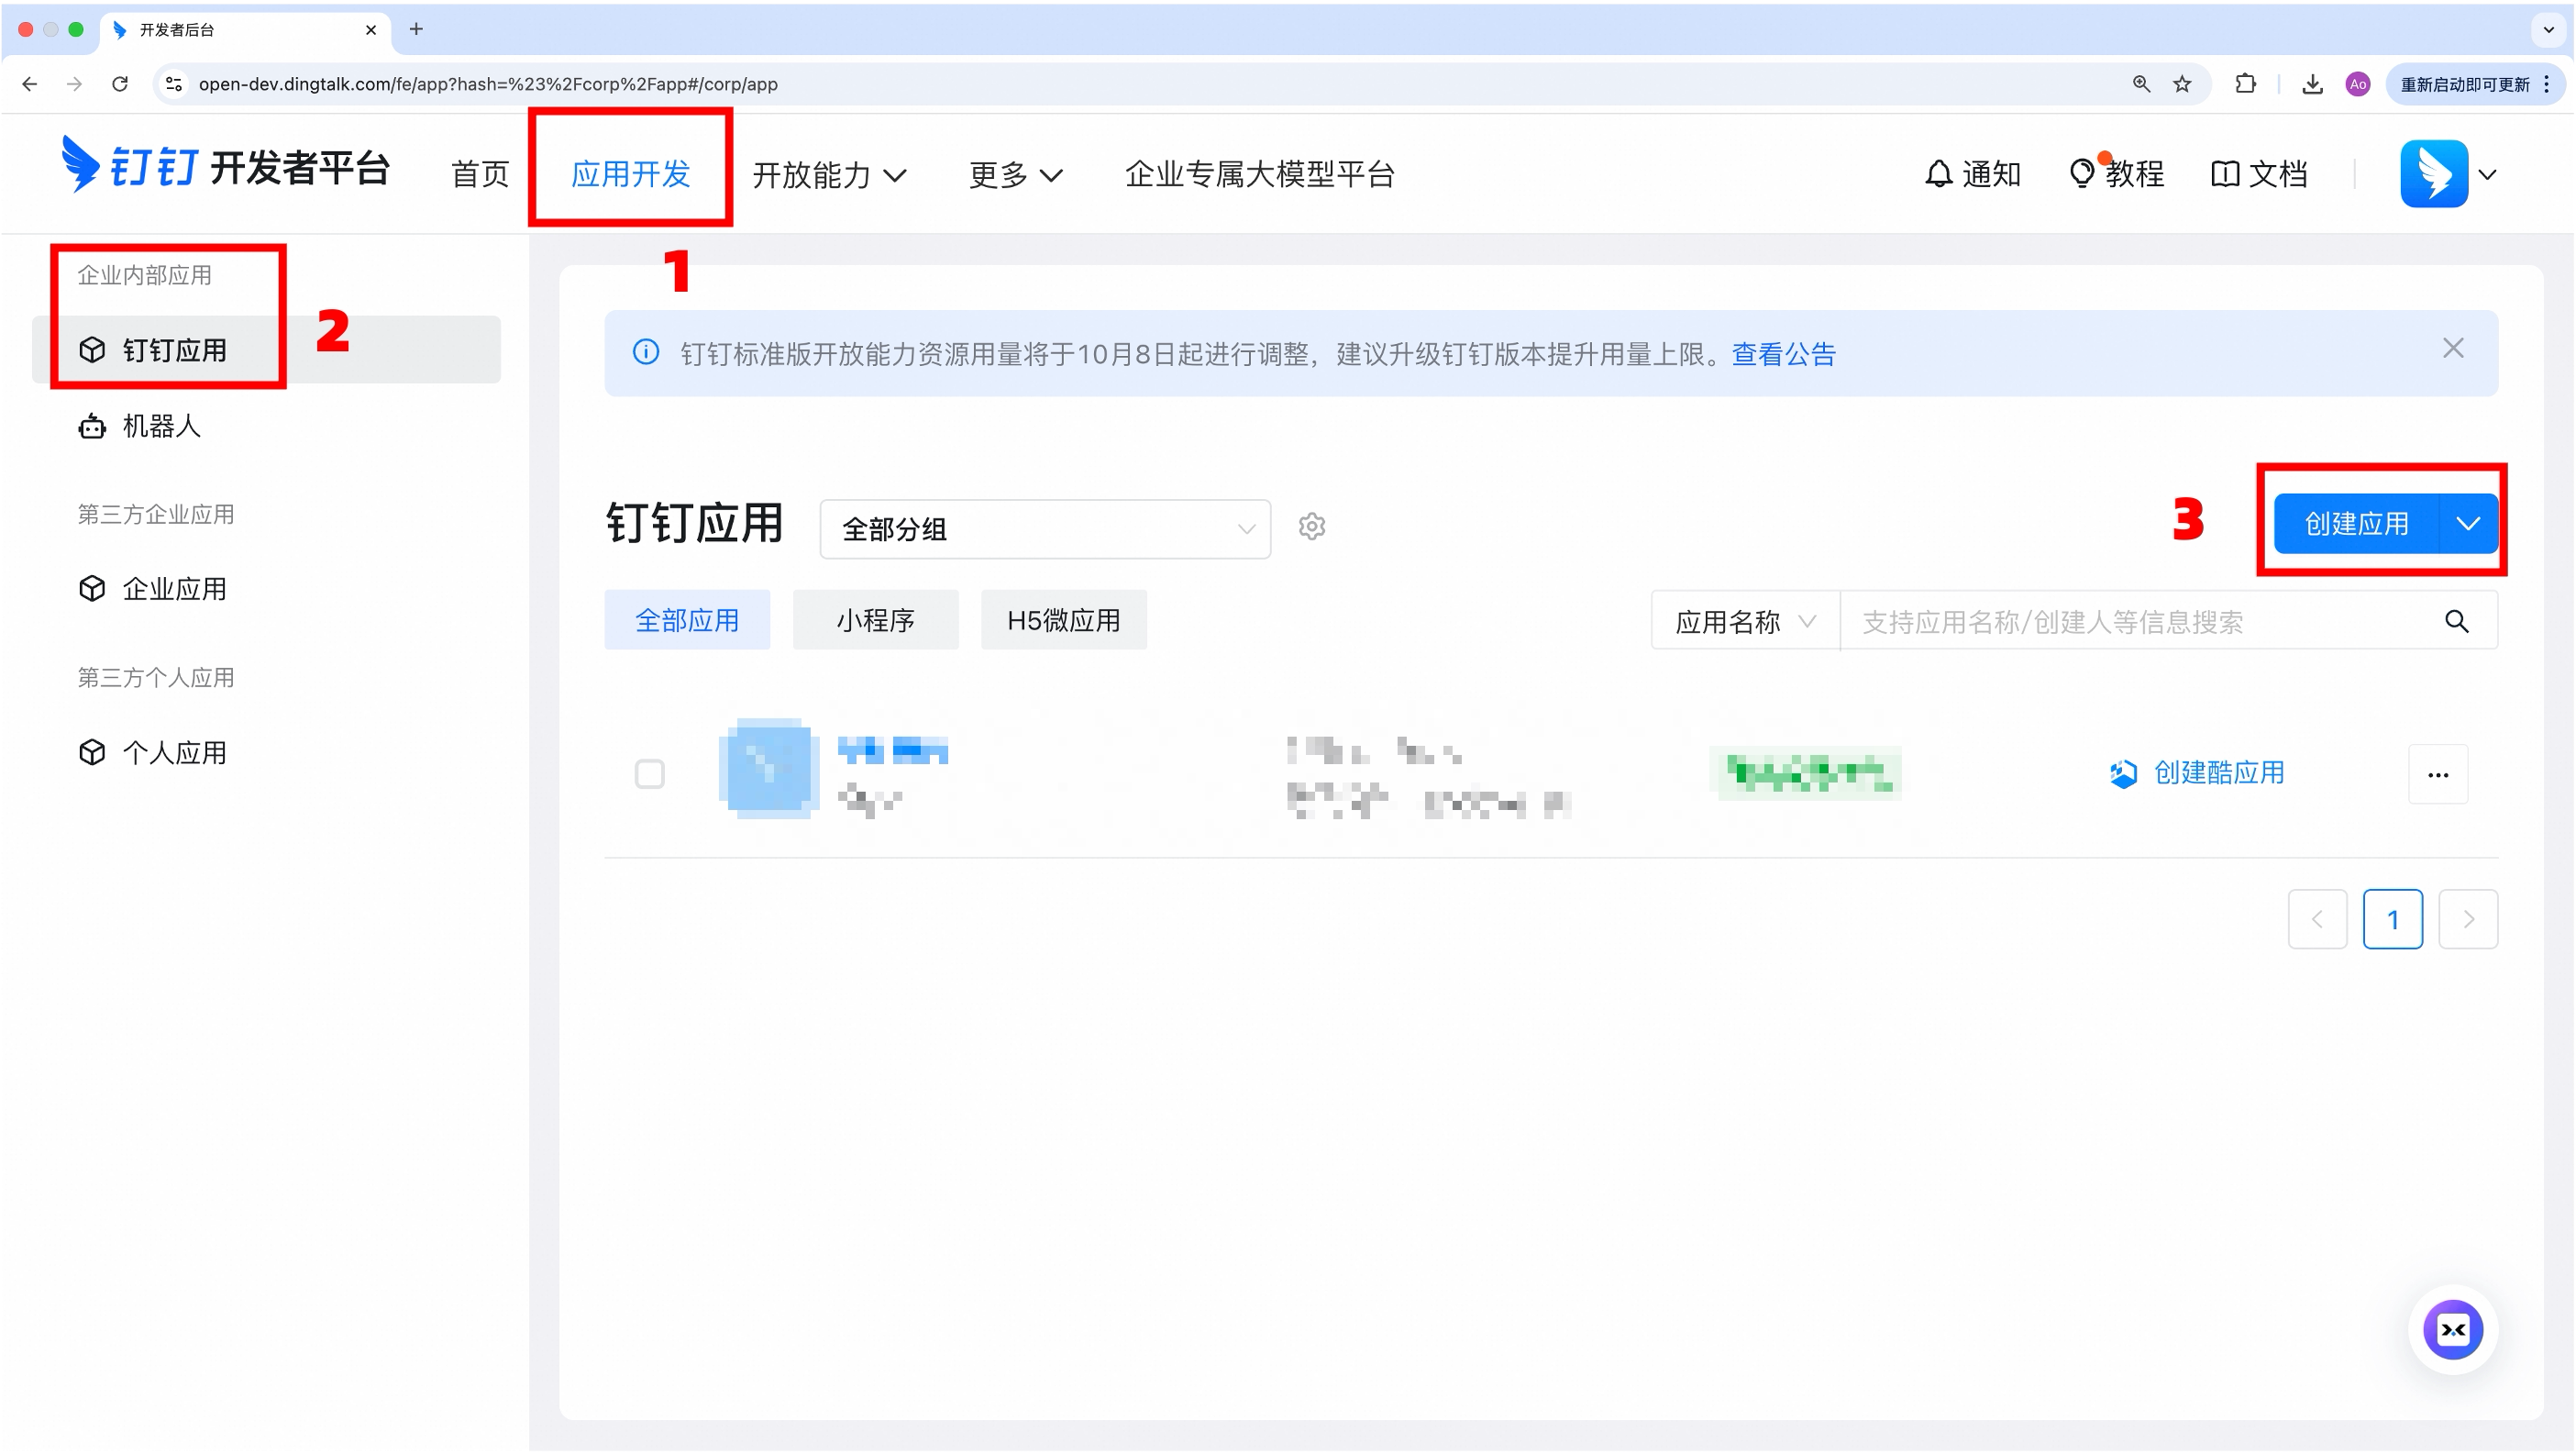
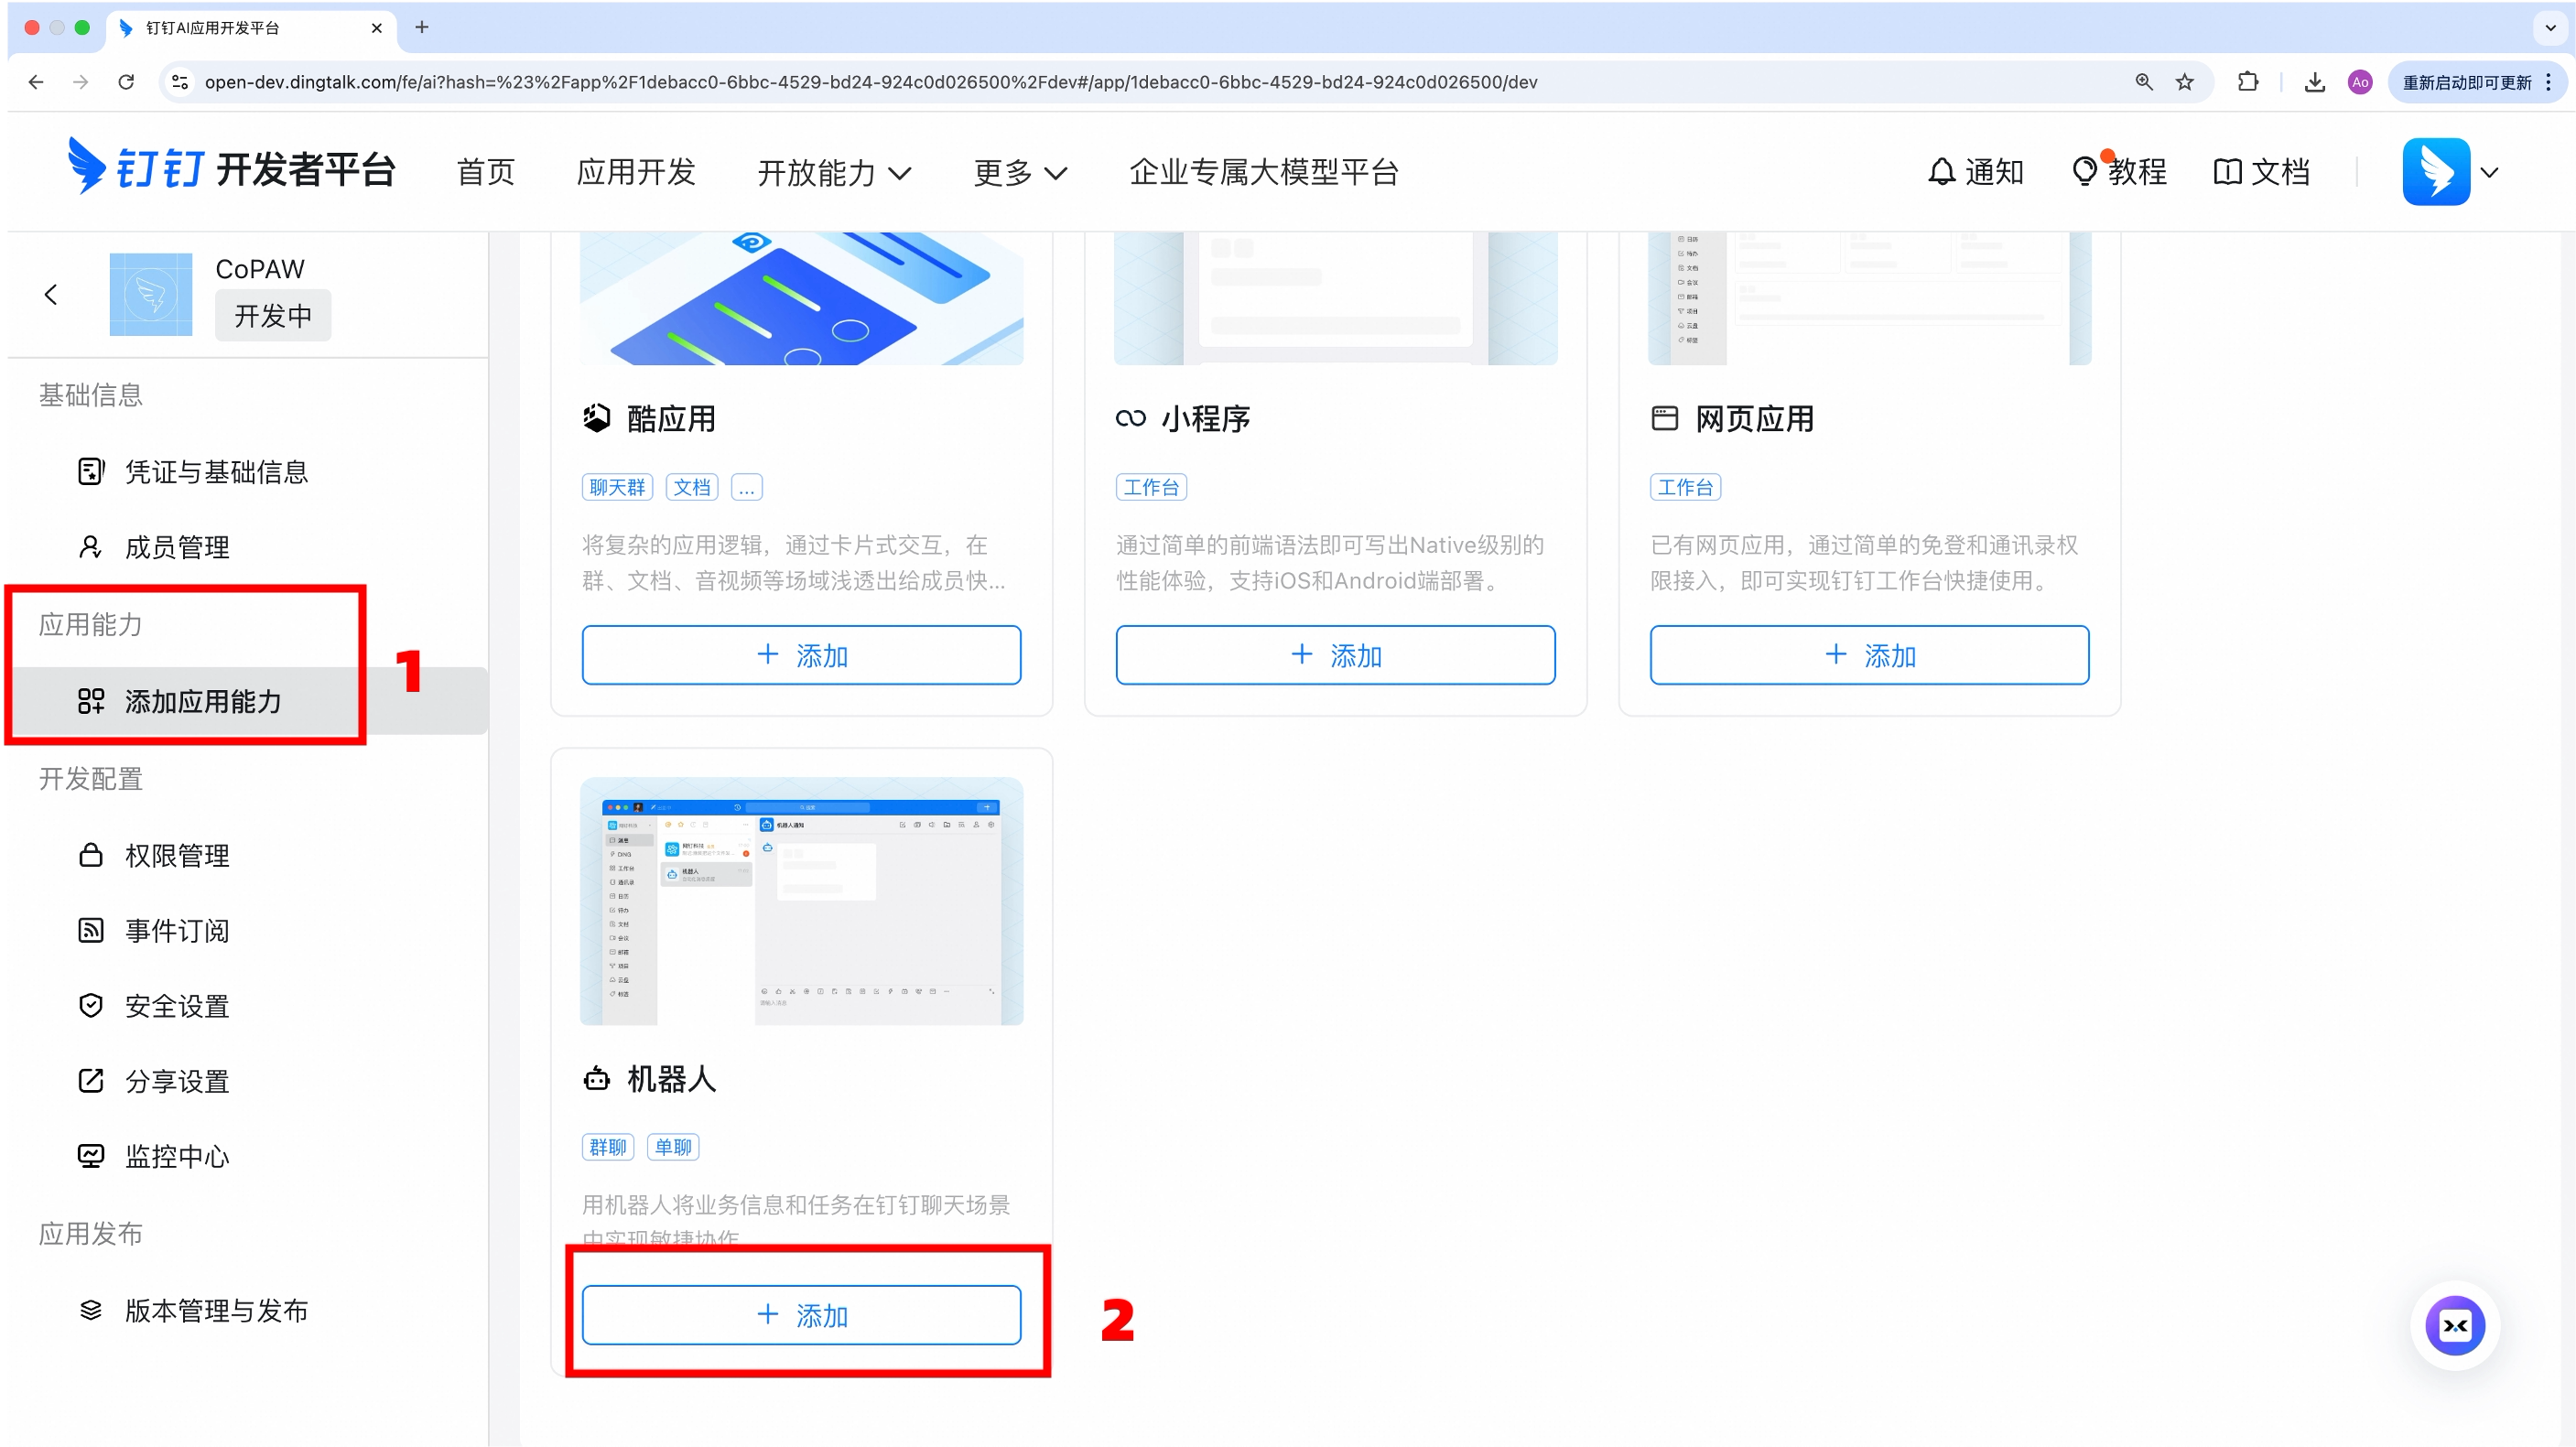
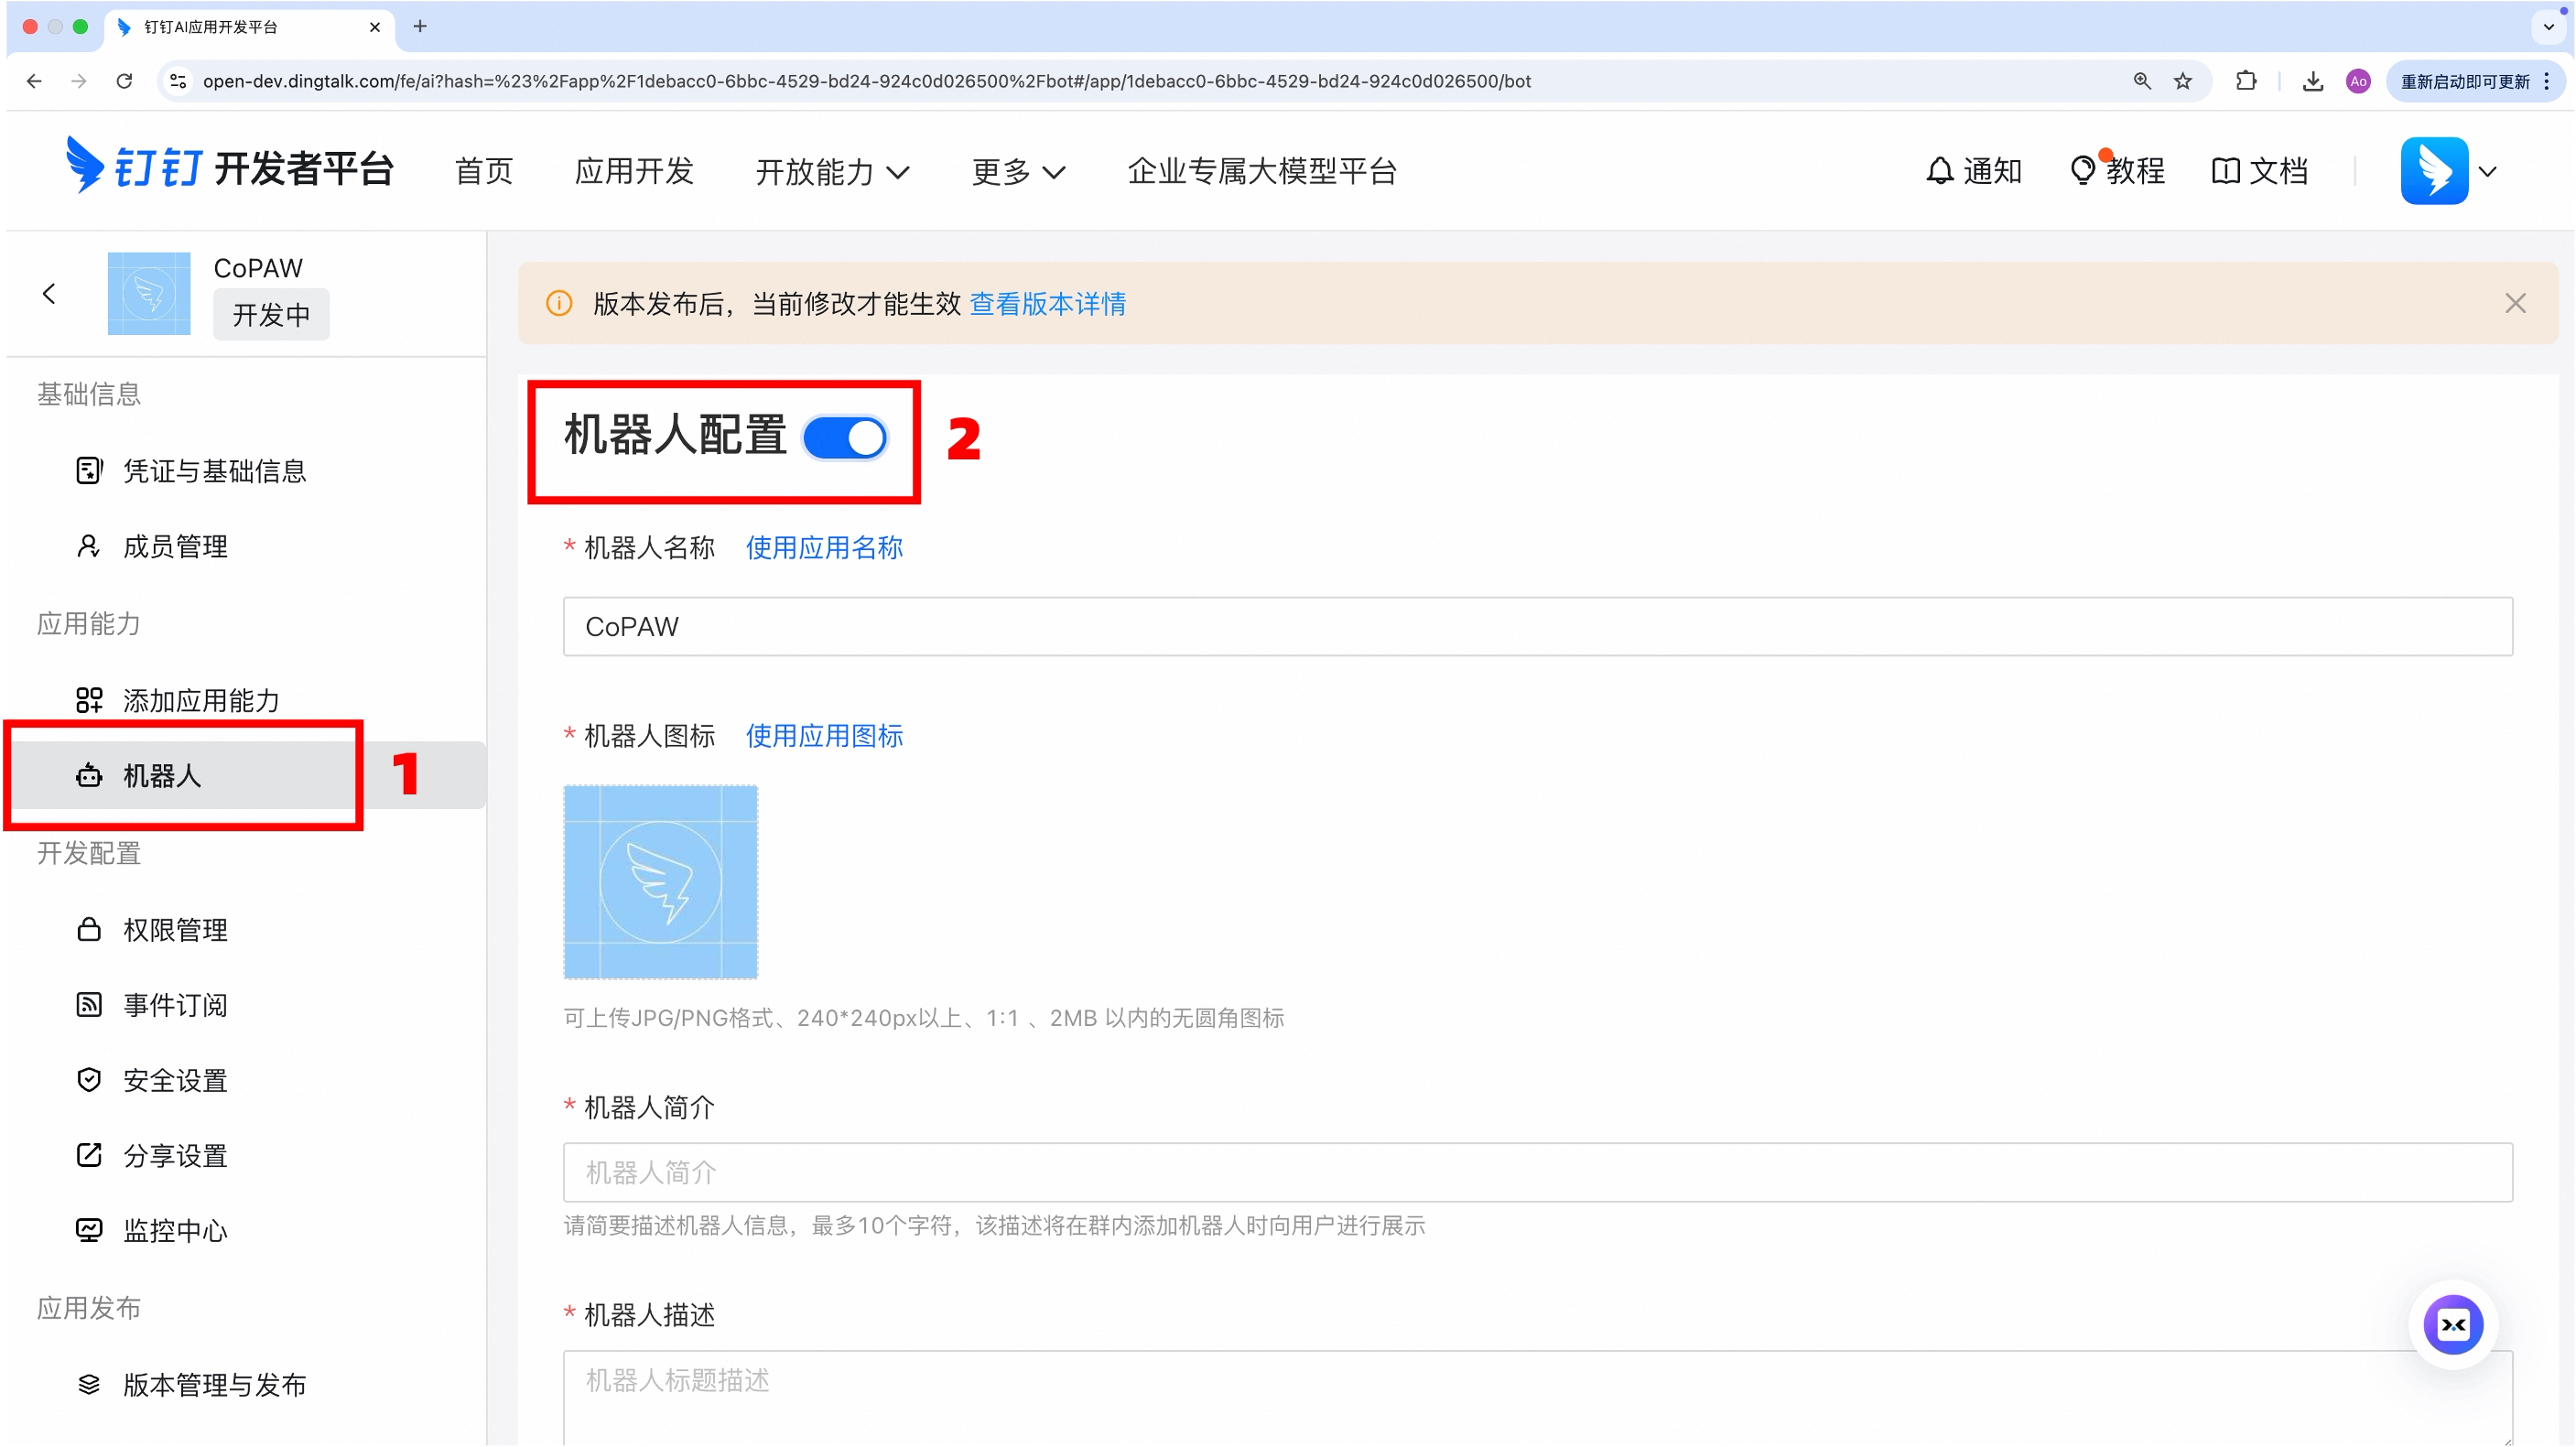
App Capabilities > Add Capability → add Robot
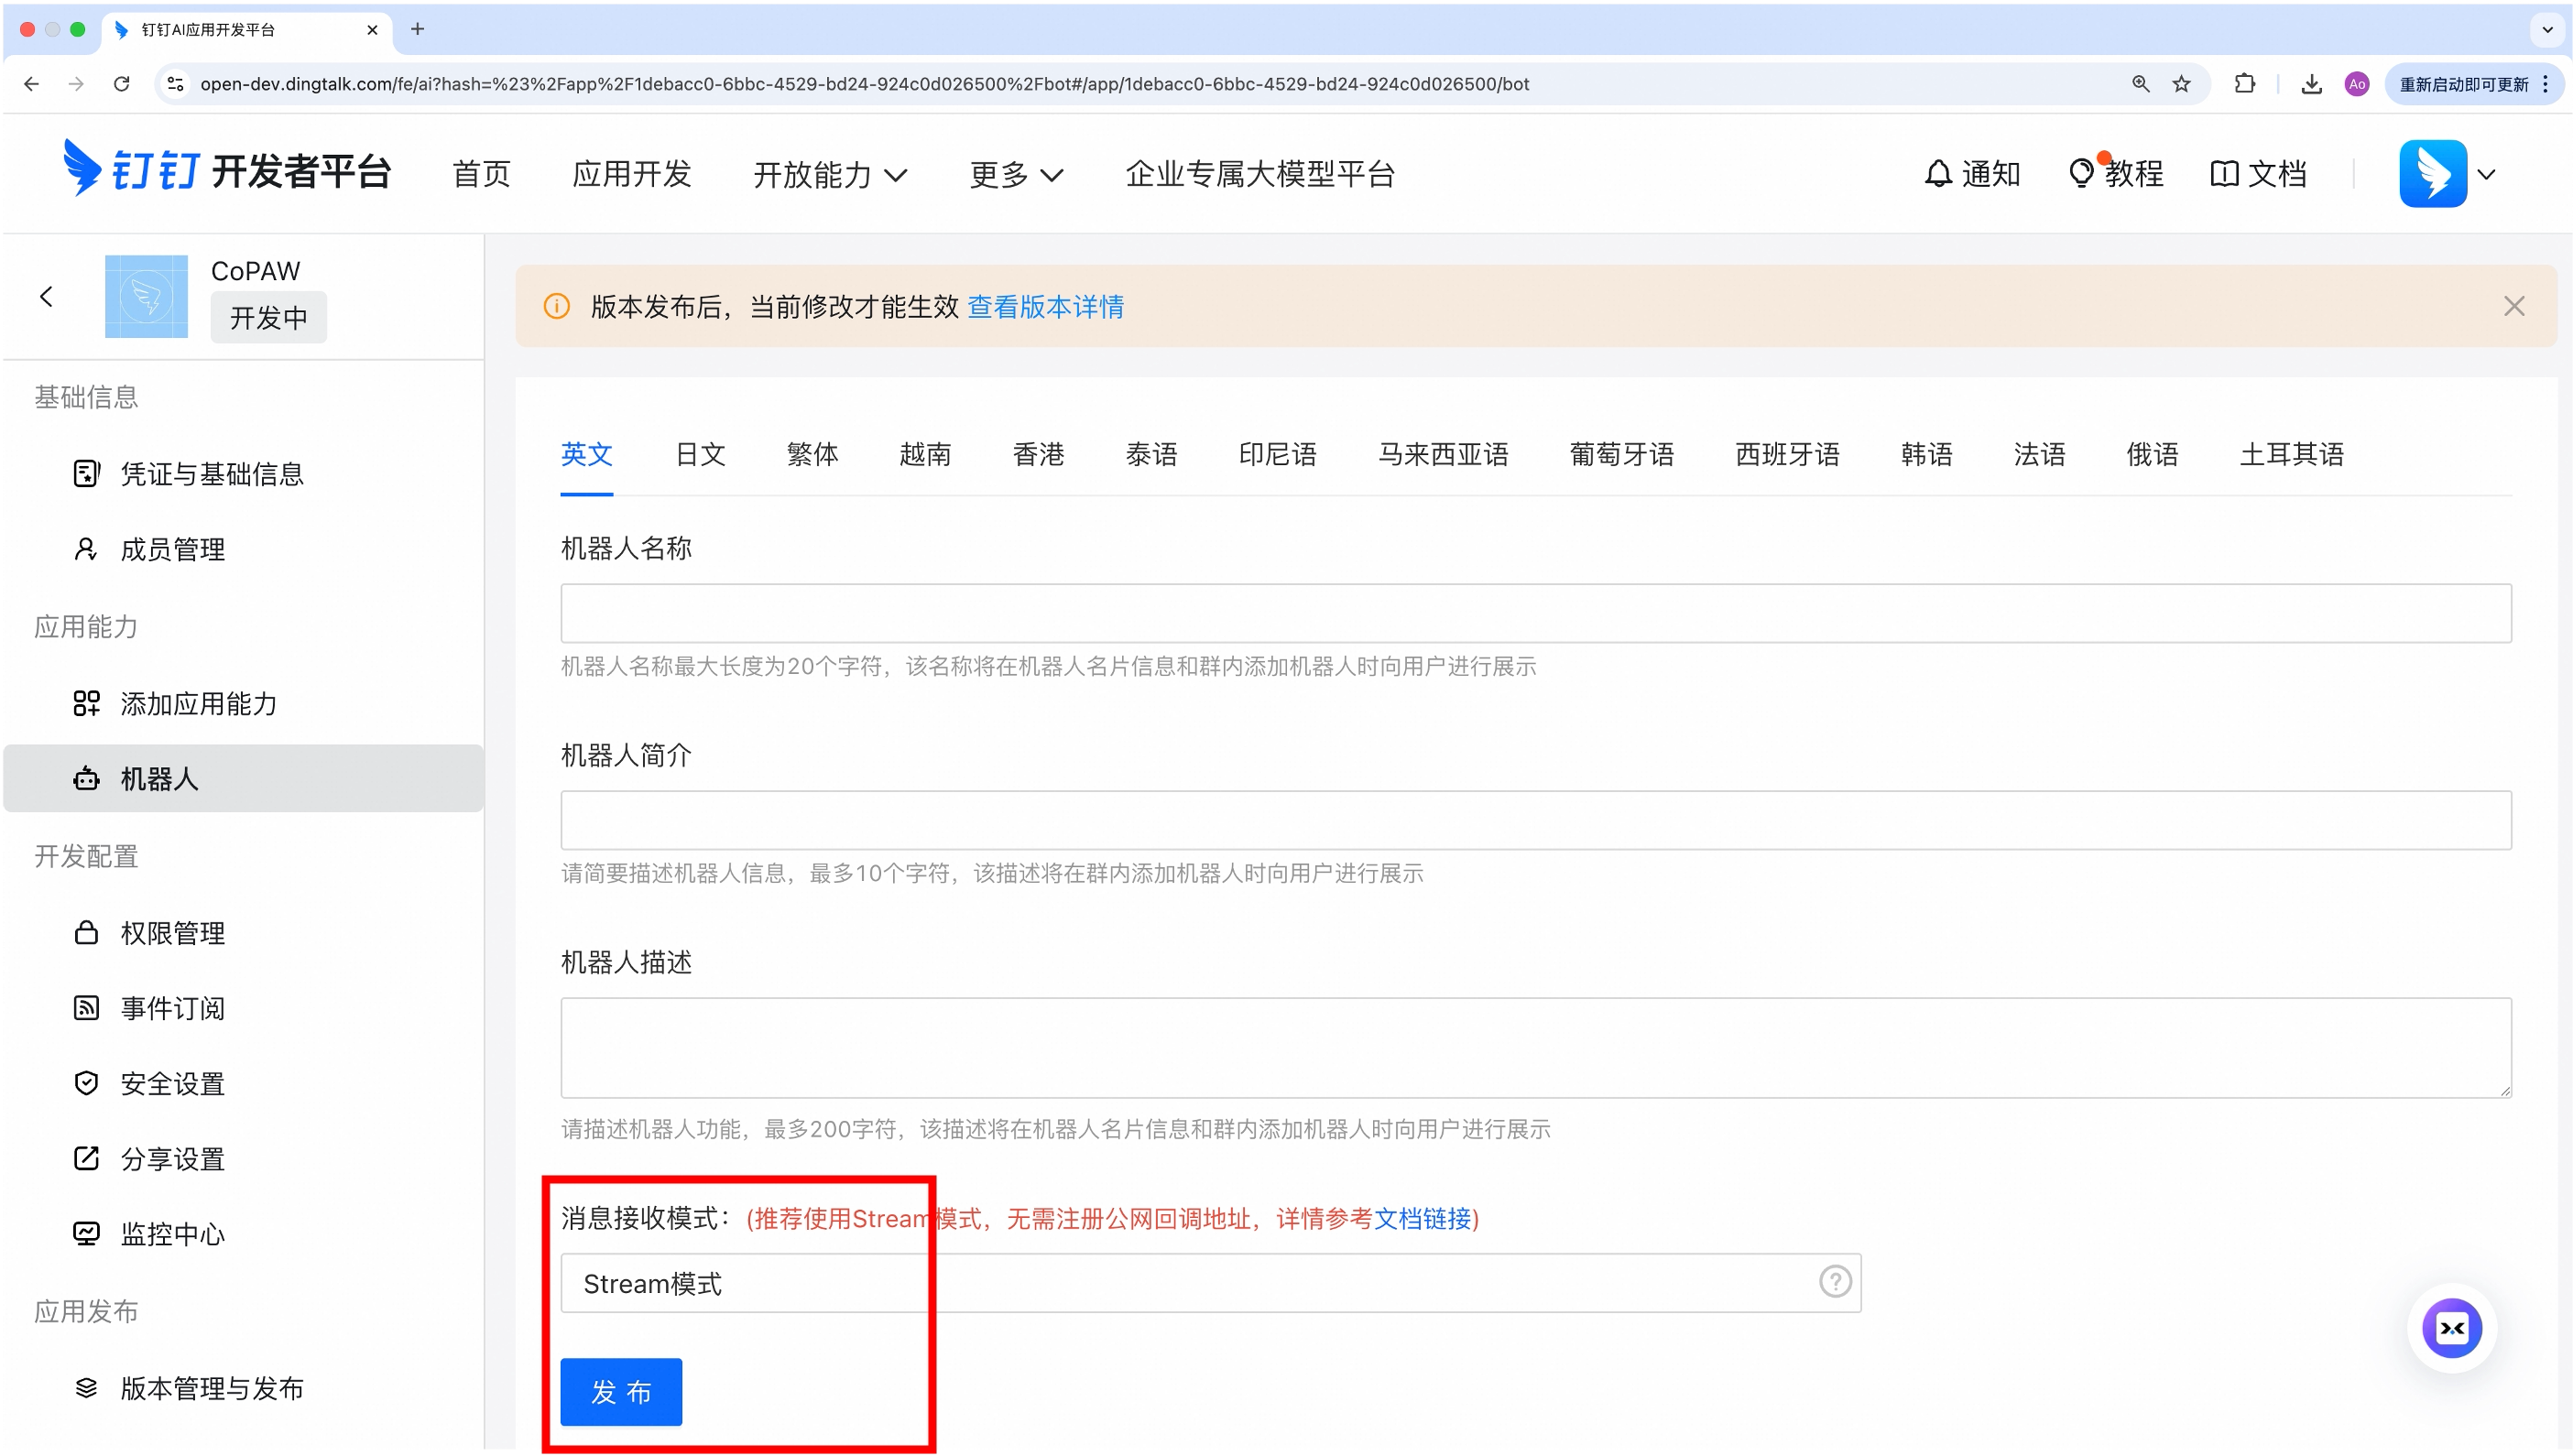
Set message receiving mode to Stream mode, publish
App Release > Version Management → create a new version and save
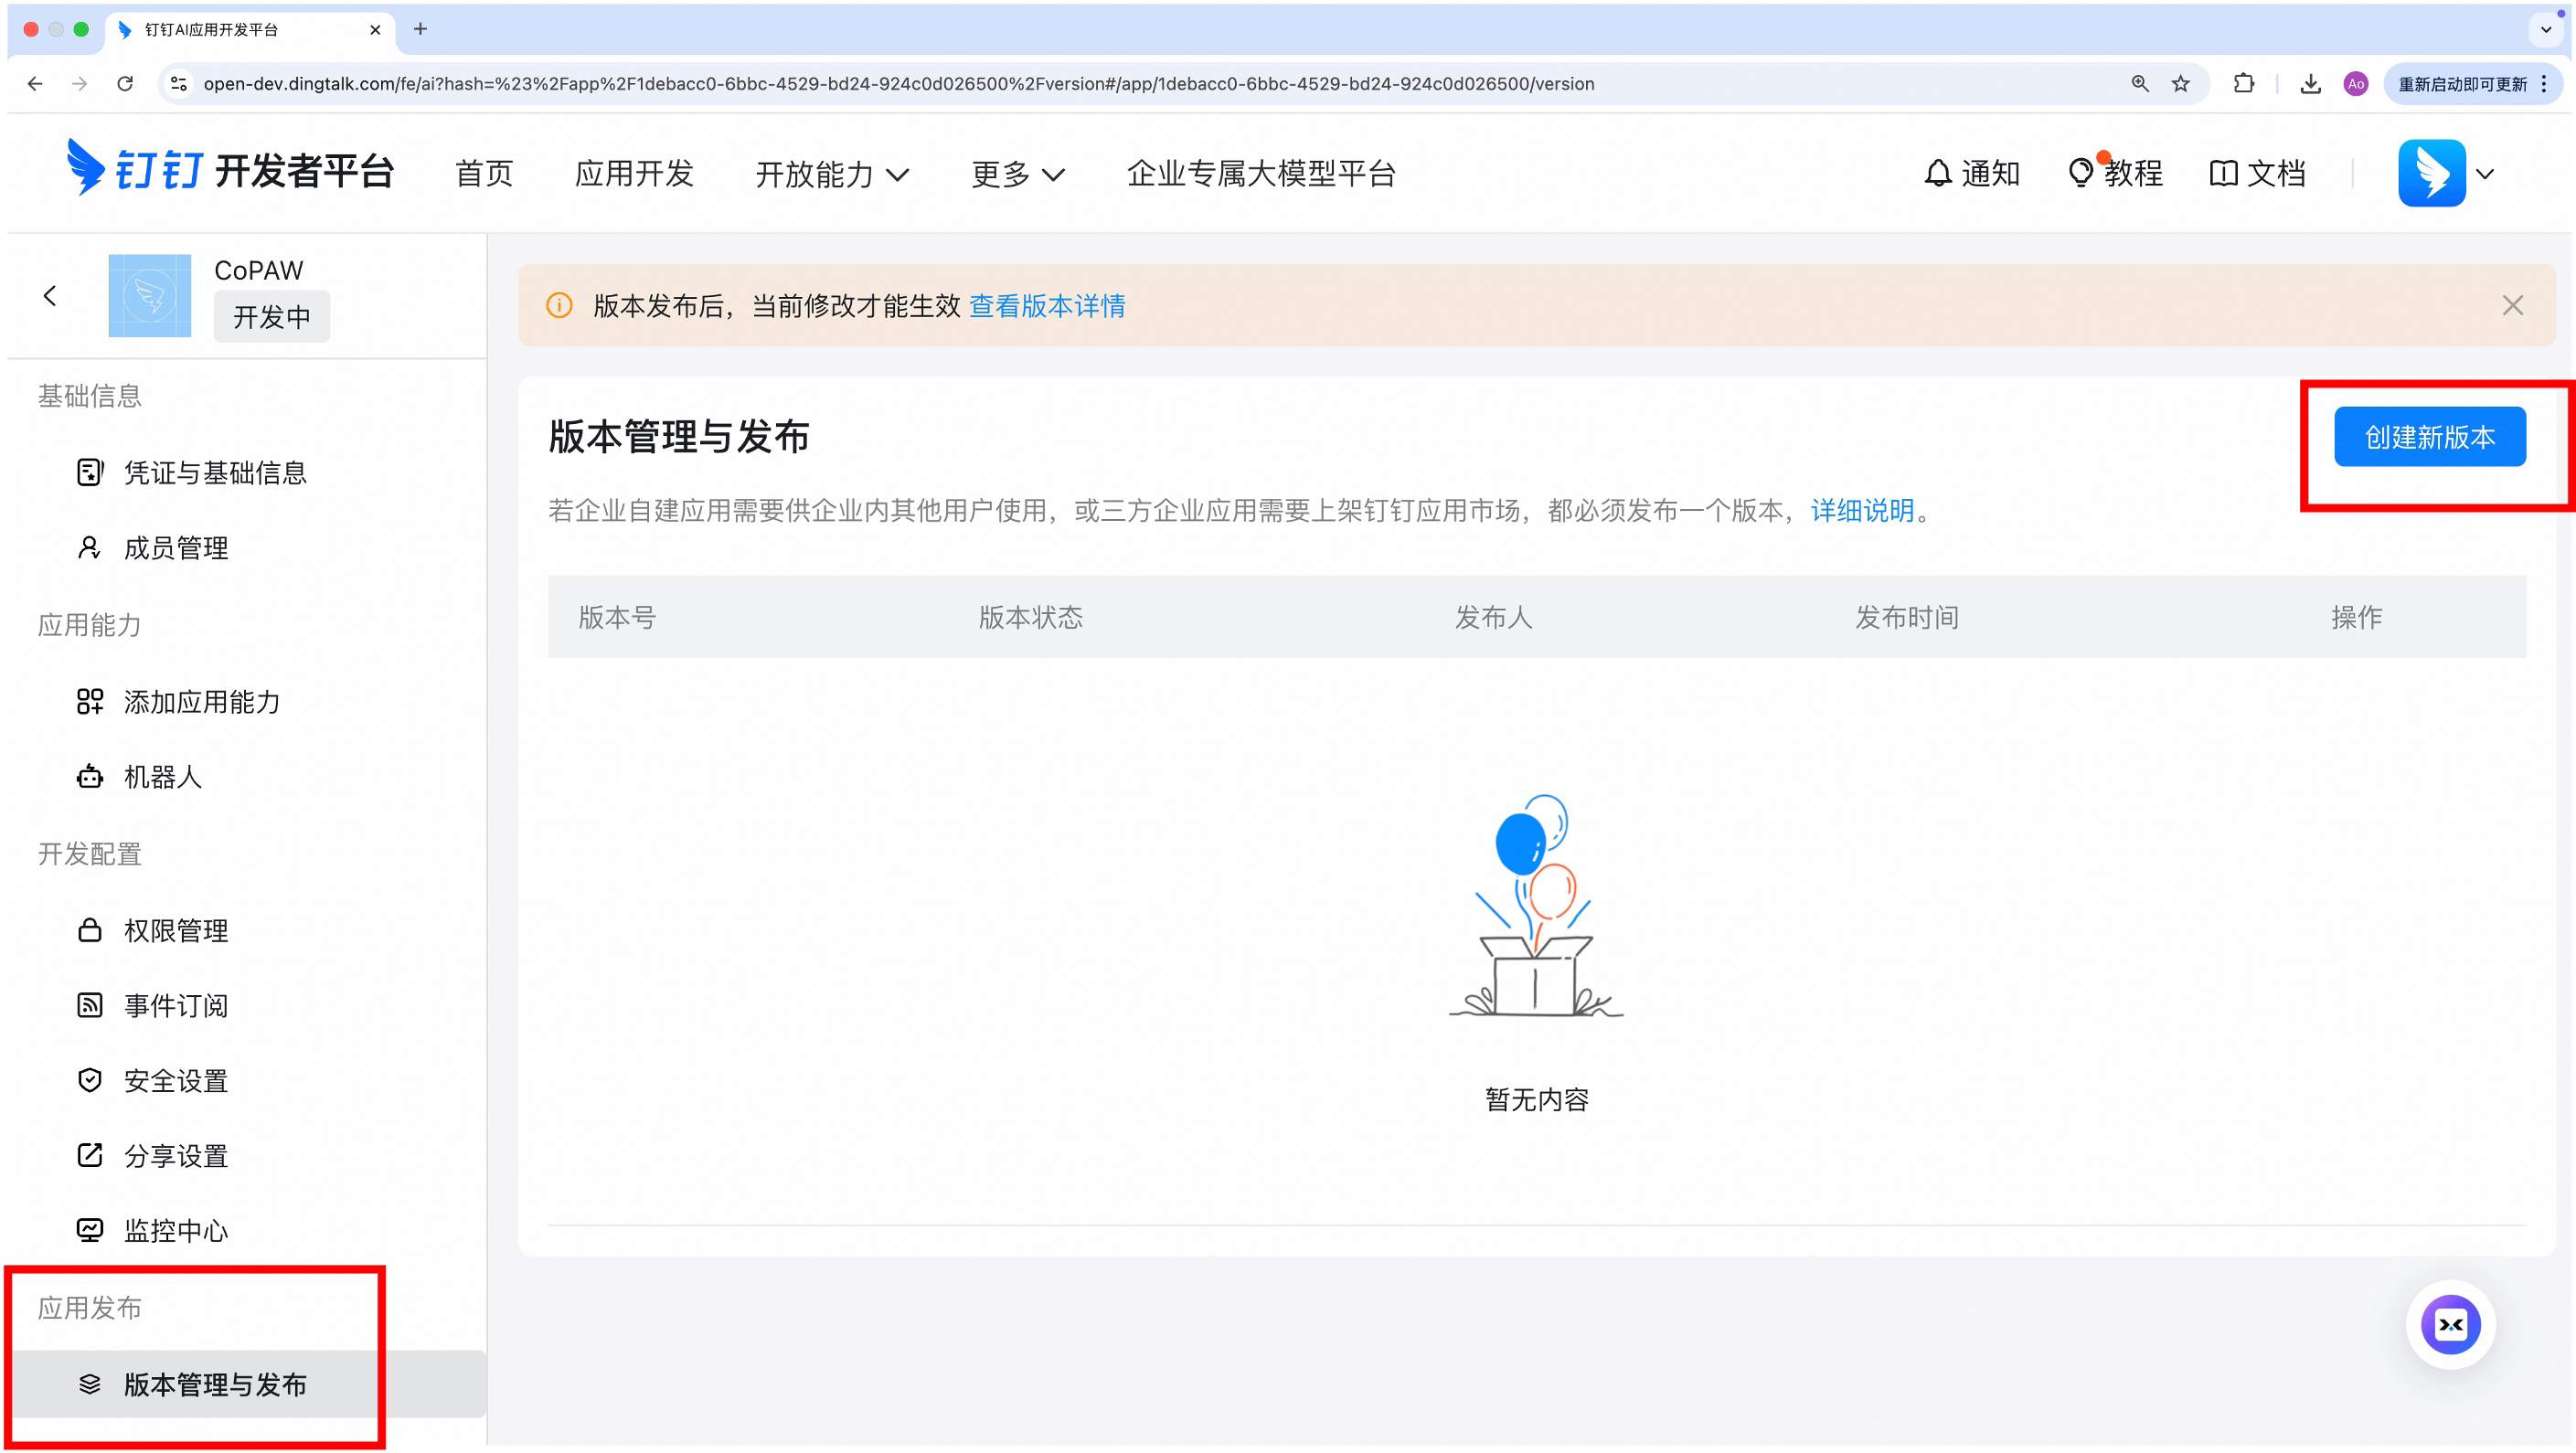
Basic Info > Credentials → get Client ID (AppKey) and Client Secret (AppSecret)

Configure in MateClaw
curl -X POST http://localhost:18088/api/v1/channels \
  -H "Content-Type: application/json" \
  -H "Authorization: Bearer <token>" \
  -d '{
    "name": "DingTalk Bot",
    "type": "dingtalk",
    "agentId": 1,
    "config": {
      "connection_mode": "stream",
      "client_id": "your-client-id",
      "client_secret": "your-client-secret",
      "message_type": "markdown"
    },
    "enabled": true
  }'
TIP
Stream mode uses the official DingTalk SDK to establish a WebSocket long connection. No public IP required. For AI Card streaming, set message_type: card and provide a template ID.
Find and use the bot
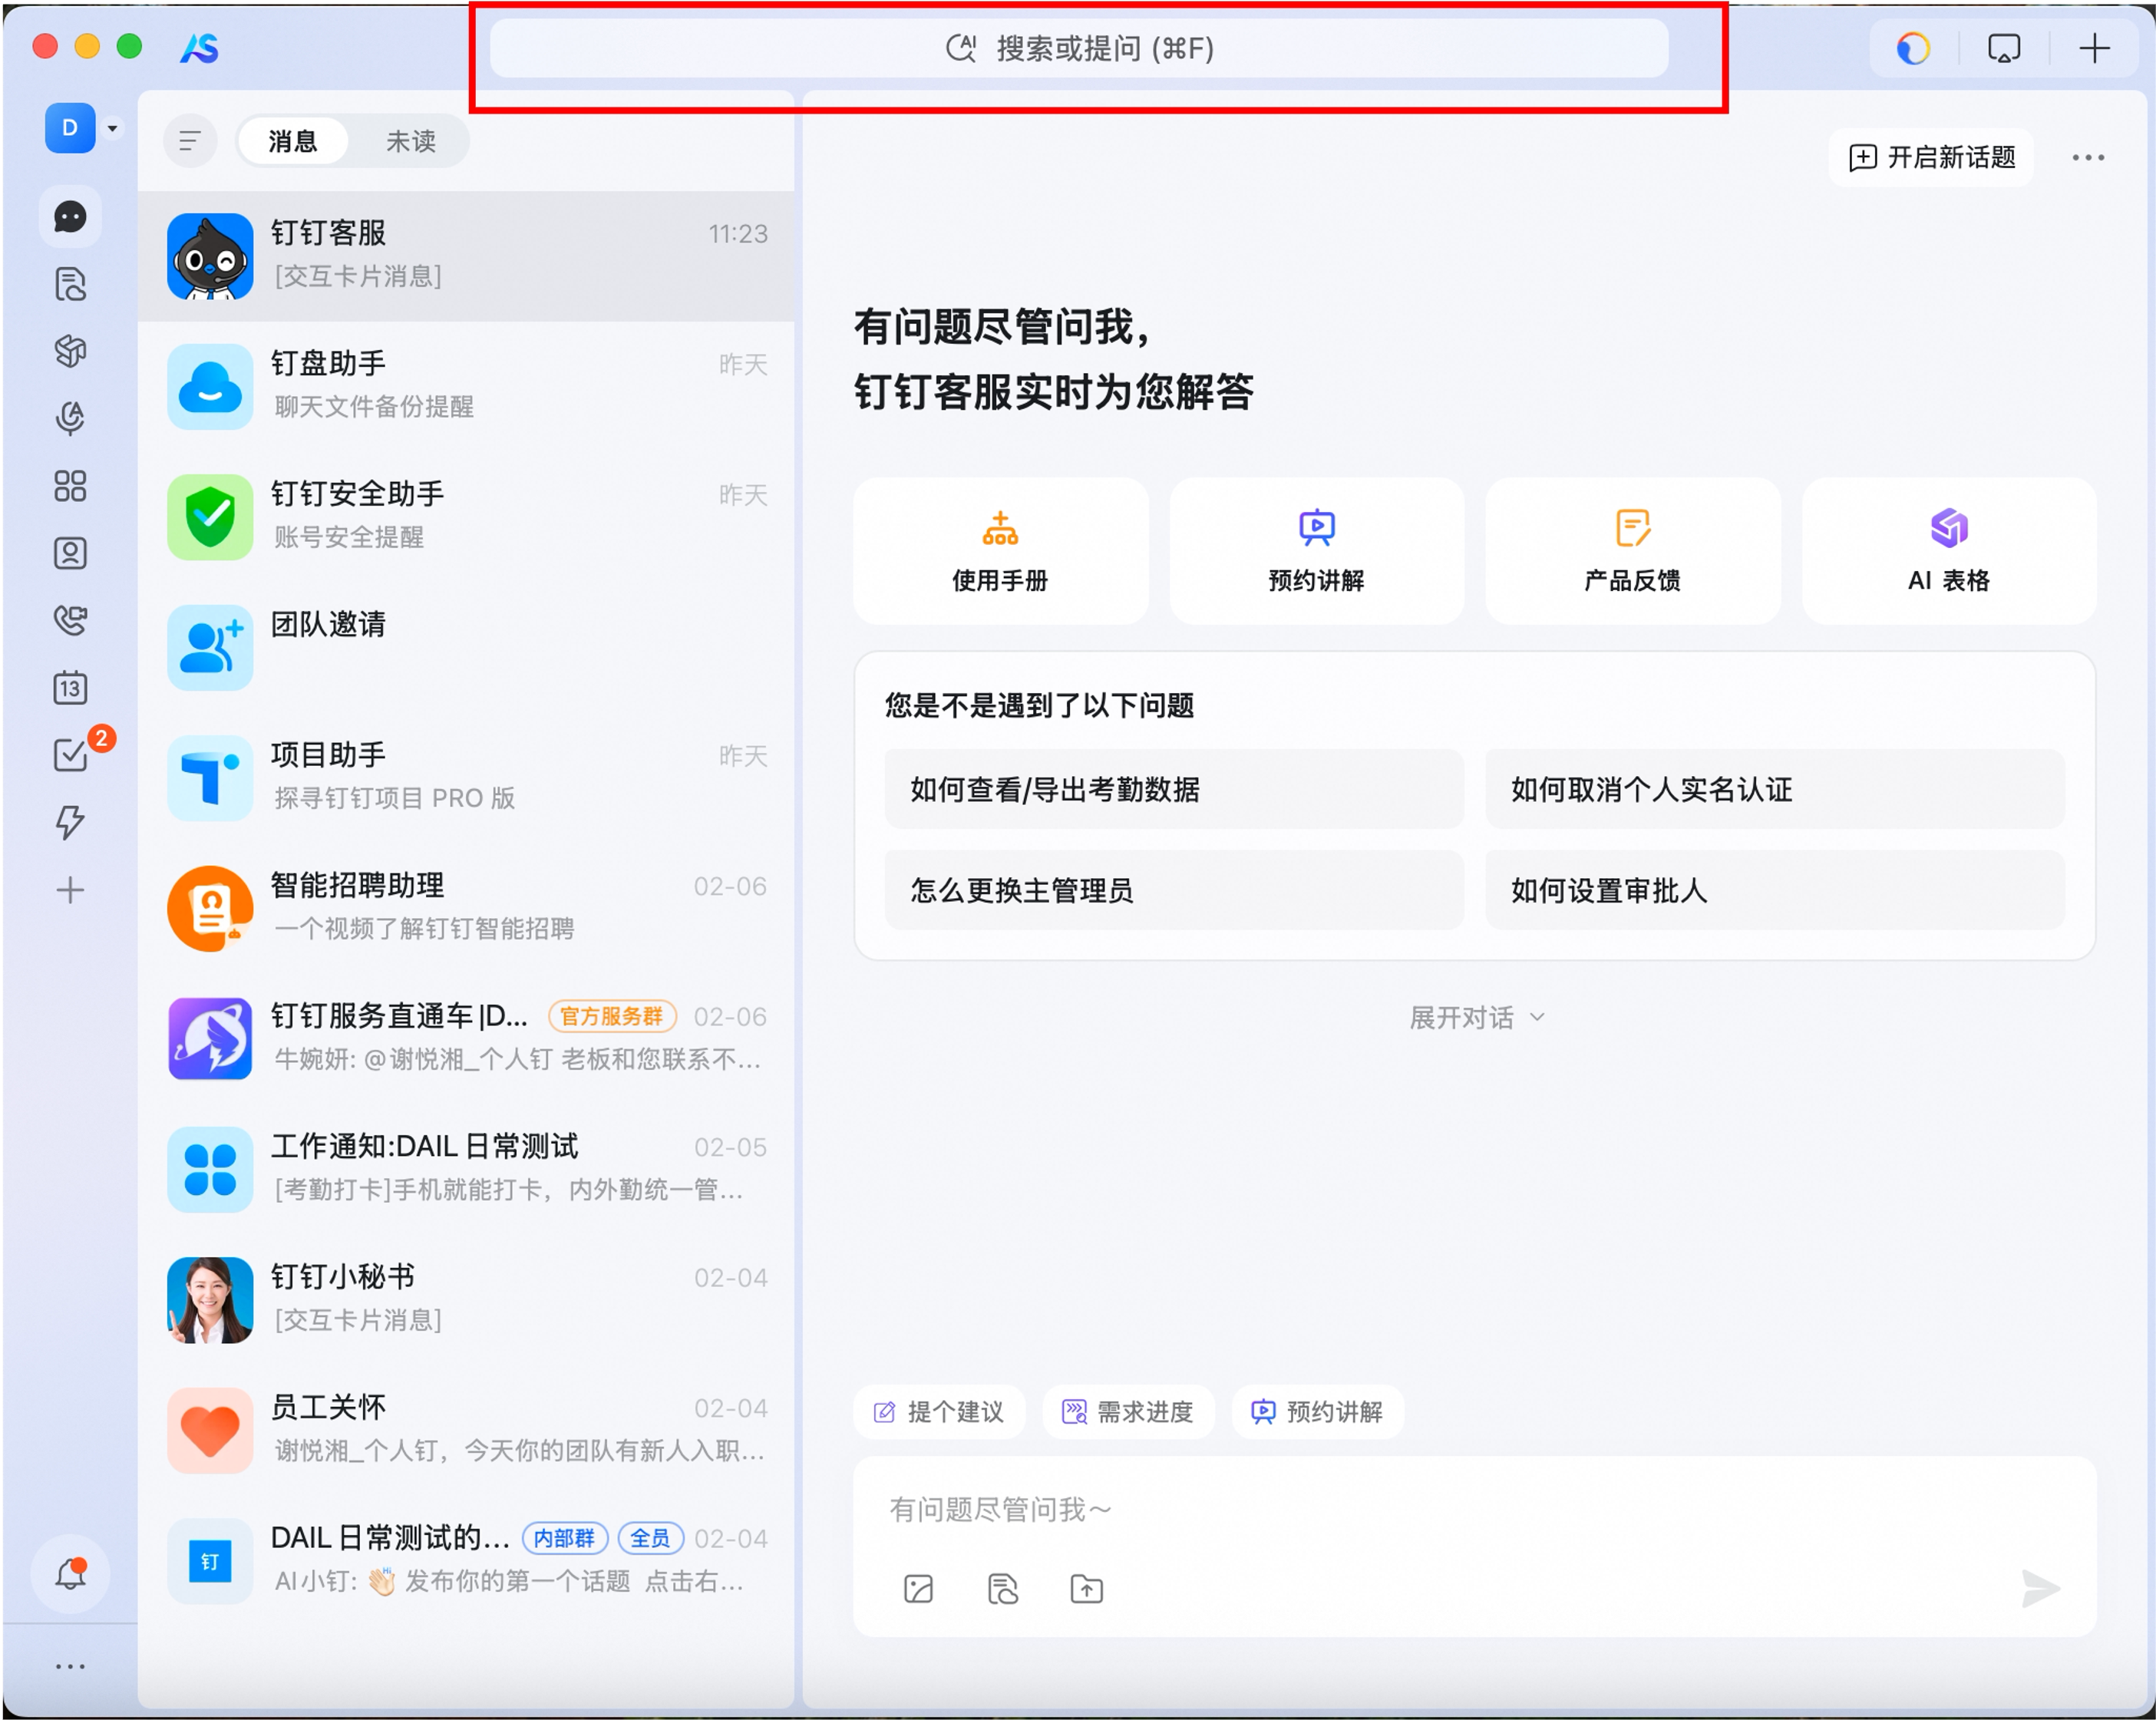
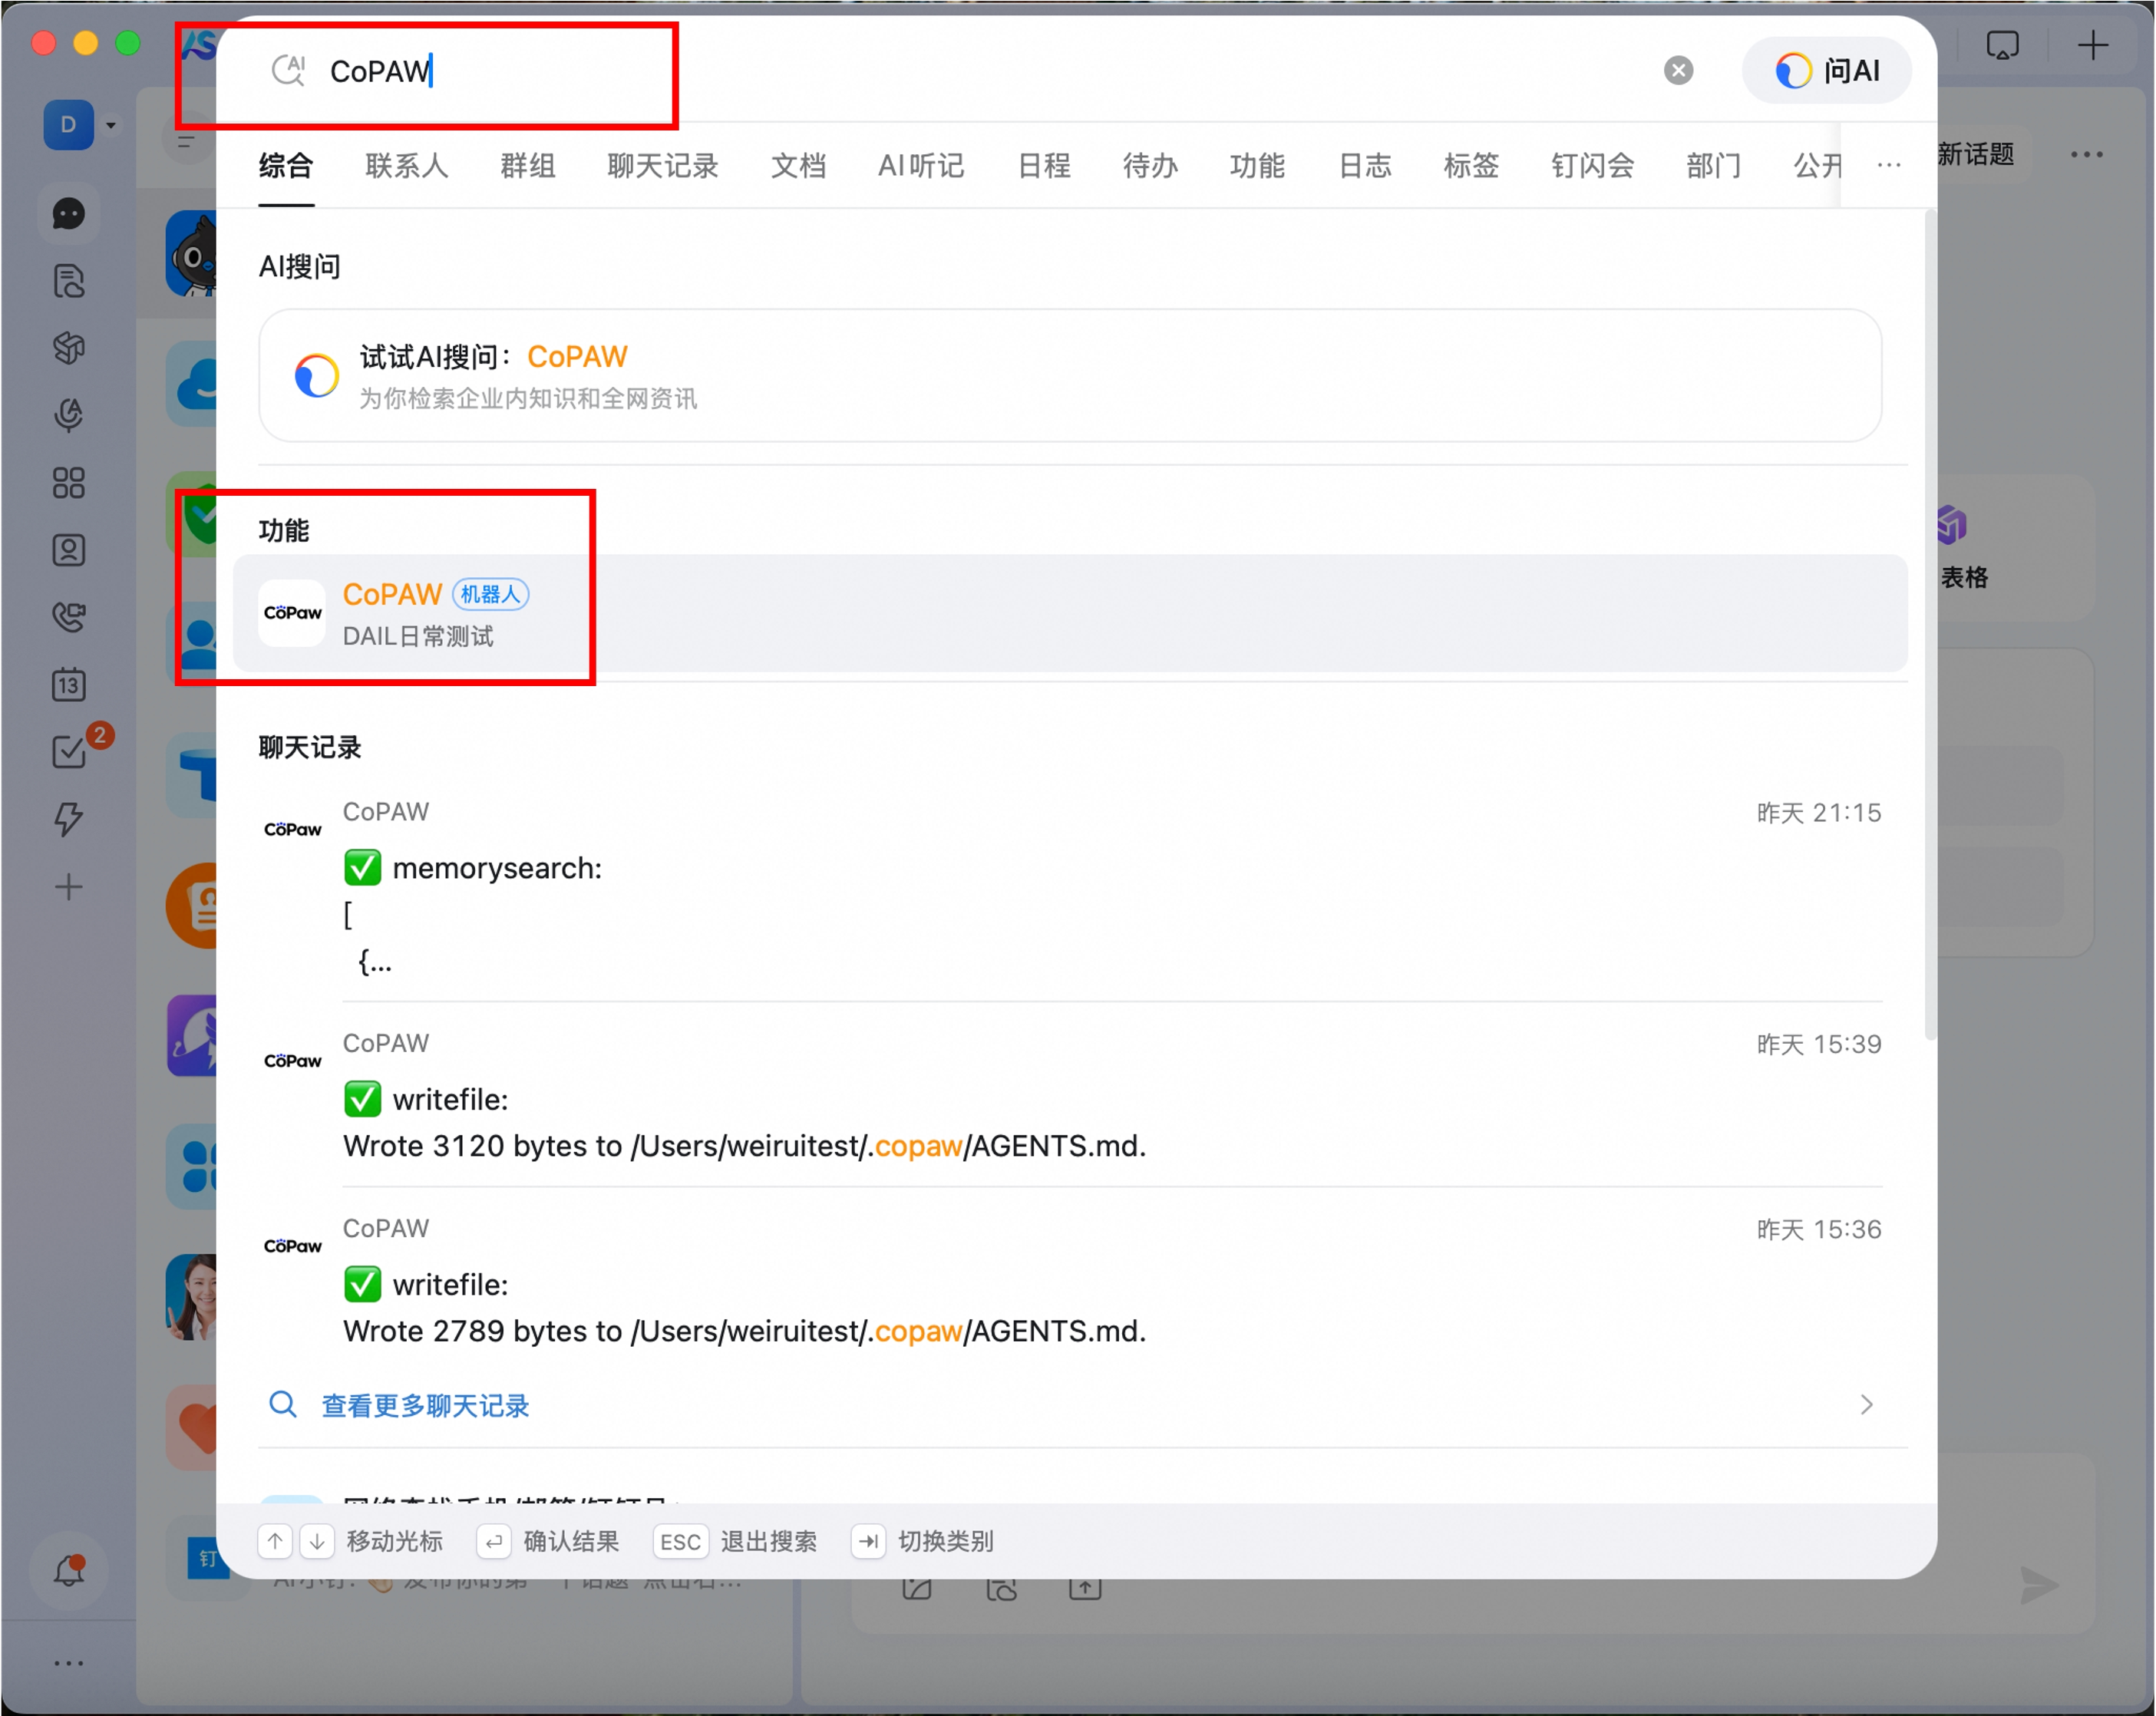
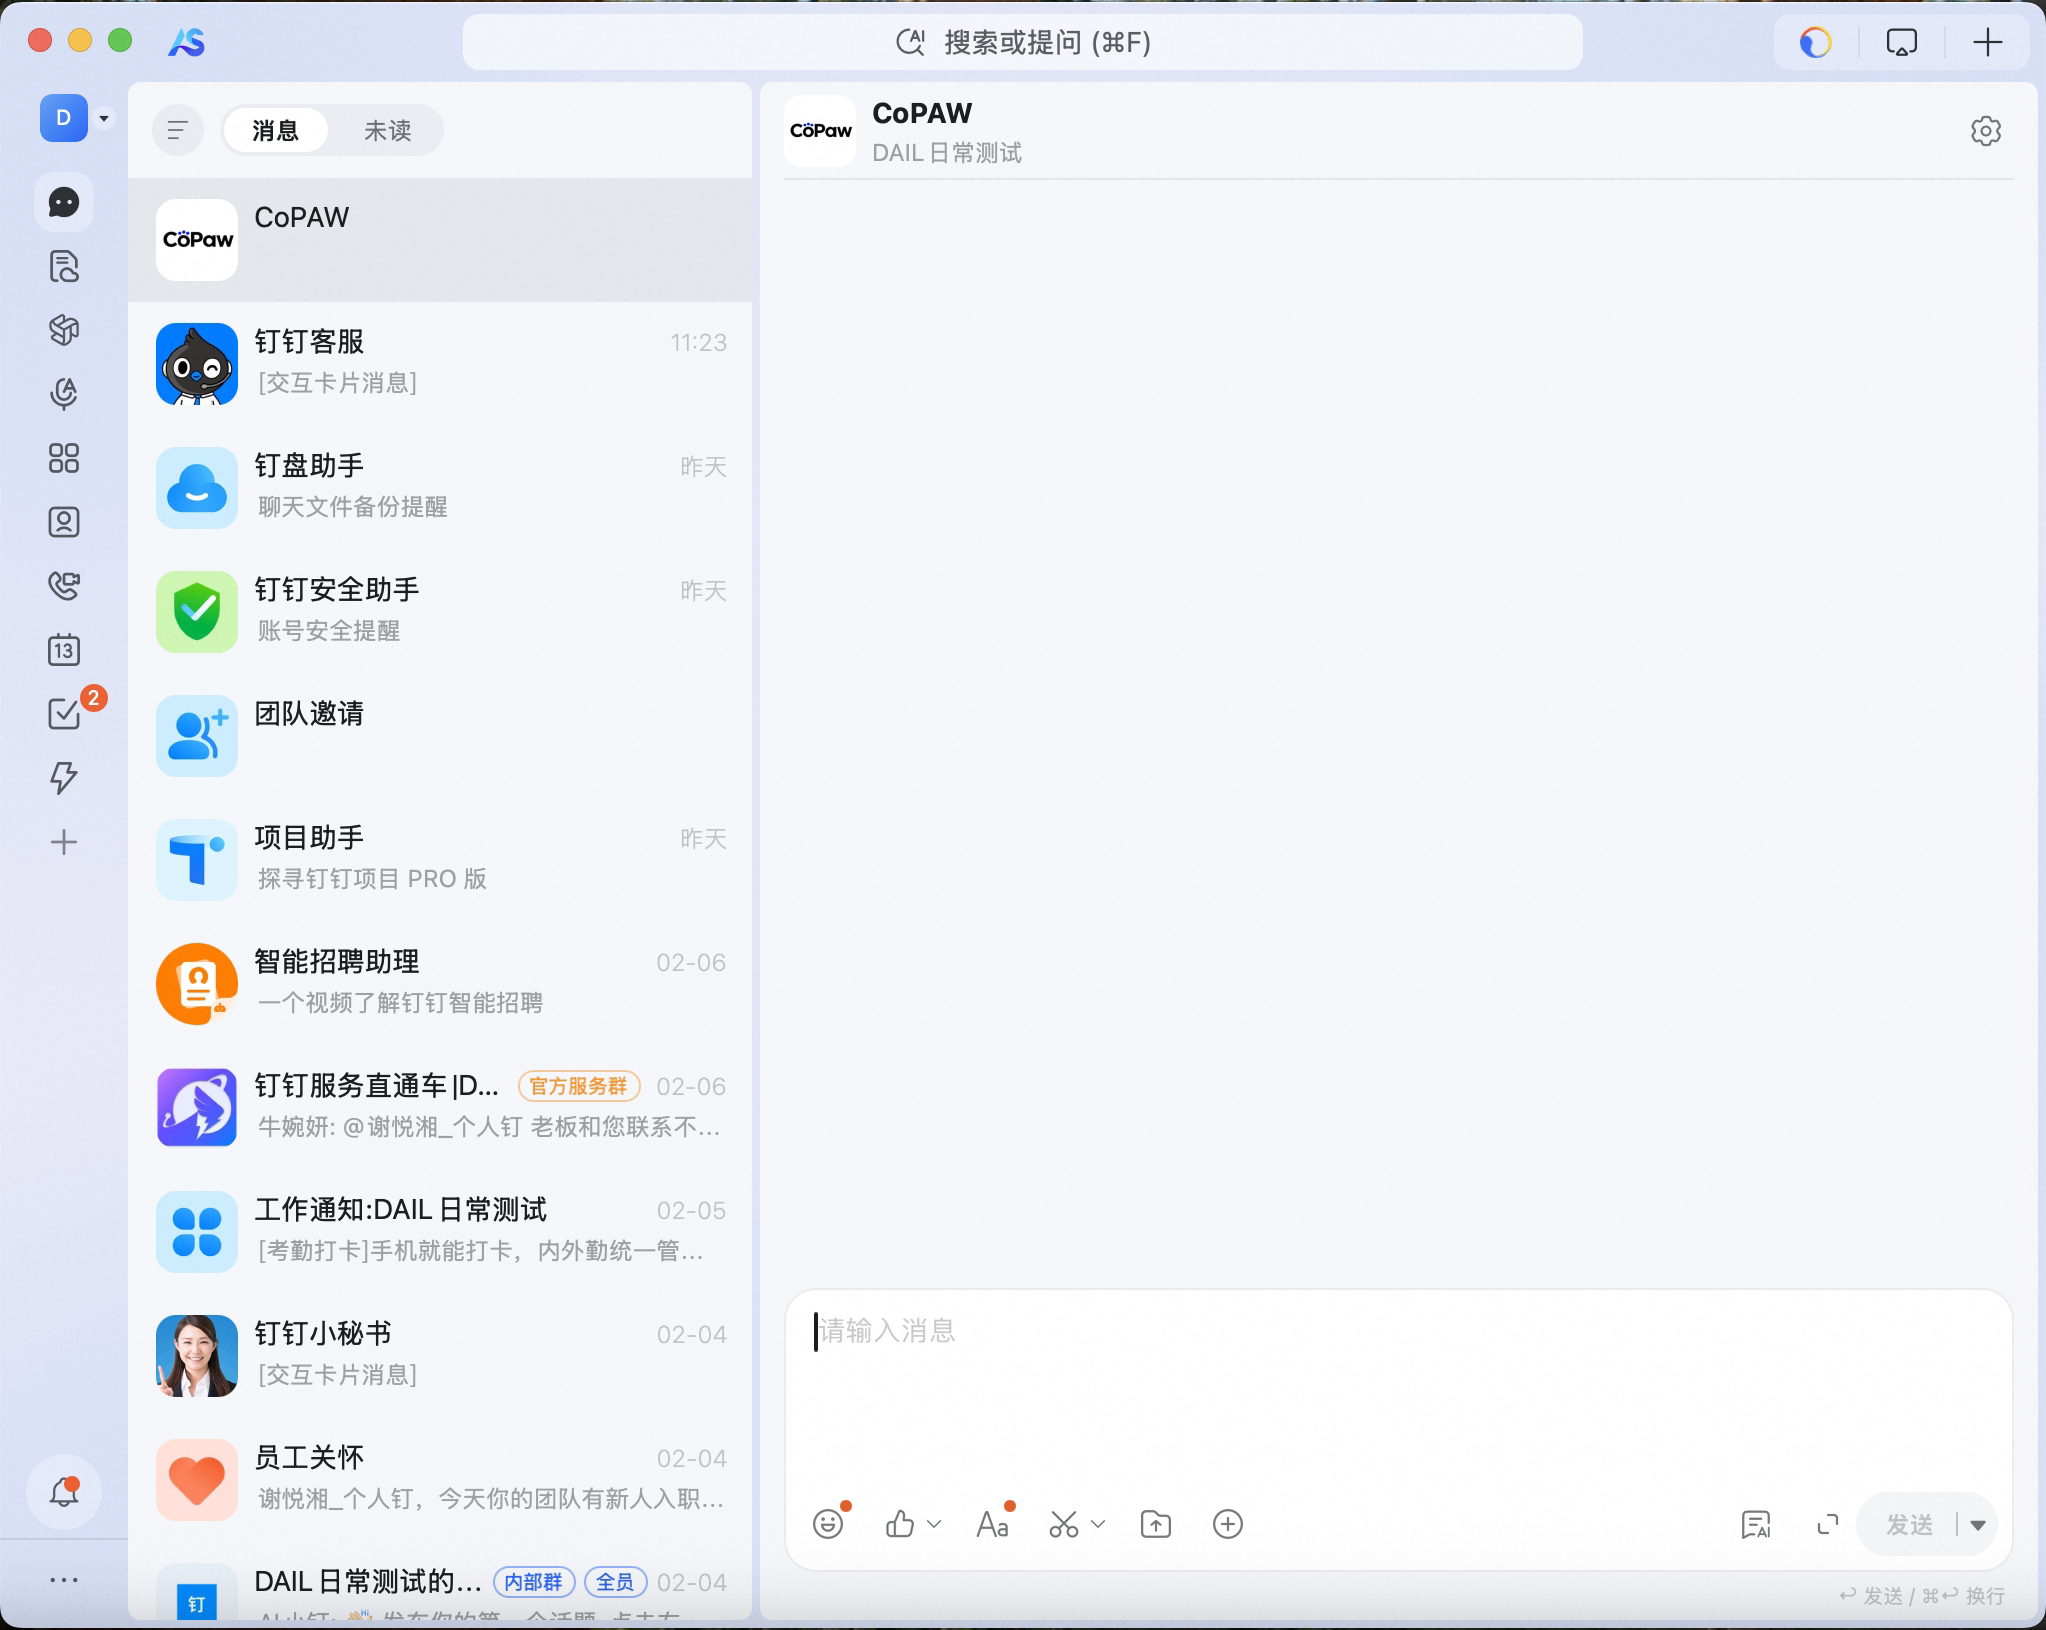
Search the bot name in DingTalk, find it under Features, start chatting.
Webhook URL (webhook mode): https://your-domain/api/v1/channels/webhook/dingtalk
Feishu (Lark)
WebSocket long connection or Webhook. WebSocket is preferred — no public IP required.
One-click QR binding (recommended, v1.1.0+)
Before: "go to the open platform → create an enterprise custom app → copy App ID and App Secret." After: click a button, scan the QR, credentials arrive.
Channels → New → choose type: Feishu- In the form, click Bind Feishu App via QR — a QR code unfolds
- Scan it with the Feishu app and confirm authorization (for Lark international, switch the domain to
lark) - Back in the form, App ID and App Secret are auto-filled
Fill in the rest (agent, plus verification token / encrypt key if you're using webhook mode) as needed. Sessions are valid for 5 minutes.
What's happening under the hood
The Feishu SDK 2.6+ ships a scene/registration Device Flow. After bumping com.larksuite.oapi:oapi-sdk to 2.6.1, the entire "create app → copy credentials" detour collapses into a single QR scan.
Manual app creation (fallback)
If the QR flow can't reach Feishu on your network, or you need webhook mode / custom permission scopes:
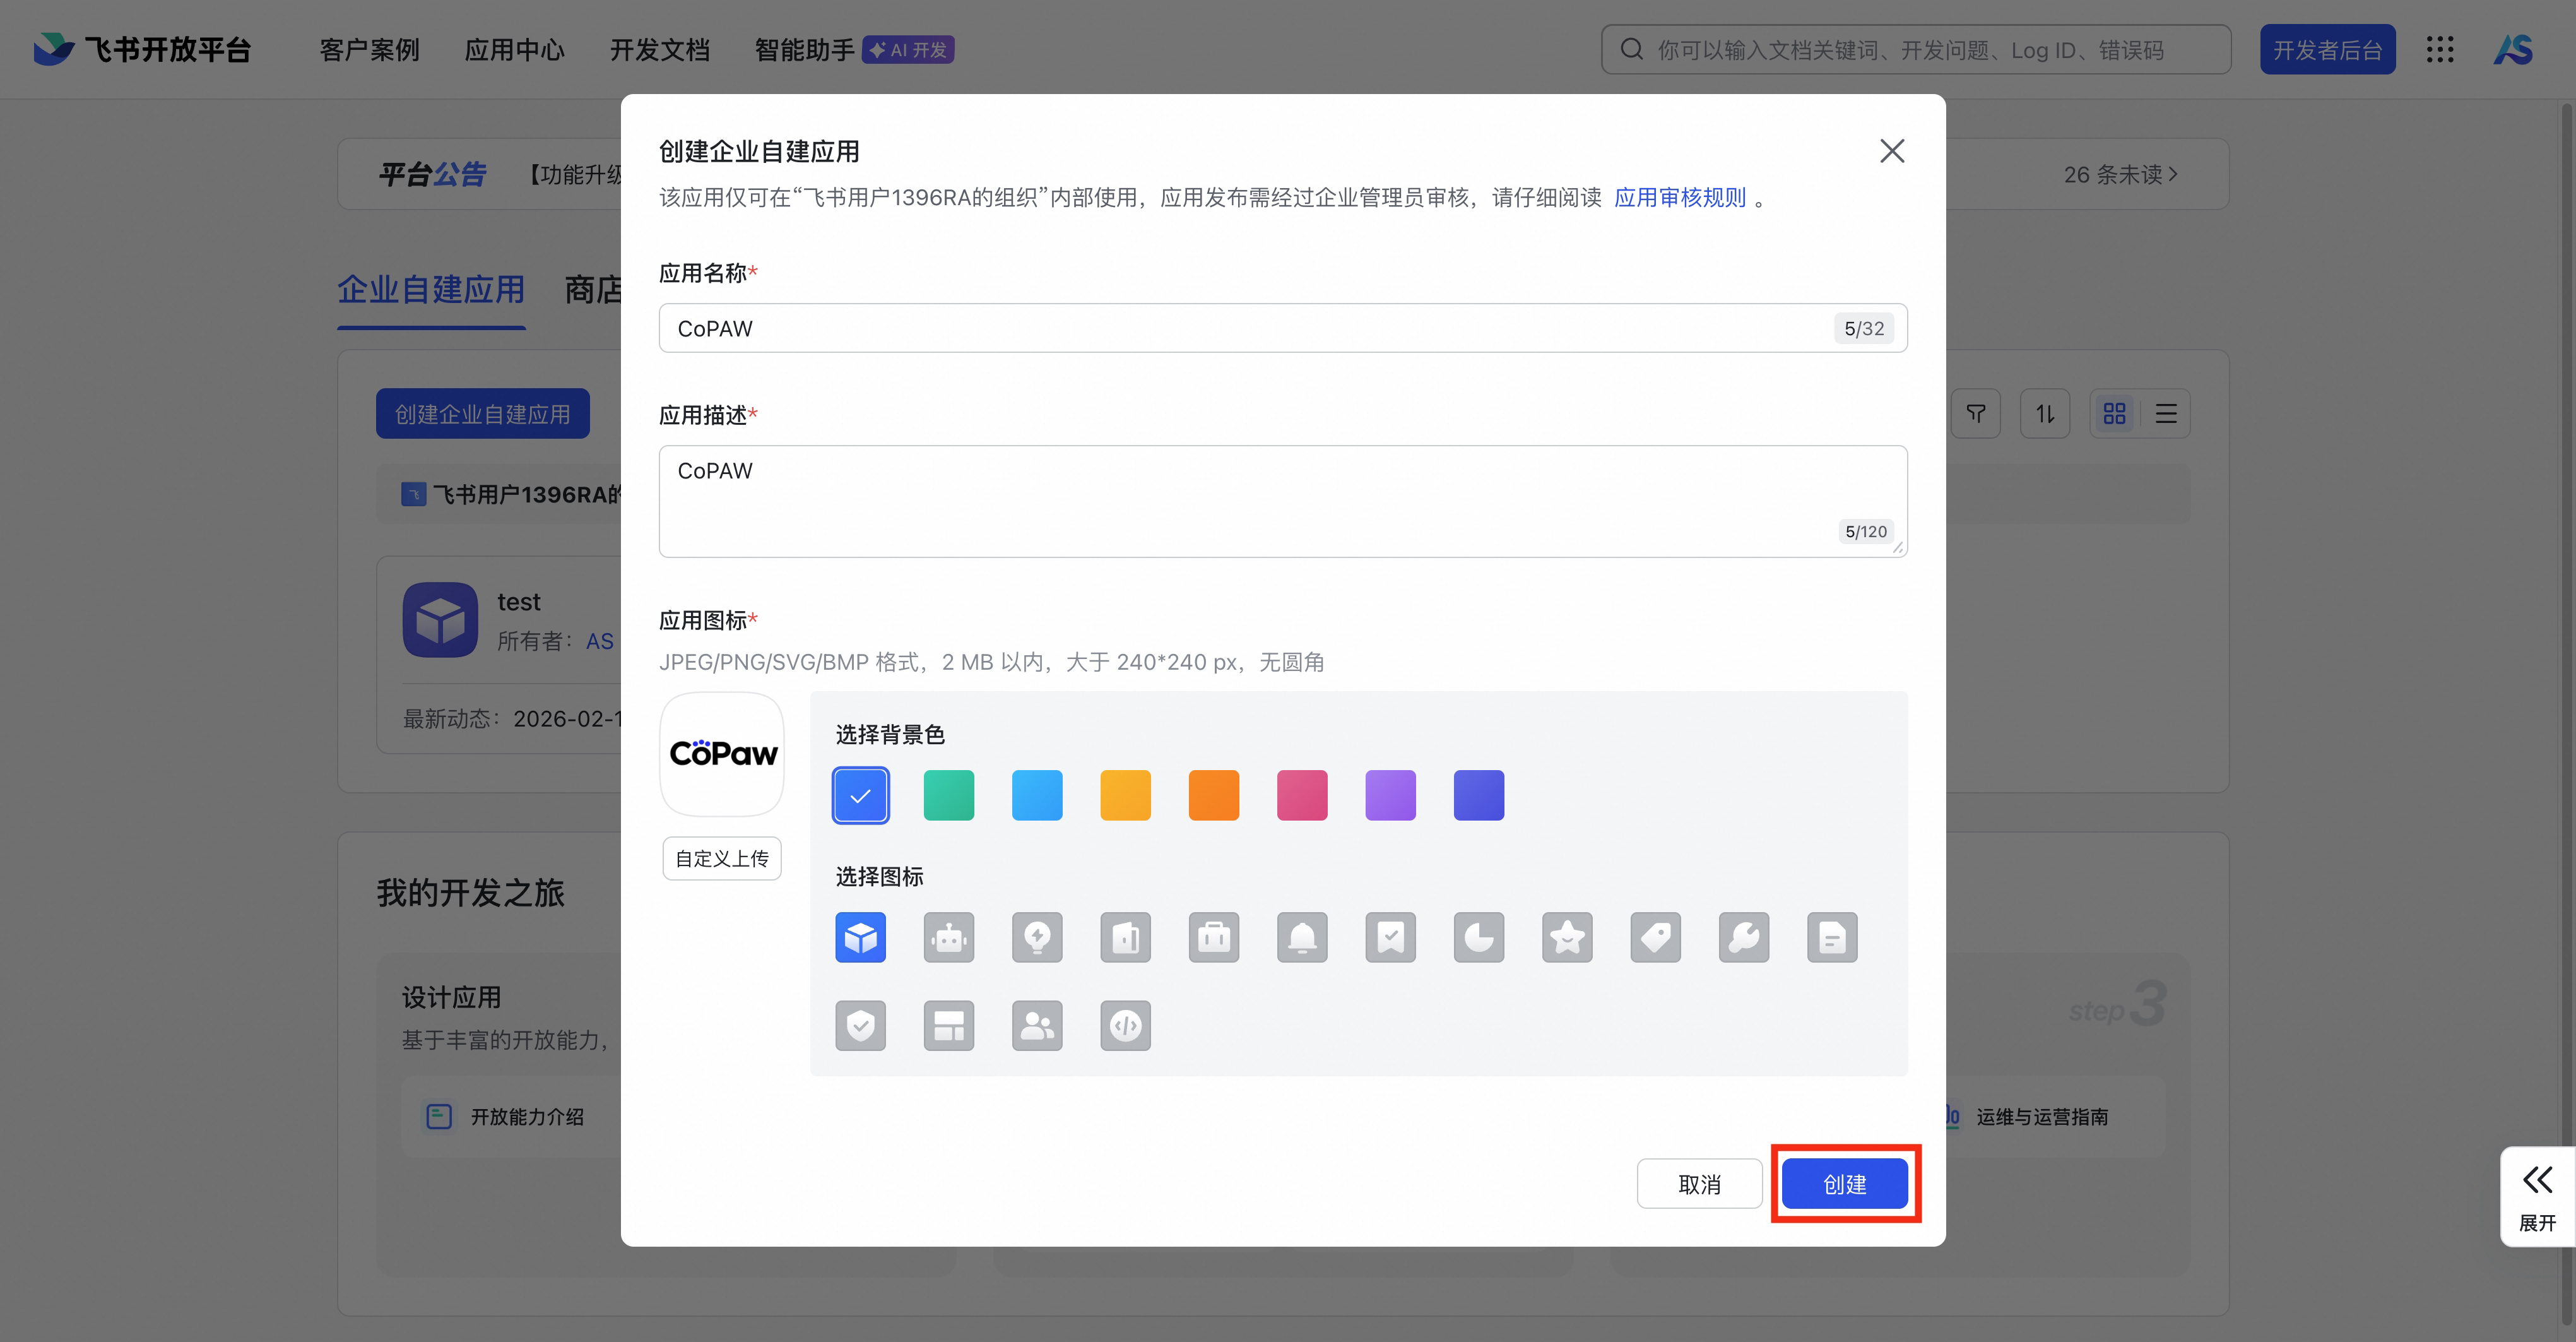
Open Feishu Open Platform, create an enterprise custom app
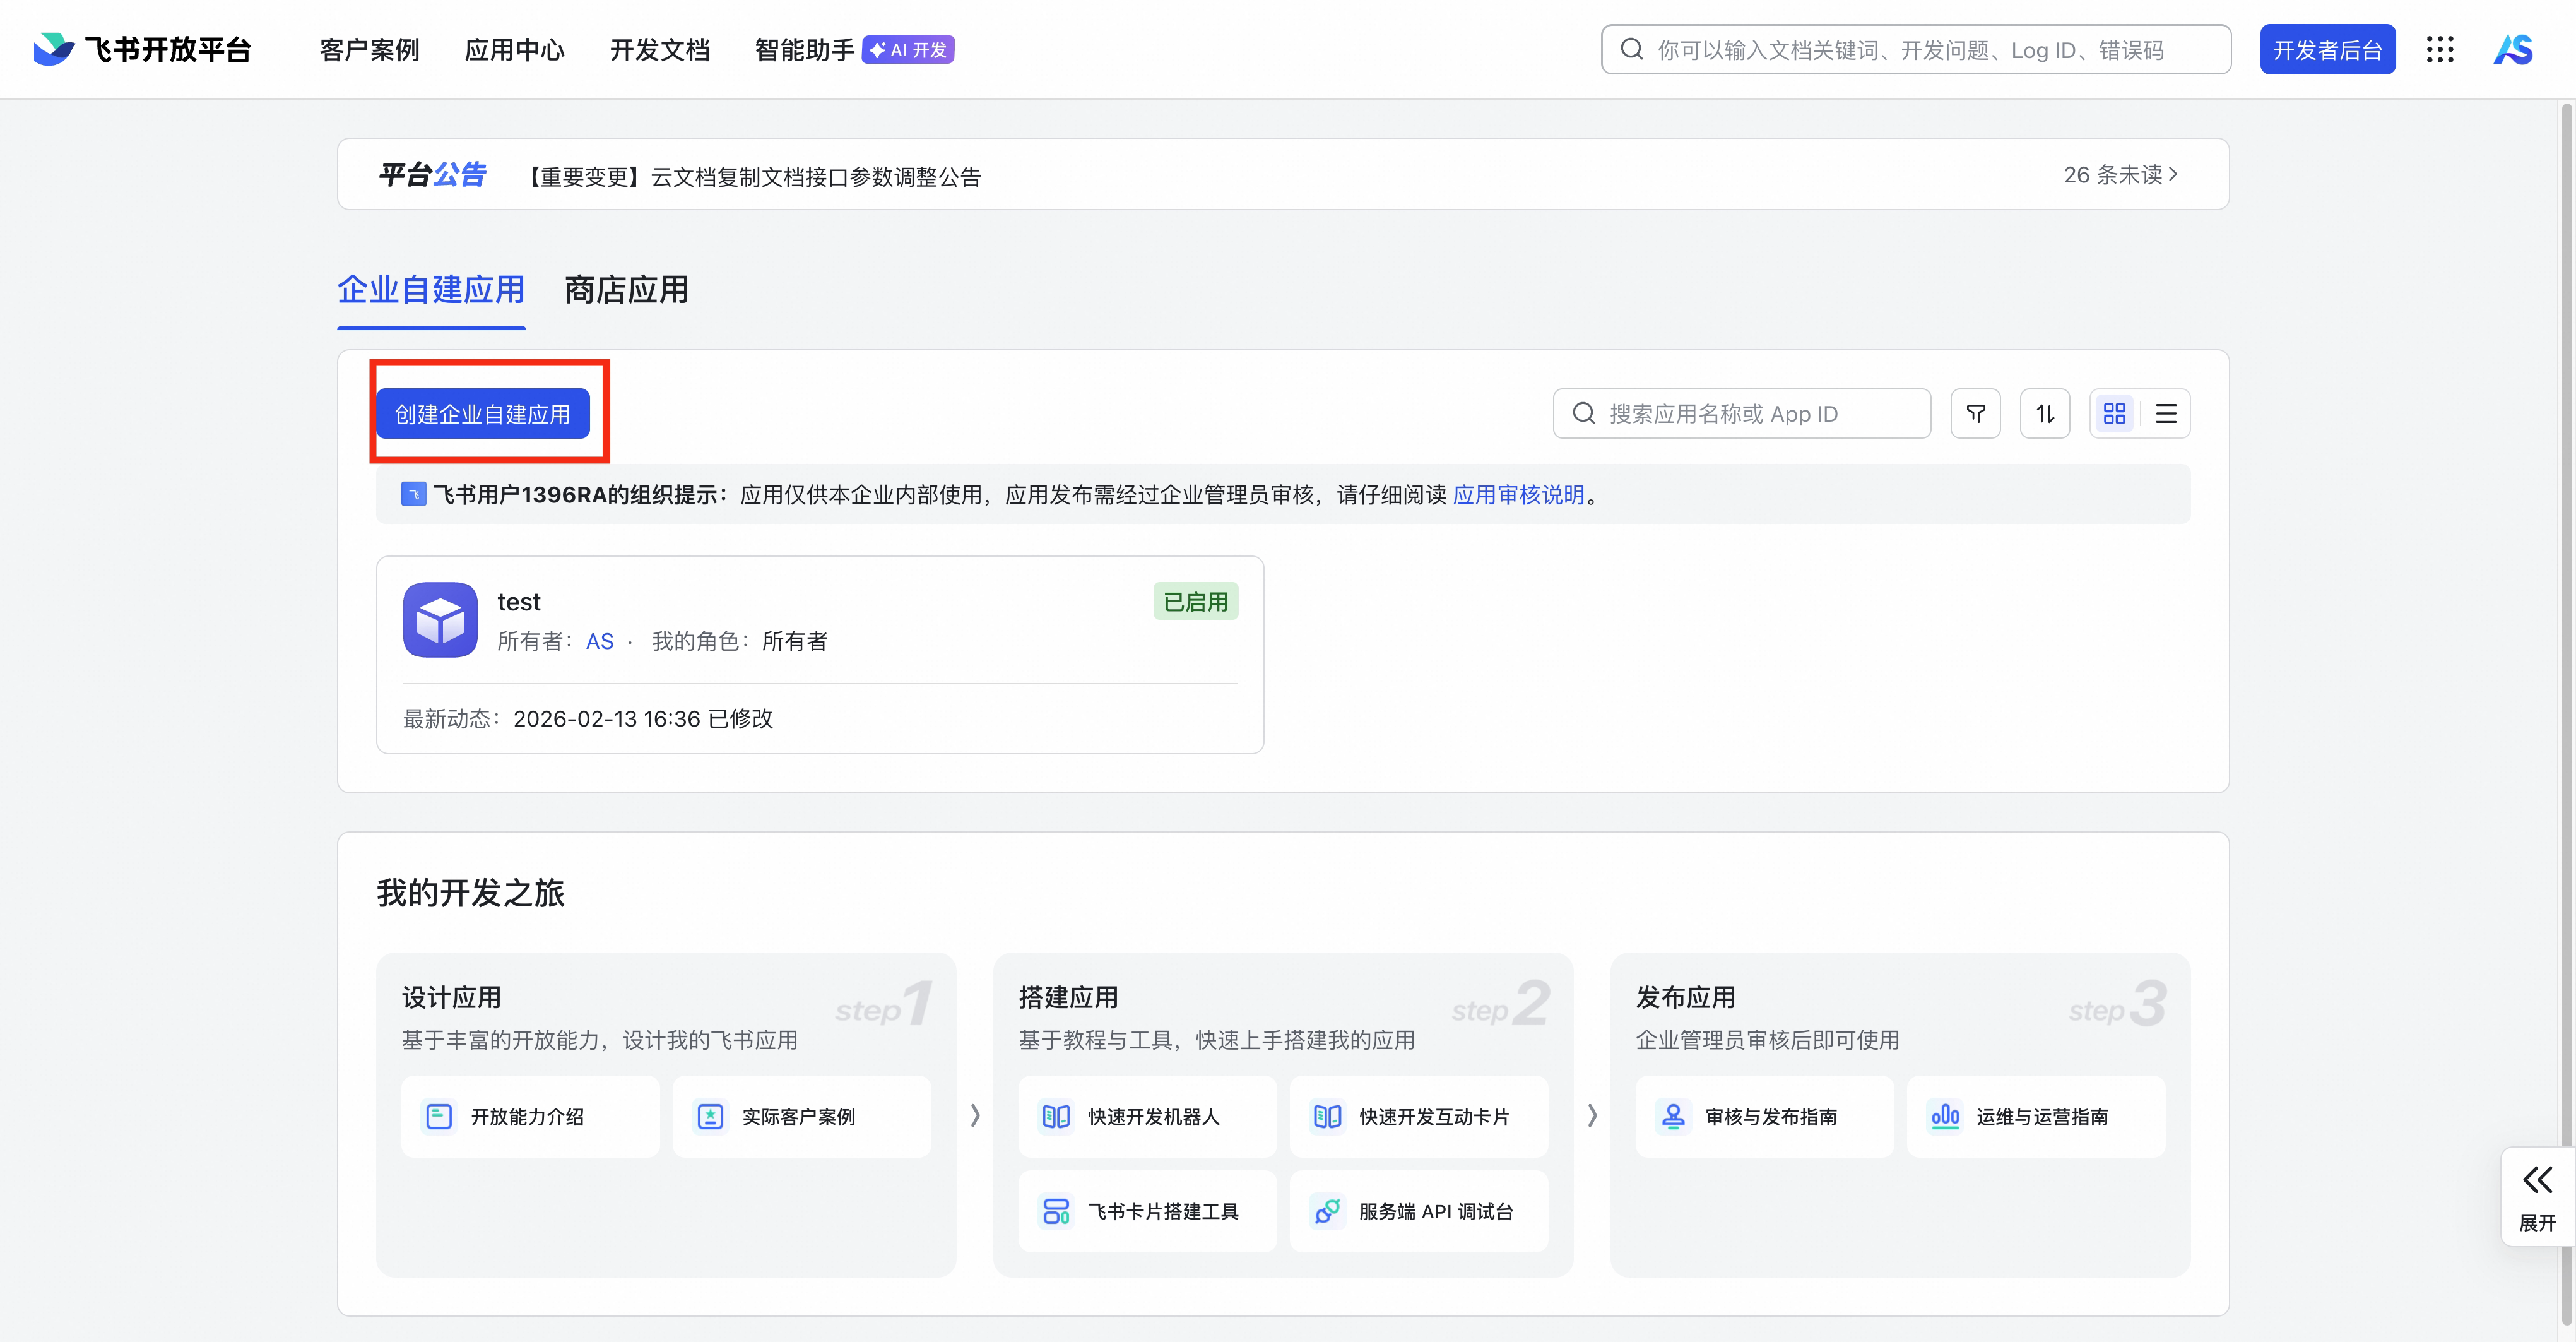
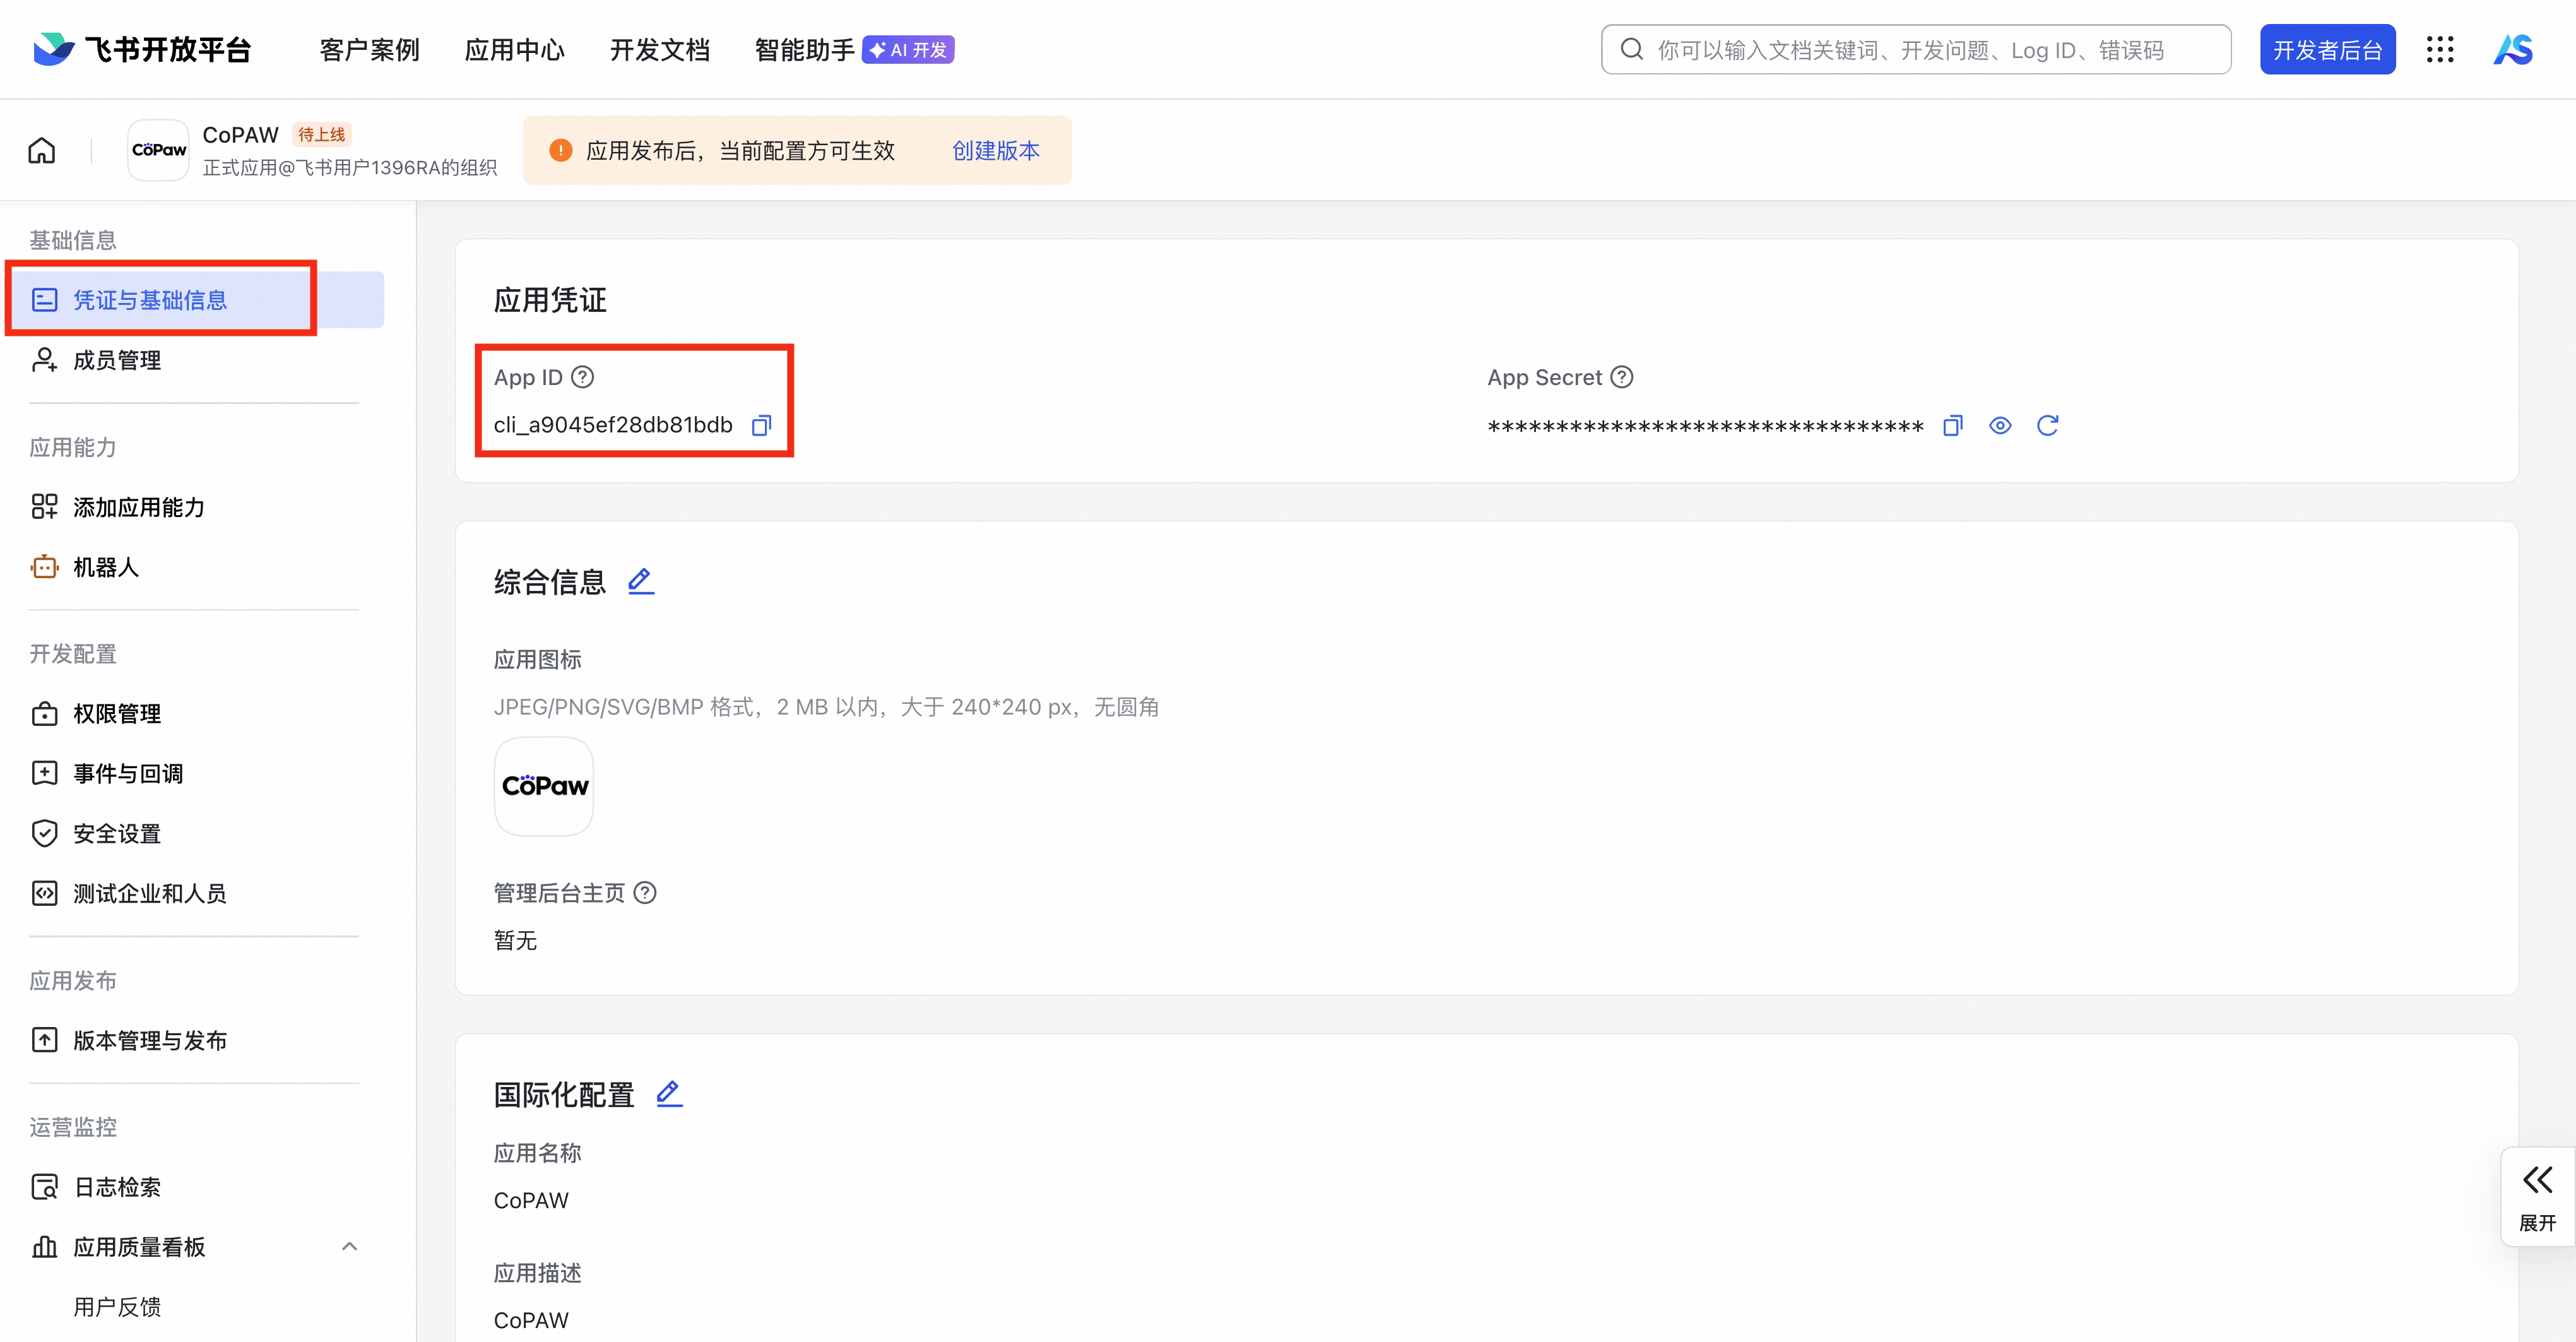
Credentials & Basic Info → grab App ID and App Secret
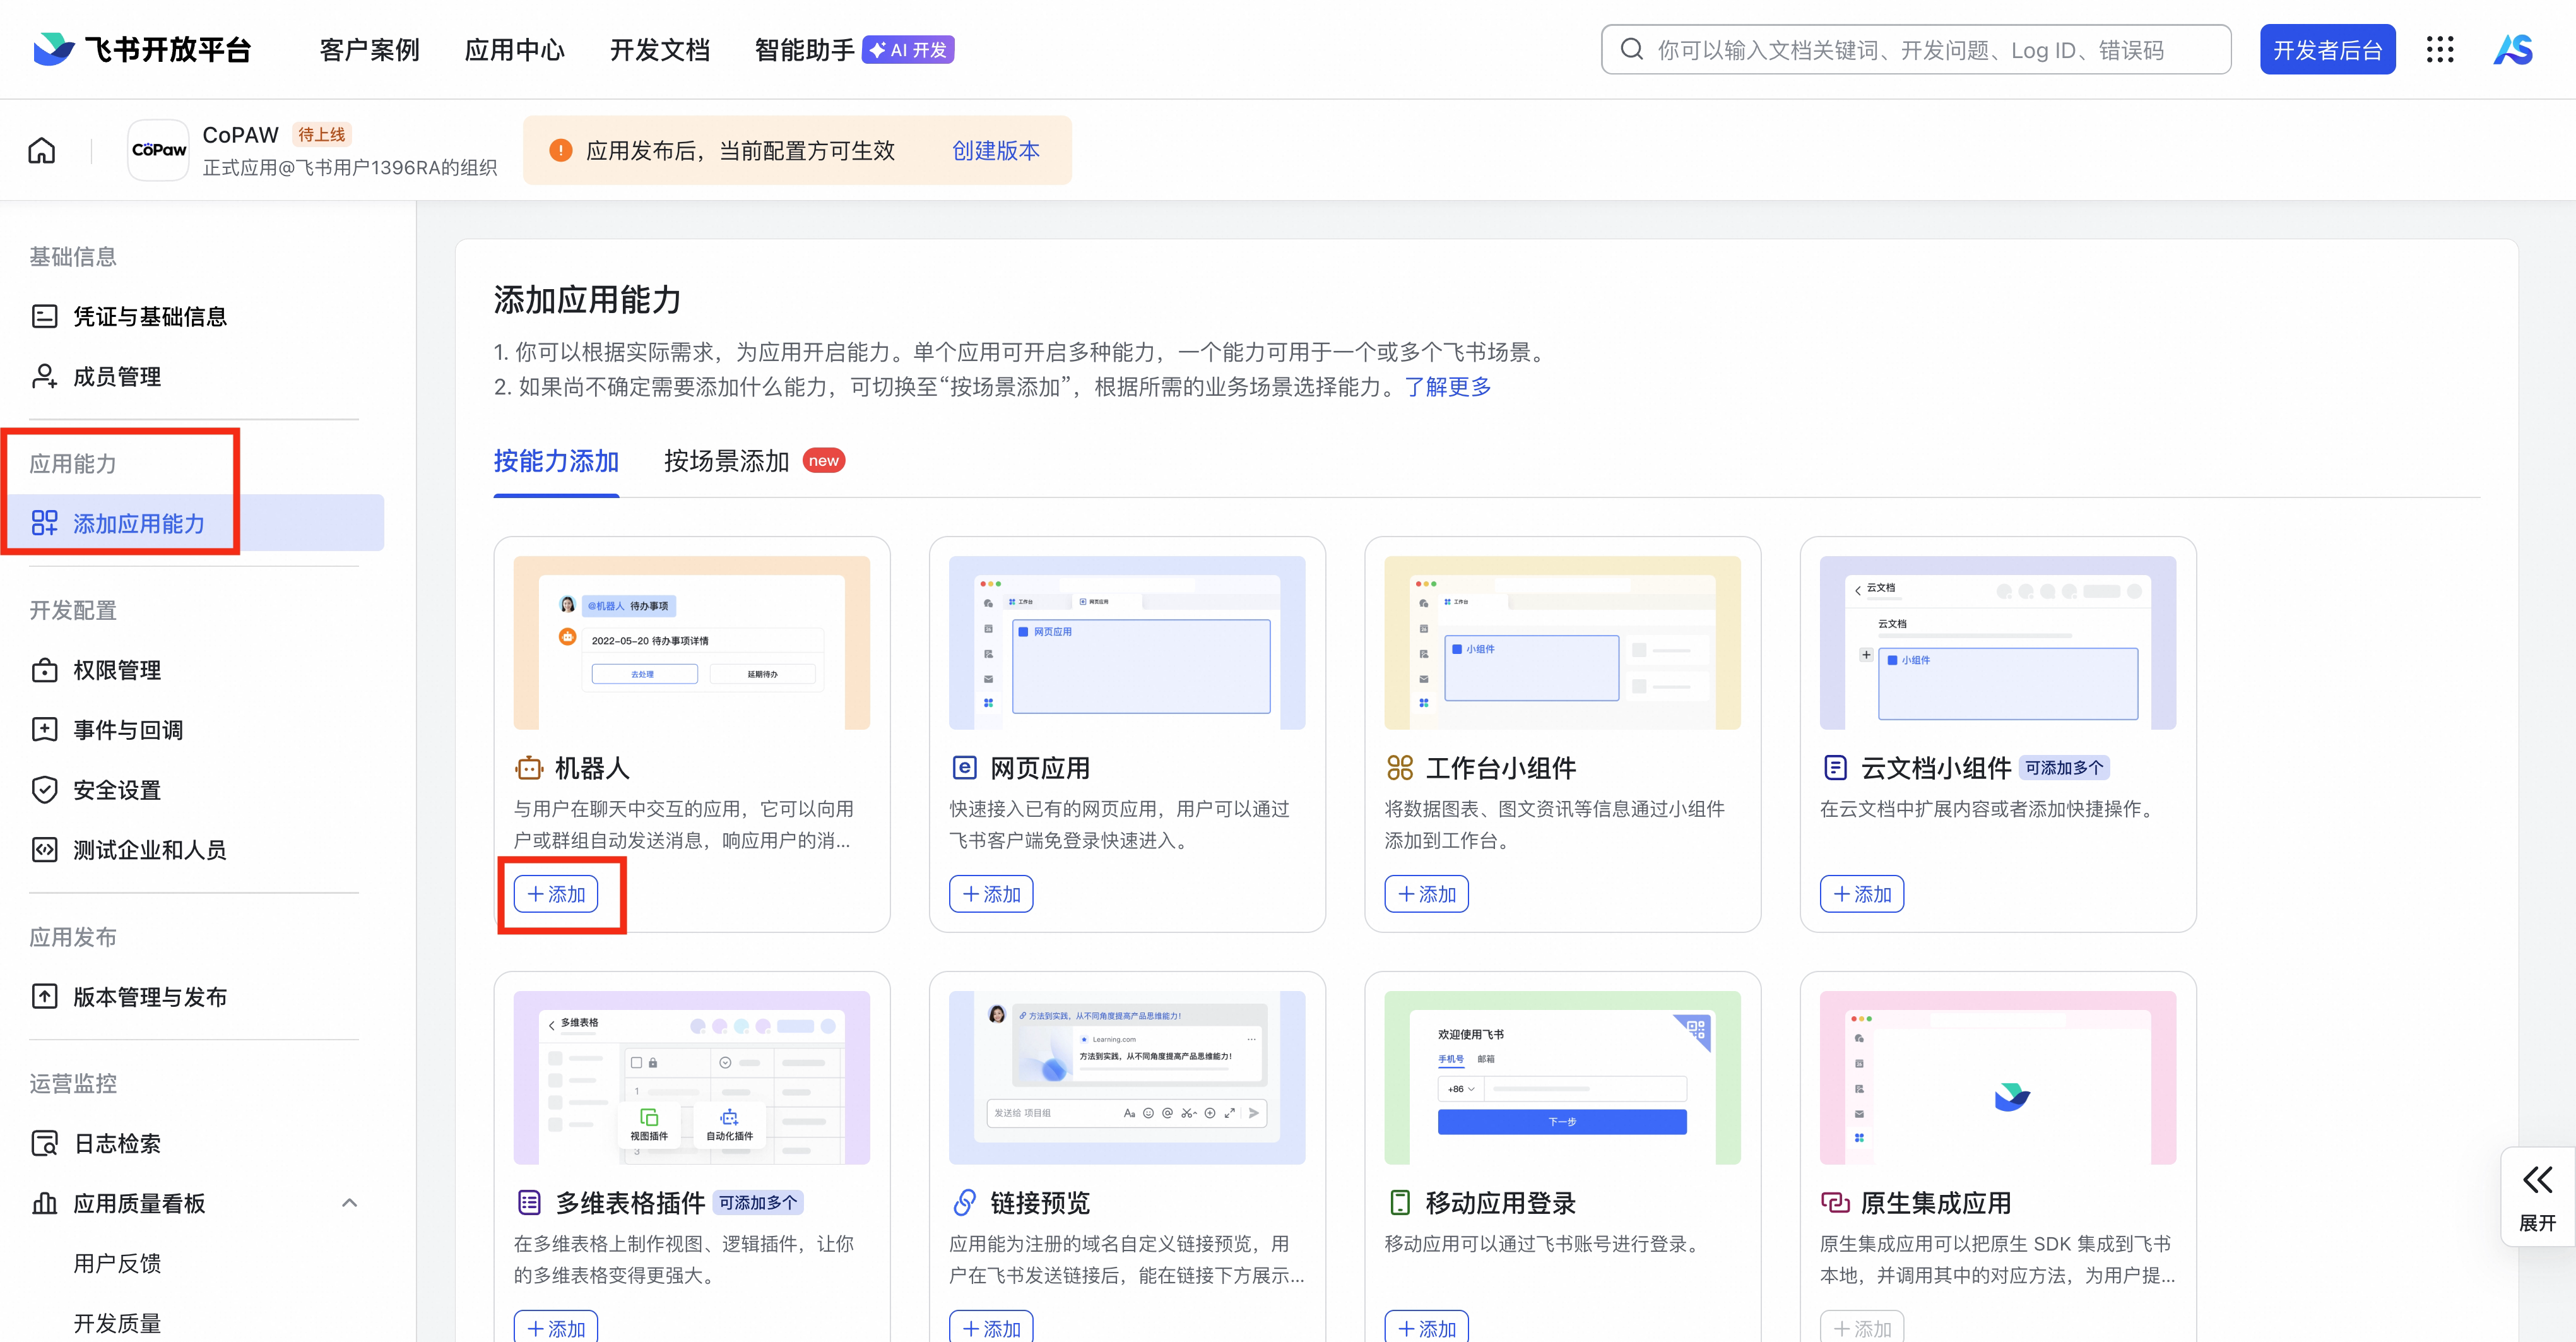
Capabilities → enable Bot
Permissions → batch-import:
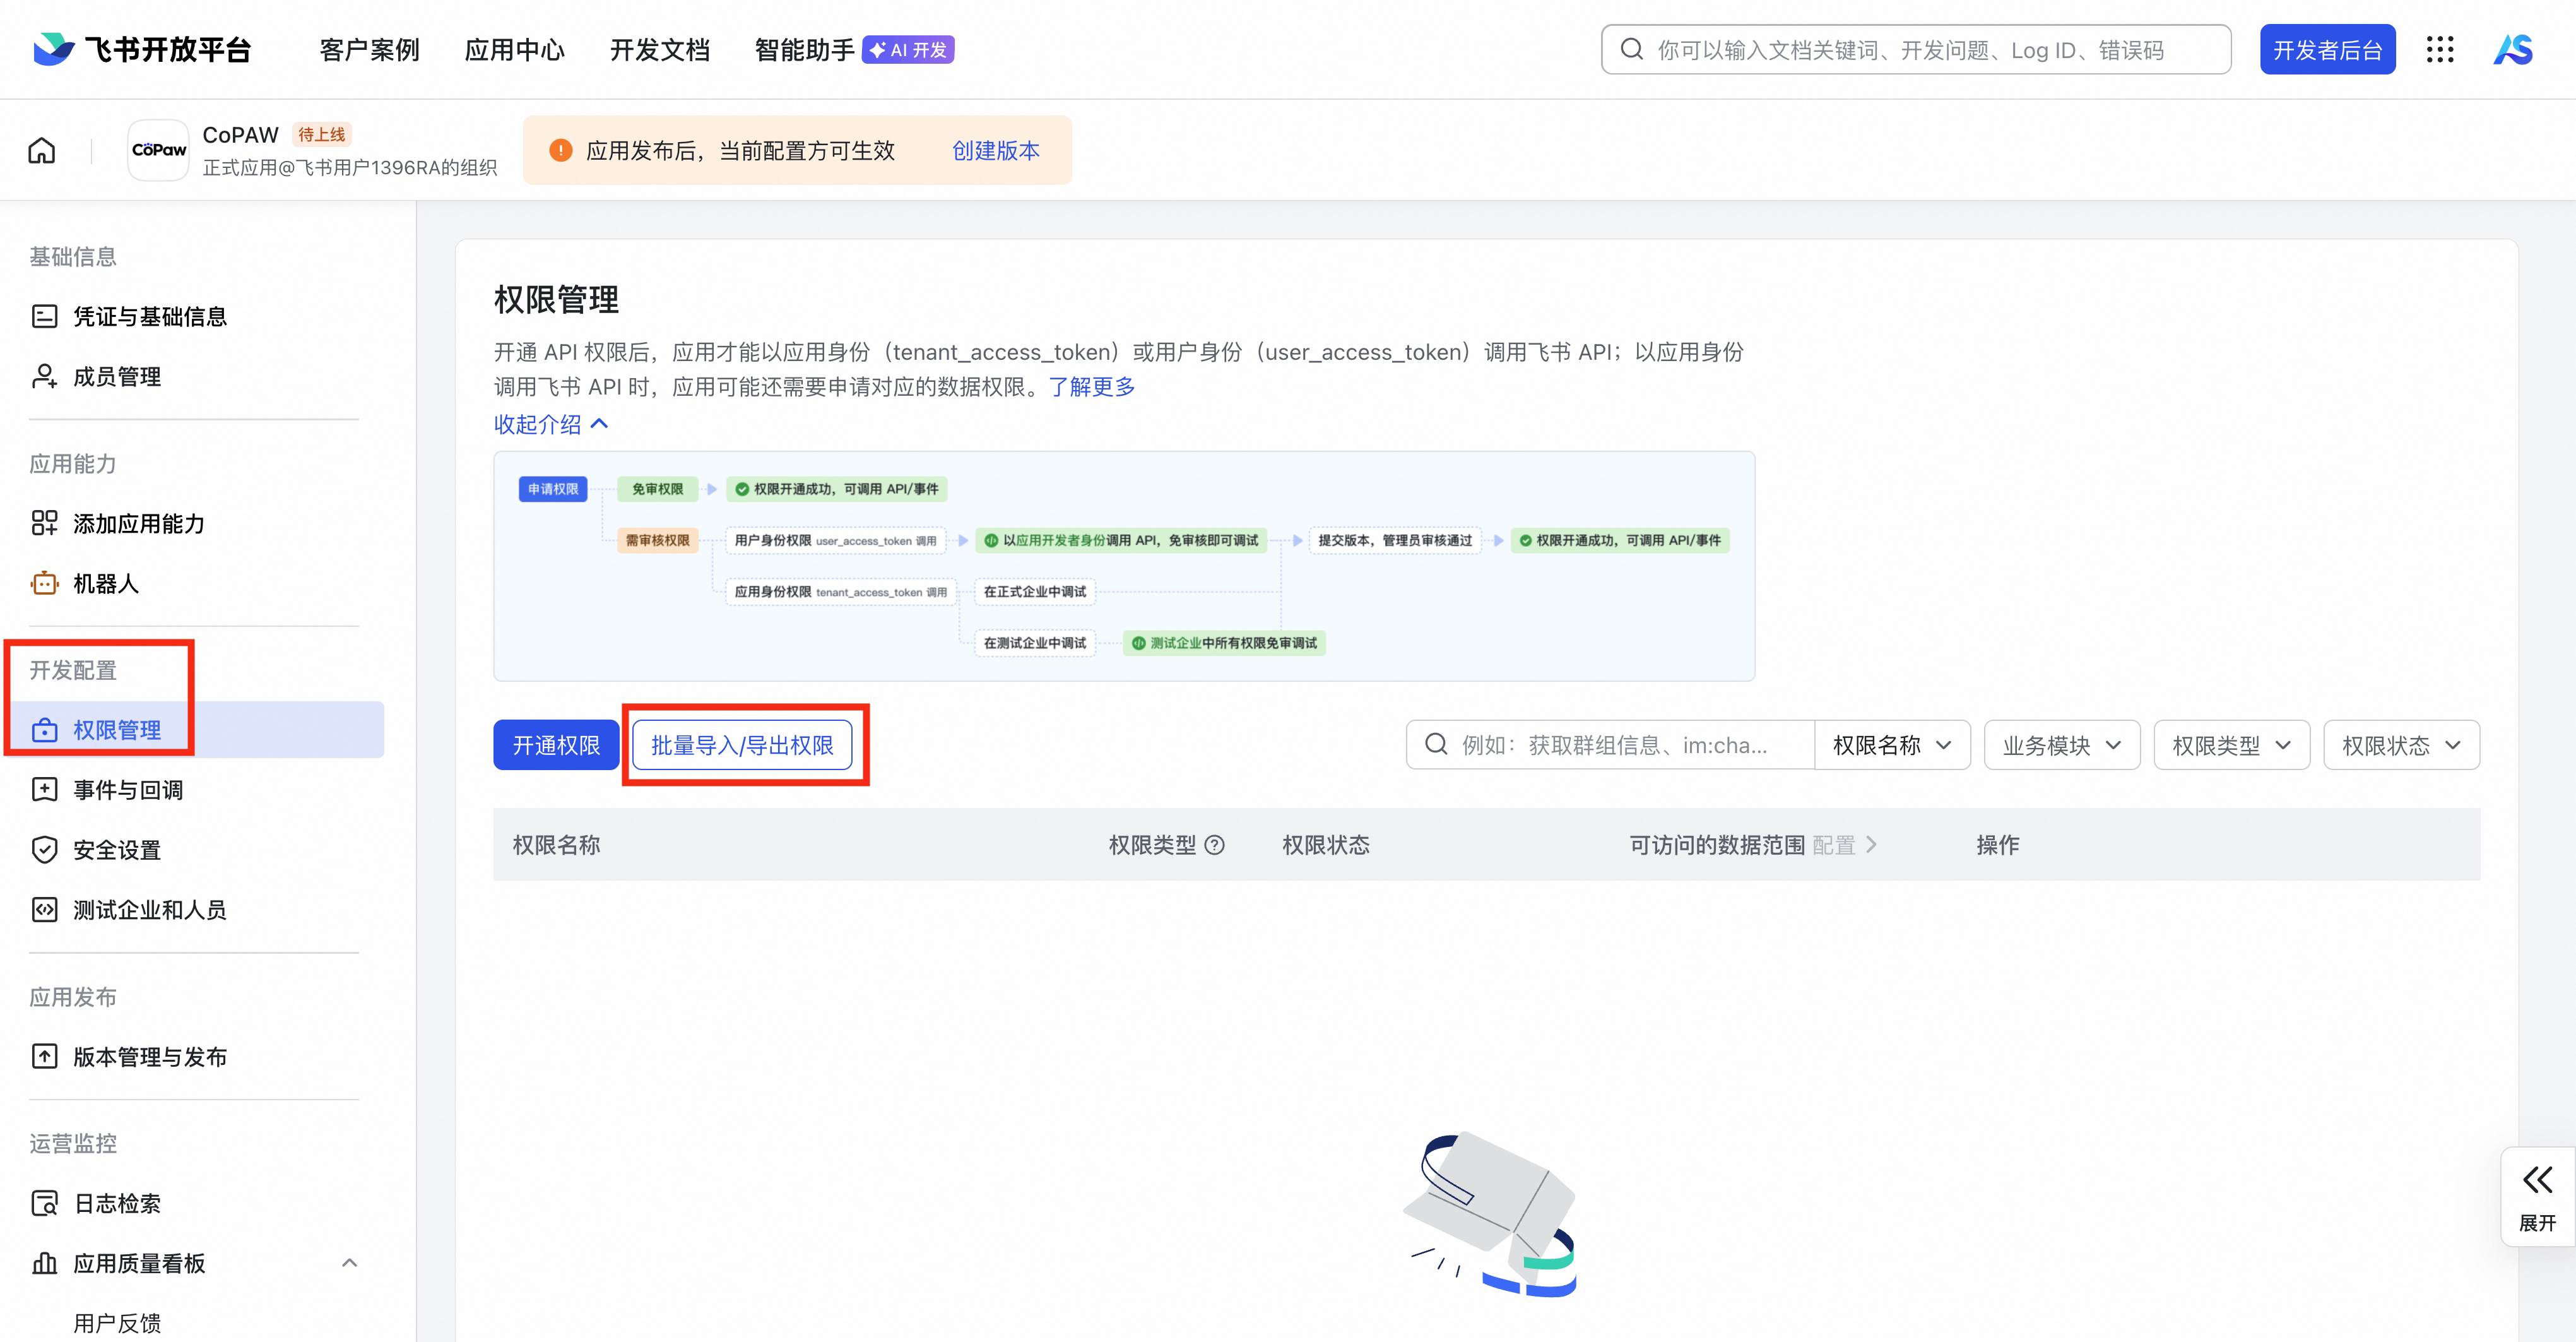 json
json{ "scopes": { "tenant": [ "im:chat", "im:message", "im:message.group_msg", "im:message.p2p_msg:readonly", "im:resource", "contact:user.base:readonly" ] } }Events & Callbacks → select WebSocket Long Connection mode
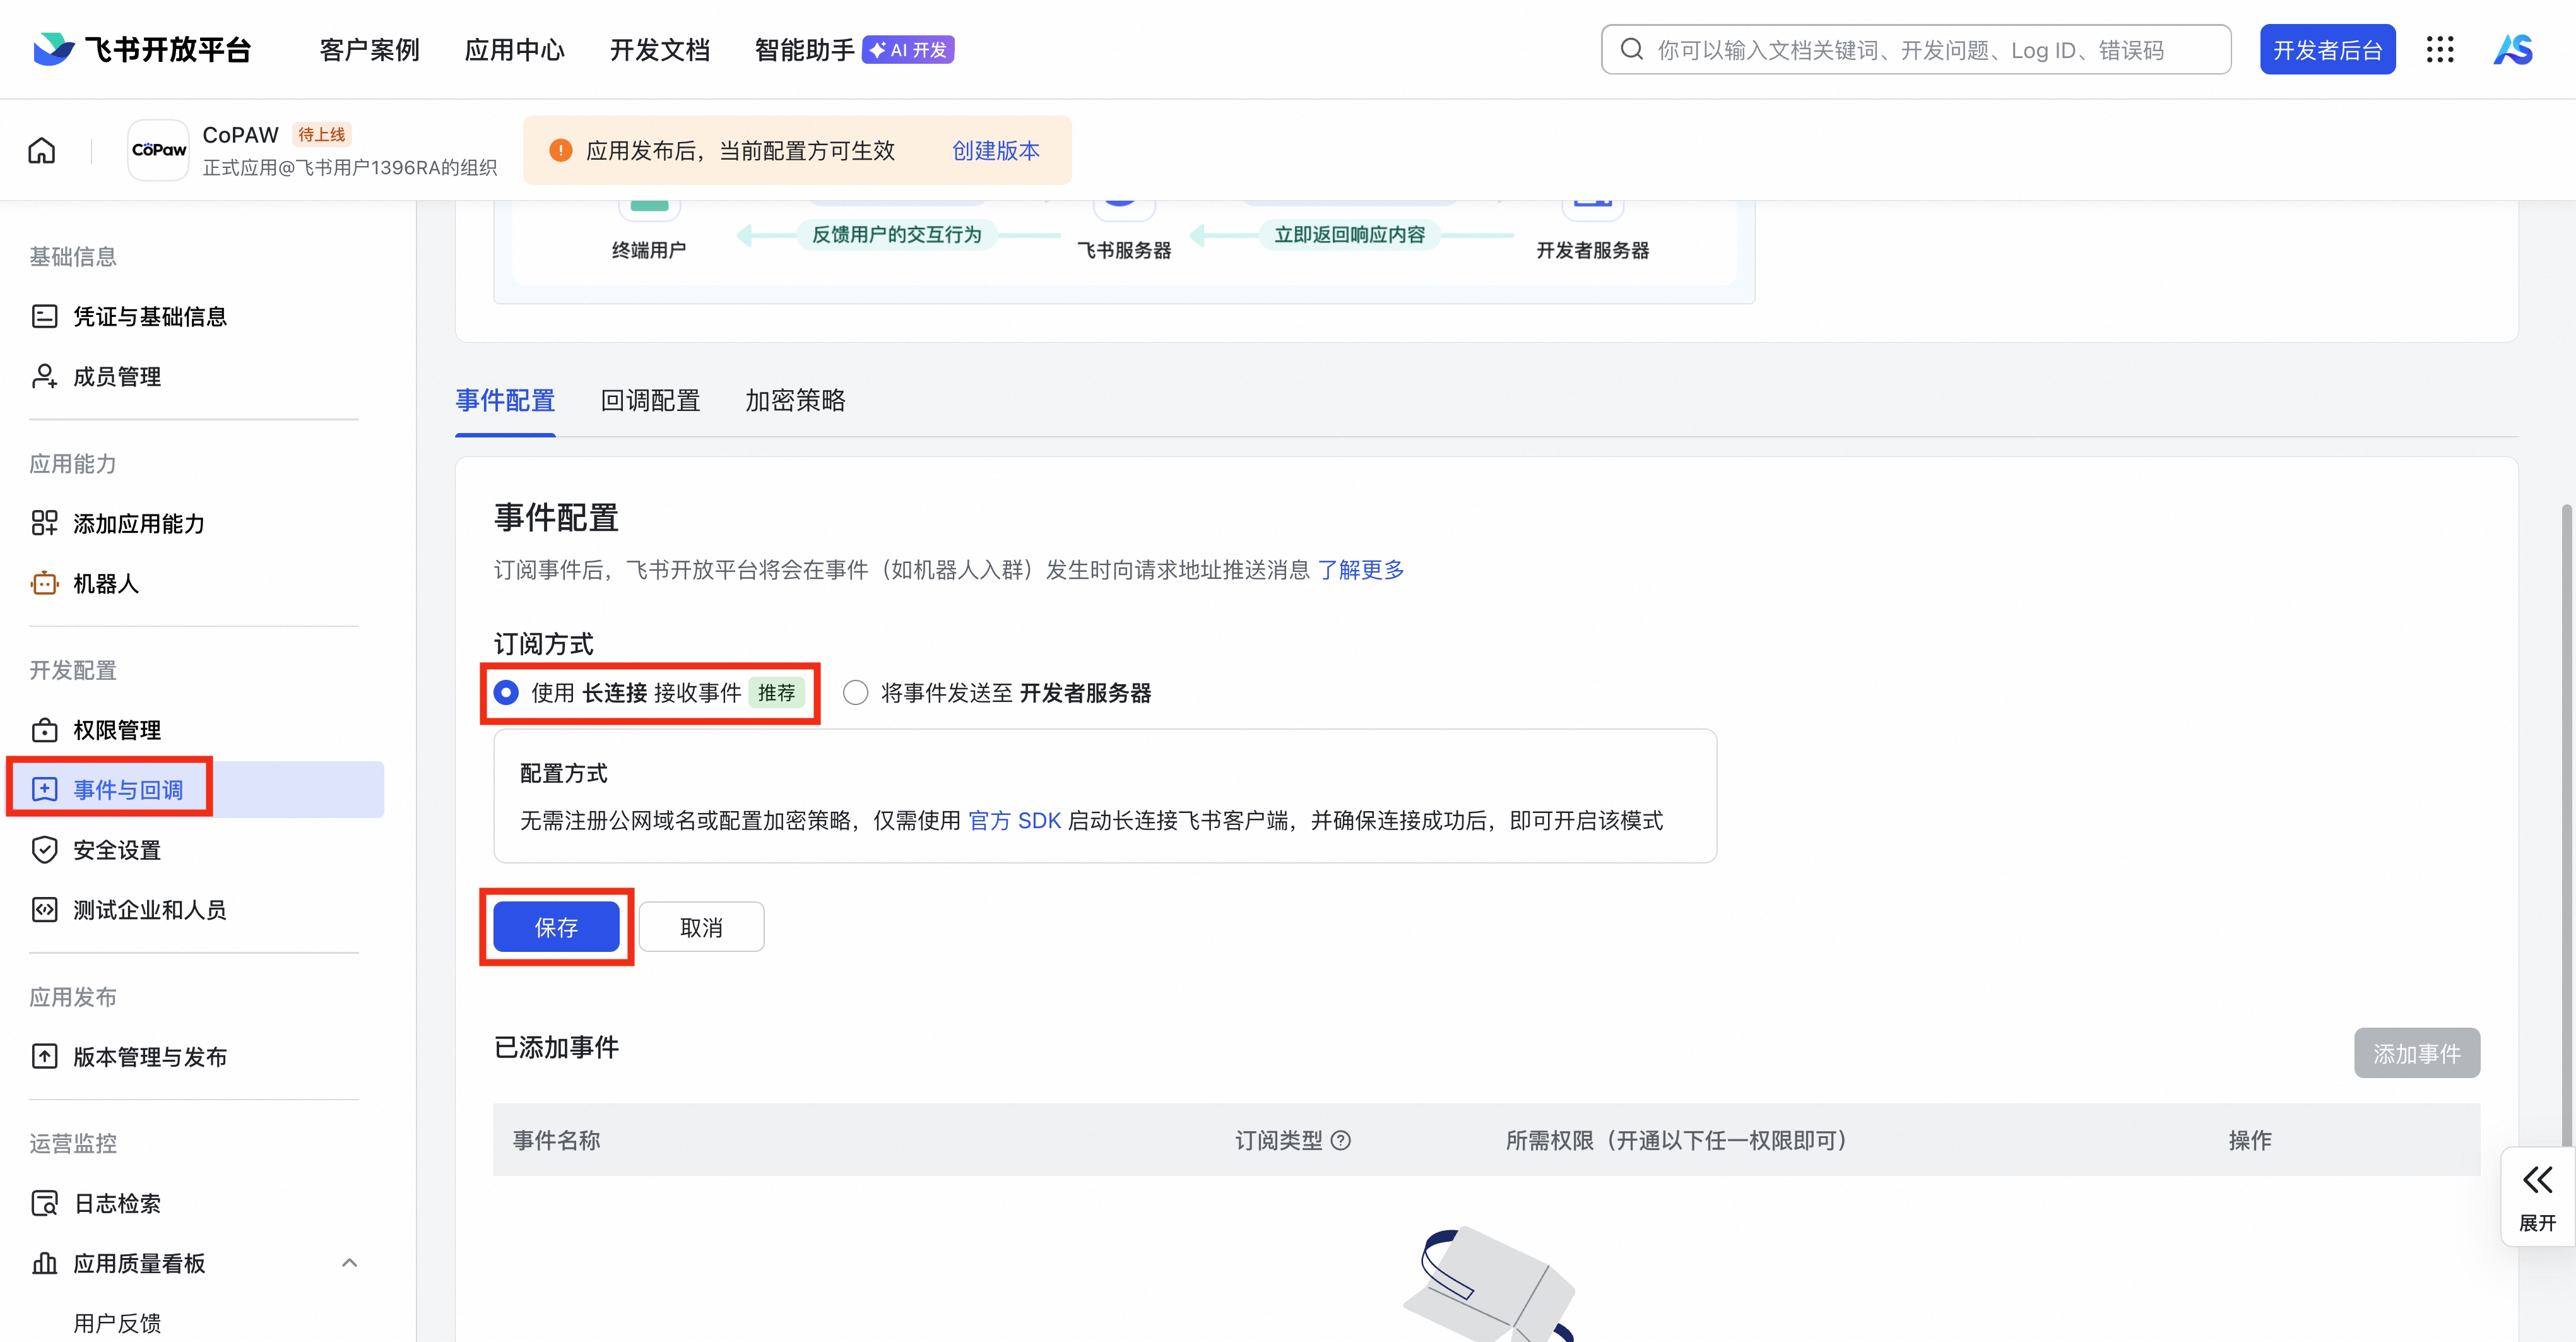
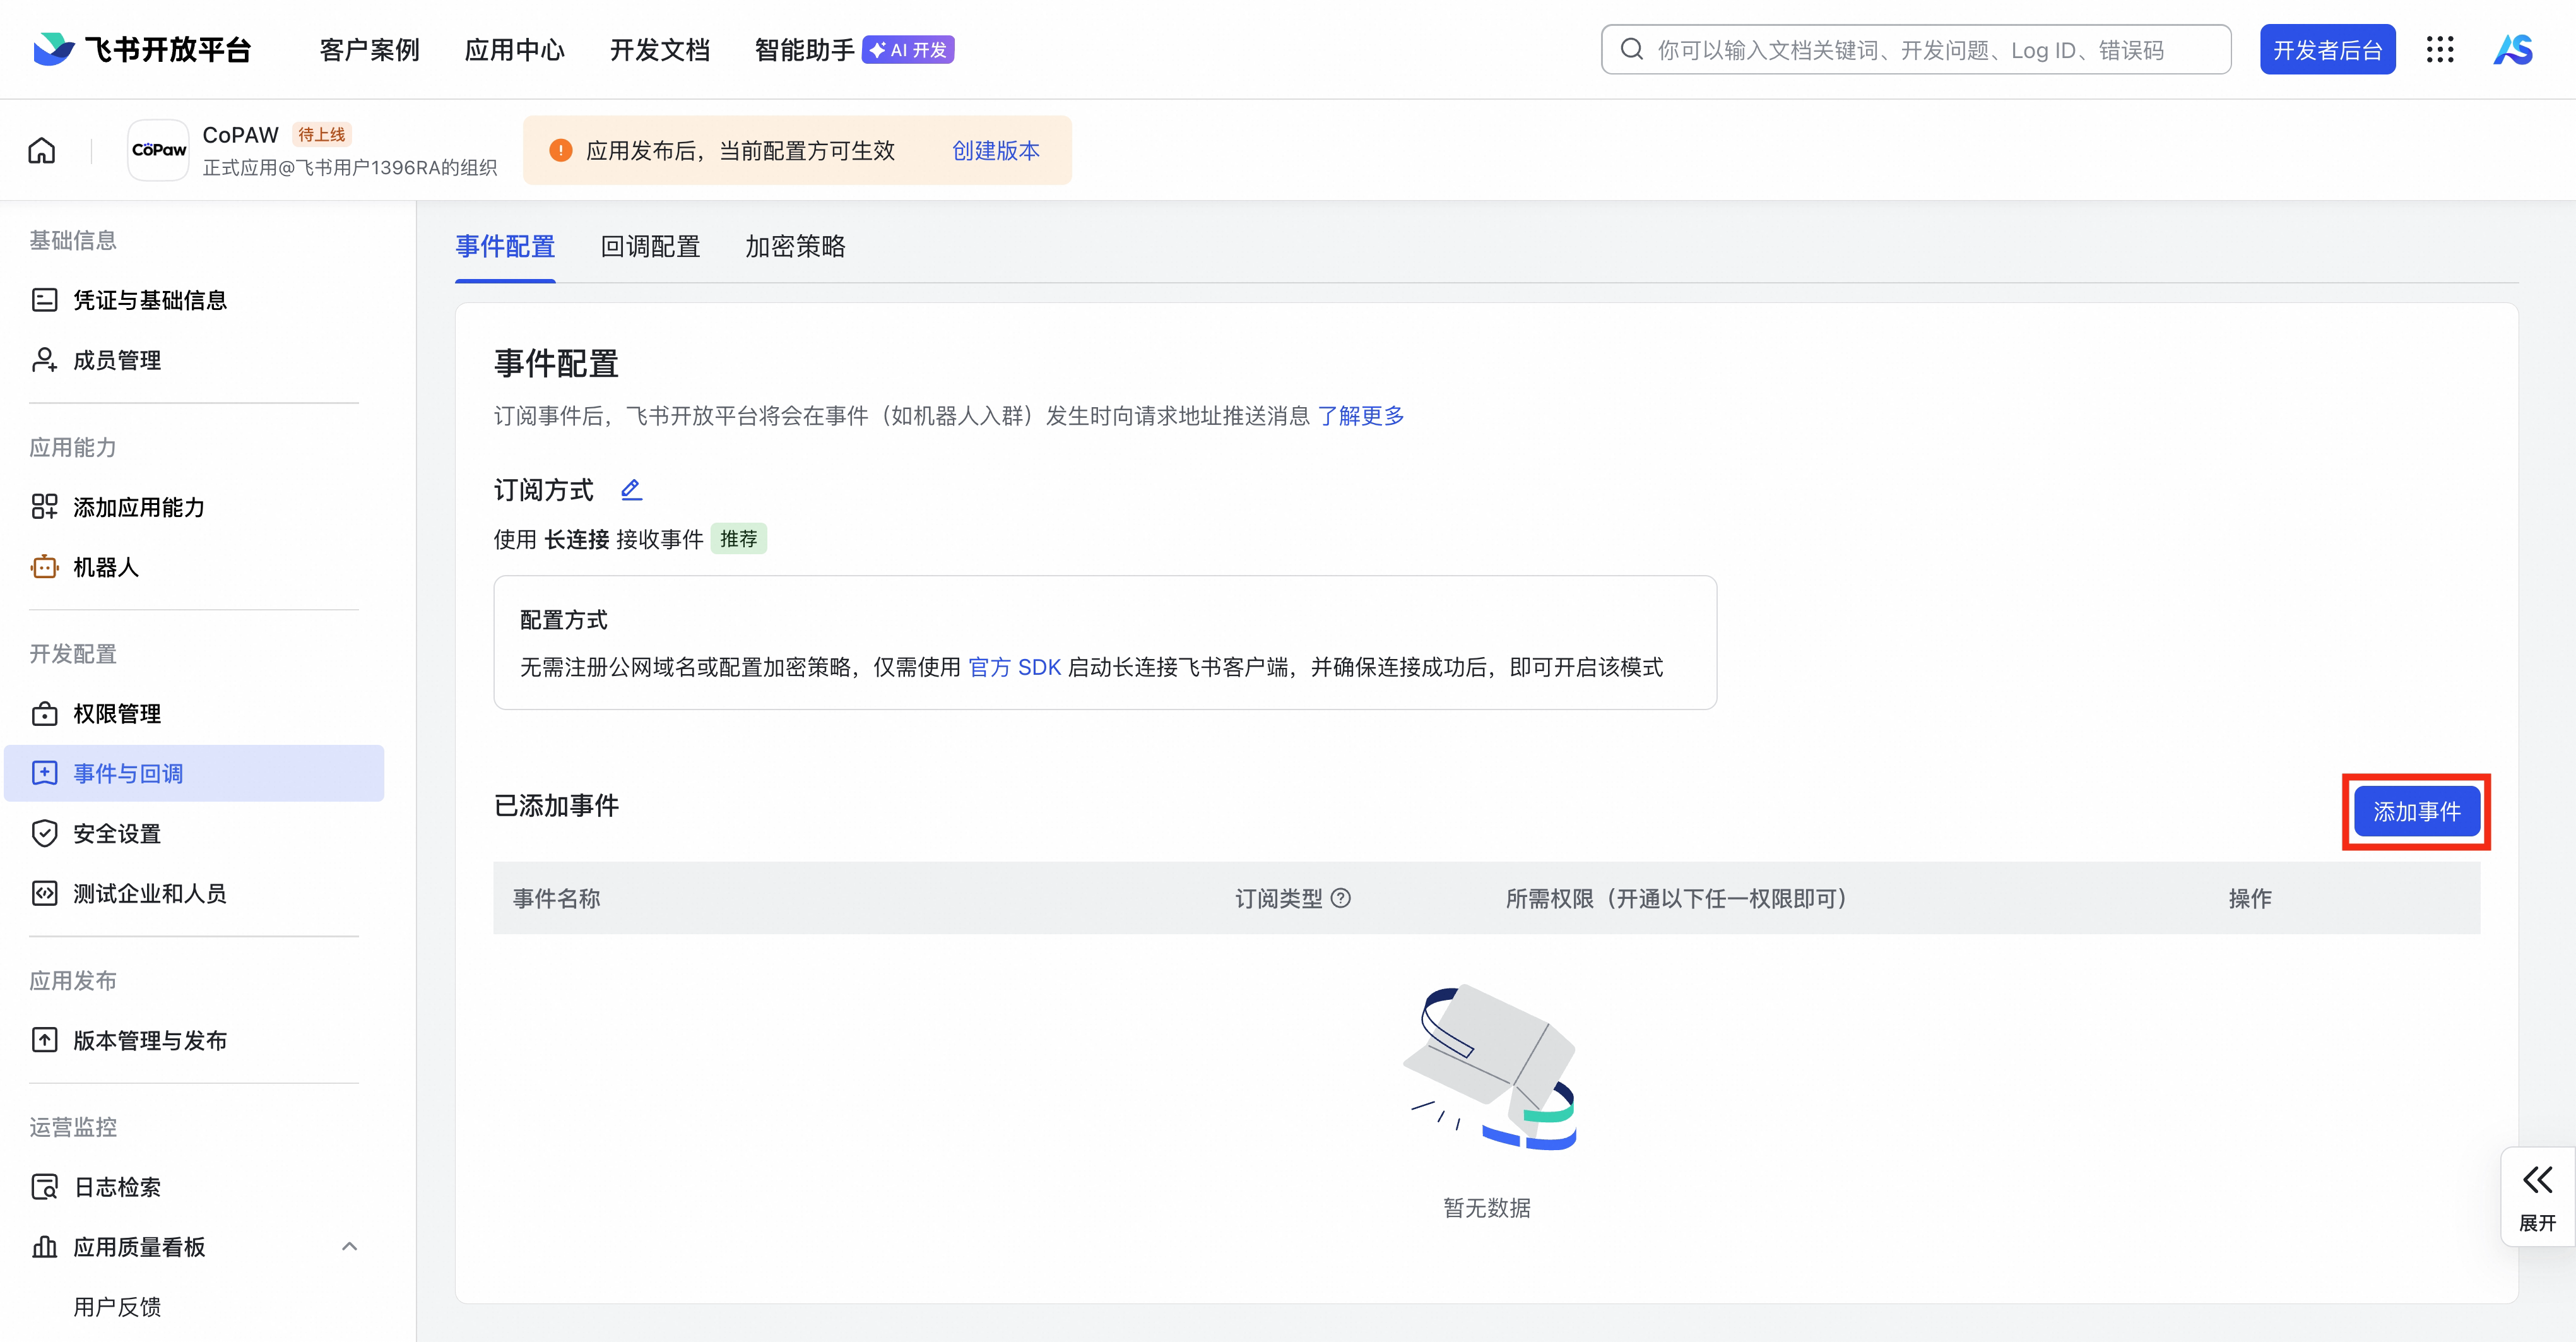
Subscribe to Receive Messages v2.0
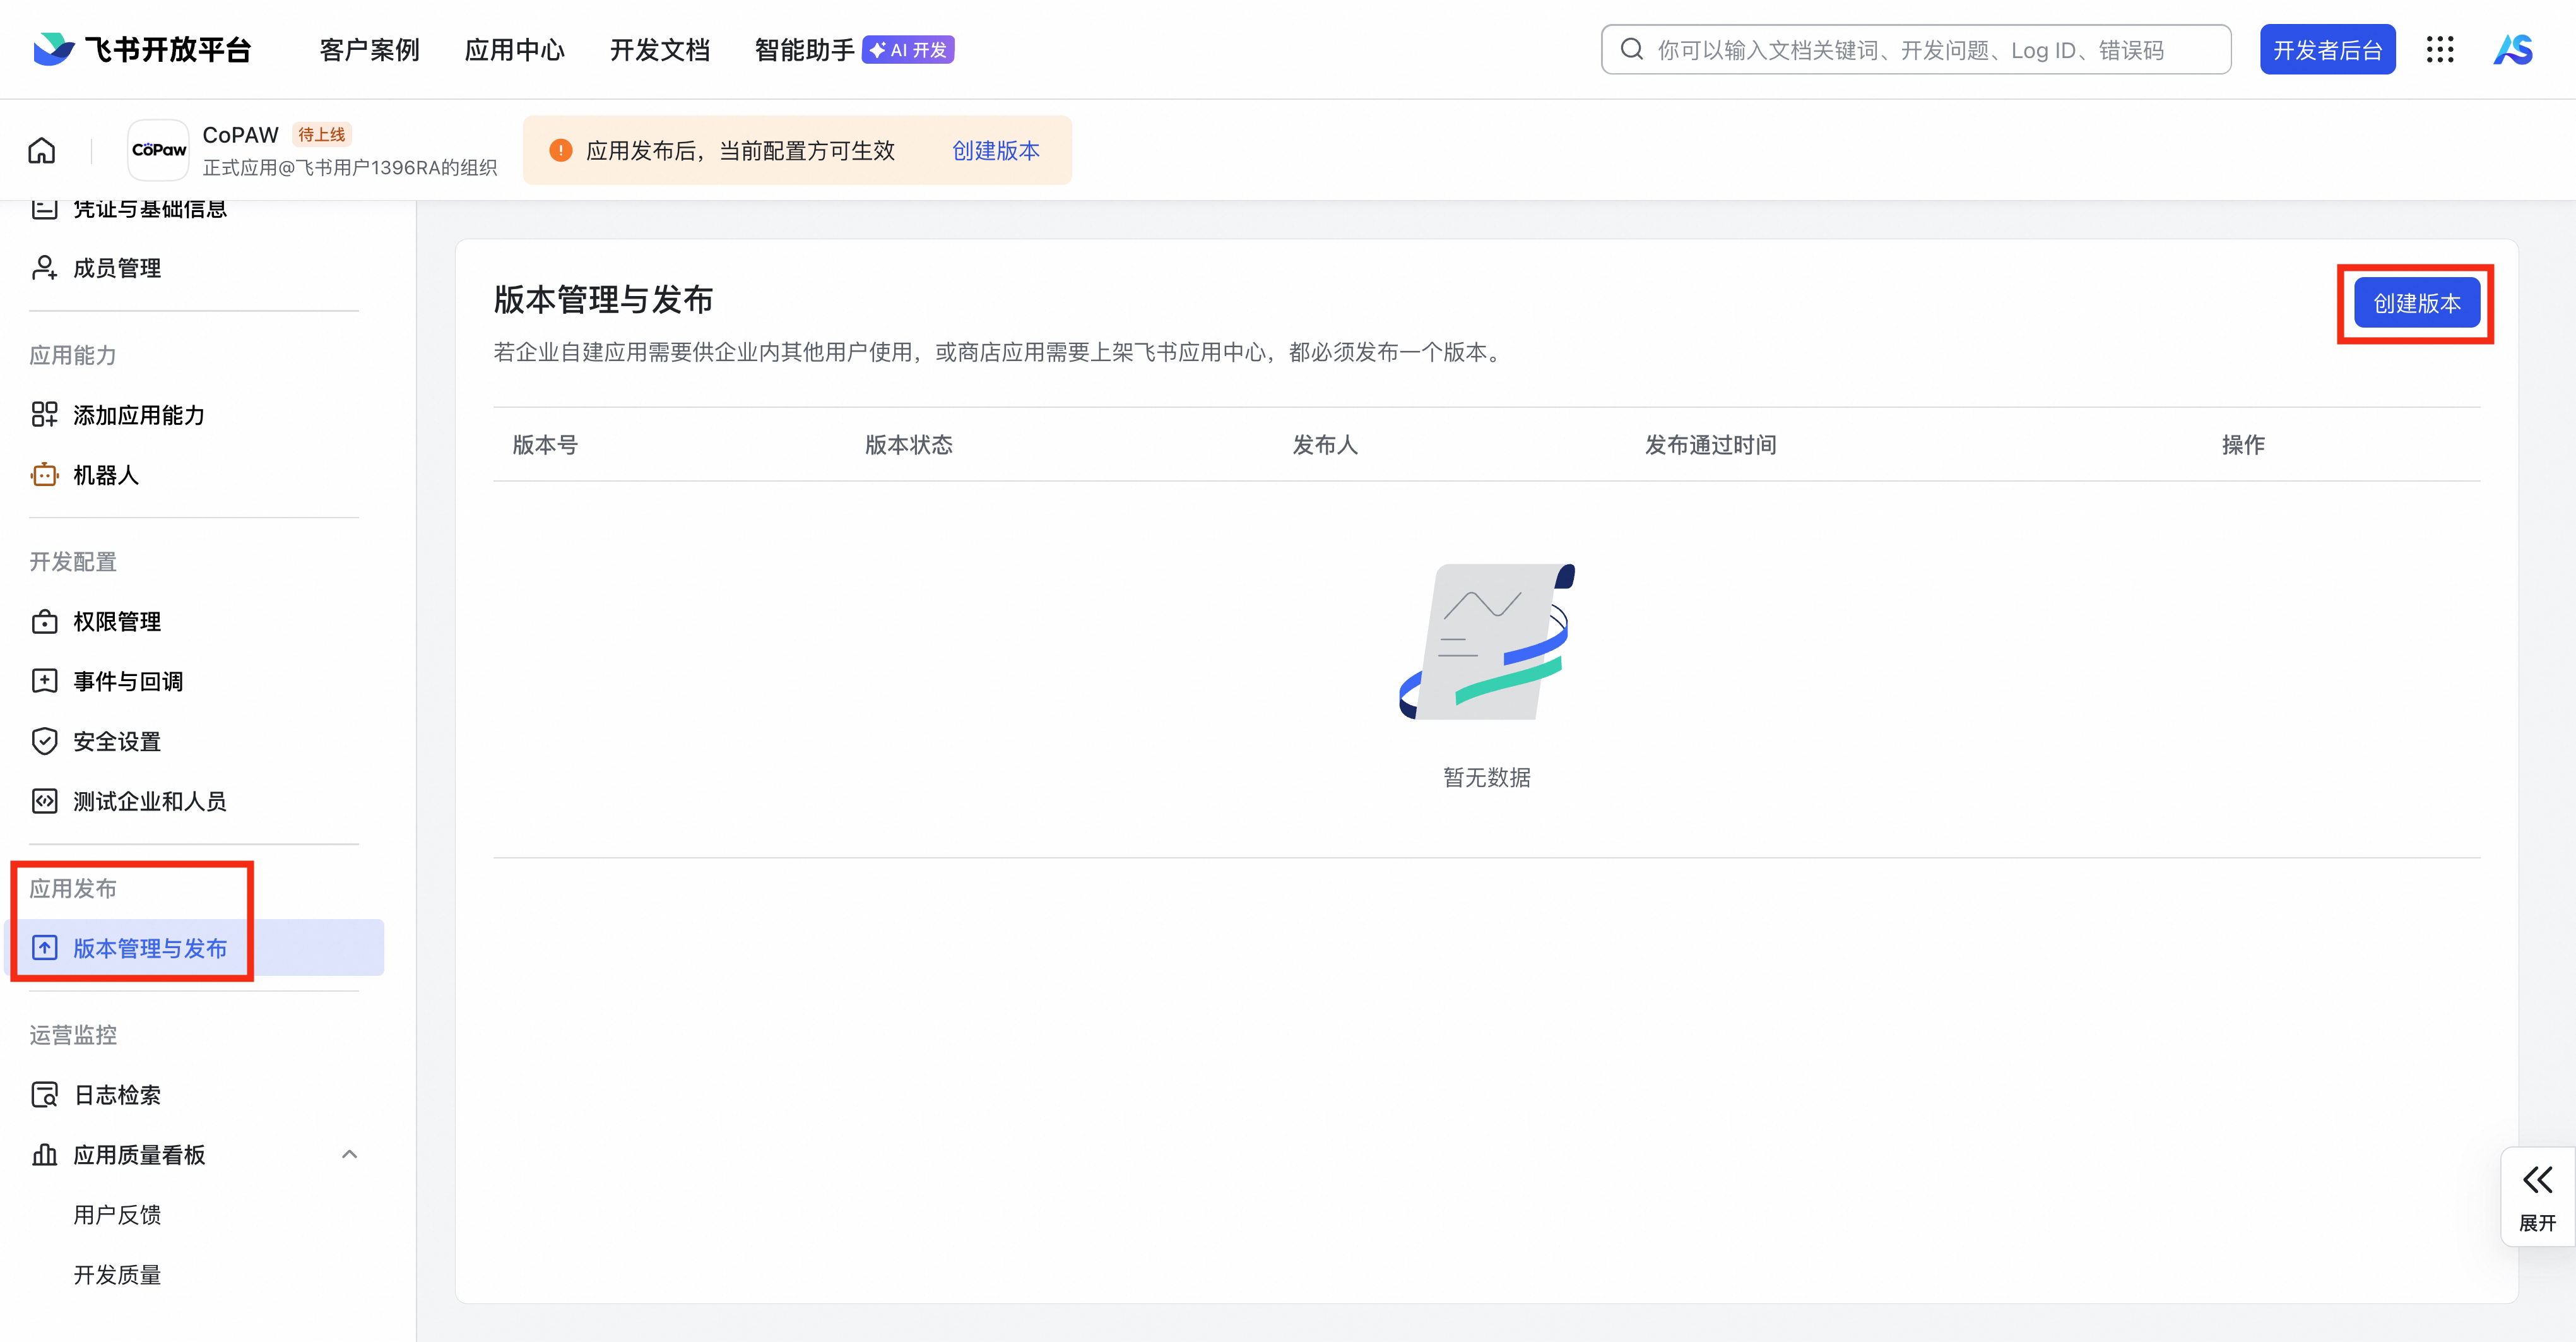
App Release → create version and publish
Configure
curl -X POST http://localhost:18088/api/v1/channels \
  -H "Content-Type: application/json" \
  -H "Authorization: Bearer <token>" \
  -d '{
    "name": "Feishu Bot",
    "type": "feishu",
    "agentId": 1,
    "config": {
      "app_id": "cli_your_app_id",
      "app_secret": "your-app-secret",
      "verification_token": "your-verification-token",
      "encrypt_key": "your-encrypt-key"
    },
    "enabled": true
  }'
Webhook URL: https://your-domain/api/v1/channels/webhook/feishu
Feishu 1.4.0 enhancements
v1.4.0 upgrades Feishu from "can send and receive text" into a full rich-interaction channel. Most of these work with zero config — they're listed here so you know where the switches live and what the defaults are.
Interactive cards (Schema 2.0)
Structured replies — JSON, Markdown with headers / tables / lists, long text — auto-render as Feishu interactive cards; short plain text still goes out as a normal text message.
| Config | Default | What it does |
|---|---|---|
card_format | auto | auto decides by content; always forces cards (for debugging); never forces plain text |
card_header | AI 助手 | Card title text; set to an empty string to suppress the header |
The JSON card payload is capped at ~32 KB; anything larger degrades to plain text.
Approval cards
Tool-guard approval flows arrive as a card with Approve / Deny buttons. Tapping Approve injects a synthetic /approve, tapping Deny injects /deny, and the agent then runs the approved tool end-to-end — approval and execution close the loop in the same conversation, no detour back to the web console.
Streaming cards (CardKit)
Replies stream char-by-char into a single card instead of waiting for the whole answer before sending.
card_streaming_enabled(defaulttrue)- The first token appears immediately; subsequent updates are throttled at 500ms
- On CardKit failure it falls back to accumulate-then-send
Inbound voice transcription
Feishu voice messages go through speech-to-text (STT) and are fed to the agent as text — the agent sees real words, not an [audio] placeholder. Auto-enabled once STT is configured, no extra switch.
Inbound file / audio / video download
Before 1.4.0 only images were downloaded; now files, audio, and video are downloaded too, cached locally, and surfaced to the agent via /api/v1/files/generated/{id}.
Default change
media_download_enabled now defaults to true in 1.4.0. If disk usage or privacy matters to you, set it explicitly to false to opt out.
Size and format limits: images cap at 10 MB (auto-compressed beyond that); files / audio / video cap at 30 MB; audio is opus-only and video is mp4-only, with everything else degrading to plain file handling.
Outbound generated files → native attachments
File URLs the agent generates are turned back into native Feishu attachments sent directly. On a cache miss, the reply carries a retry hint instead of a dead link.
Channel-native tools (no MCP server)
Bind a Feishu channel and the agent immediately gains three native Feishu tools, no separate MCP server required:
| Tool | Type | Default |
|---|---|---|
feishu_calendar_list_events | read | on |
feishu_doc_read | read | on |
feishu_doc_create | write | off, approval-gated |
DB-seeded guard rules automatically apply NEEDS_APPROVAL to mutating tools (e.g. feishu_doc_create), triggering the approval-card flow above.
Sender context injection
In group chats the agent needs to know who's talking. When a Feishu message comes in, the agent prompt automatically carries Channel / Sender / (in groups) Chat context lines. No config.
DONE reaction
After a successful reply, the bot adds a ✅ reaction to the inbound message as a lightweight "handled" receipt. enable_done_reaction (default true).
Mention filtering
By default the bot responds to anyone in a group chat. Set require_mention to true (default false) and only an @mention triggers it — the check uses the Feishu SDK's mentions field. The bot's own open_id is prefetched on startup with a 60s negative cache (if it can't be resolved, the gate falls open rather than locking the whole group on a single failure).
curl -X POST http://localhost:18088/api/v1/channels \
  -H "Content-Type: application/json" \
  -H "Authorization: Bearer <token>" \
  -d '{
    "name": "Feishu Bot",
    "type": "feishu",
    "agentId": 1,
    "config": {
      "app_id": "cli_your_app_id",
      "app_secret": "your-app-secret",
      "card_format": "auto",
      "card_header": "AI 助手",
      "card_streaming_enabled": true,
      "media_download_enabled": true,
      "enable_done_reaction": true,
      "require_mention": false
    },
    "enabled": true
  }'
WeCom (WeChat Work)
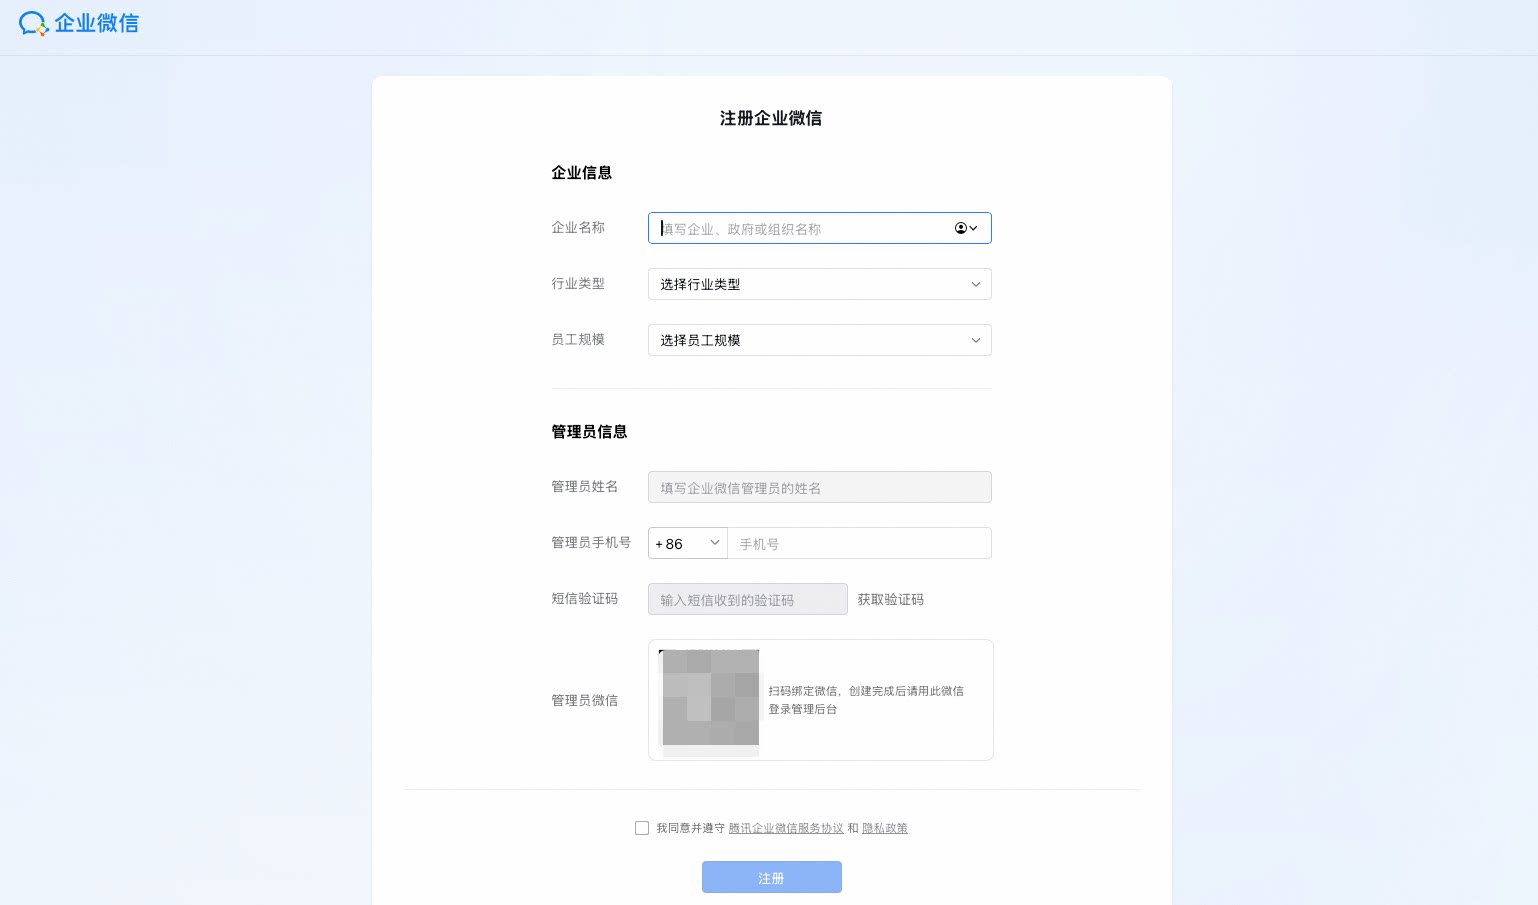
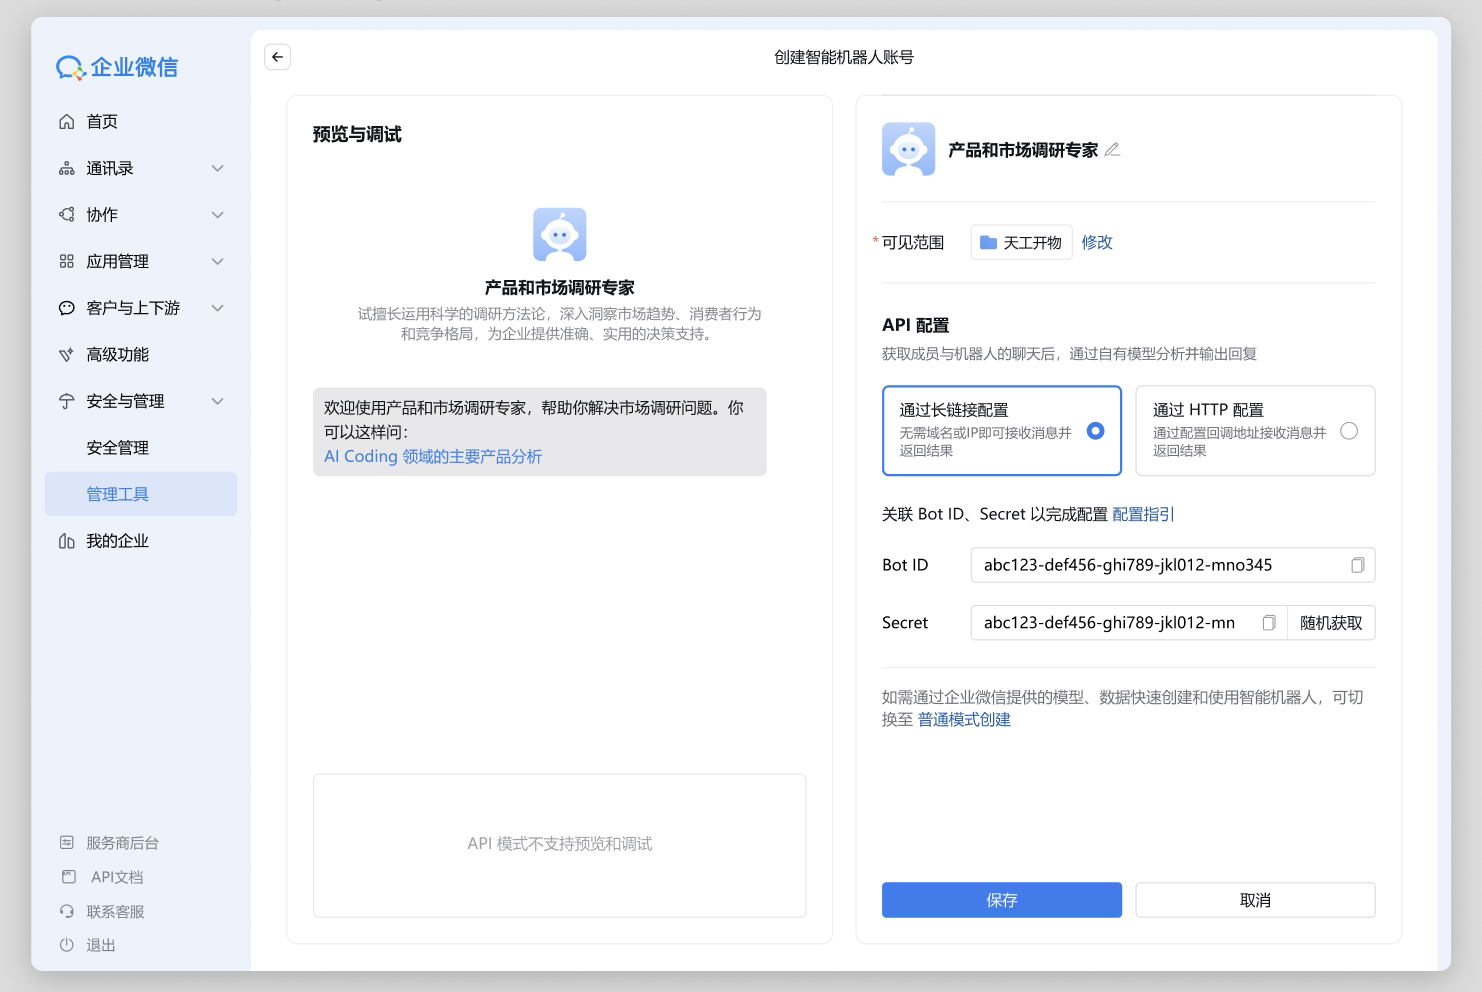
WeChat Work — register or log in
Workbench → Smart Robot > Create Robot → API Mode > Long Connection
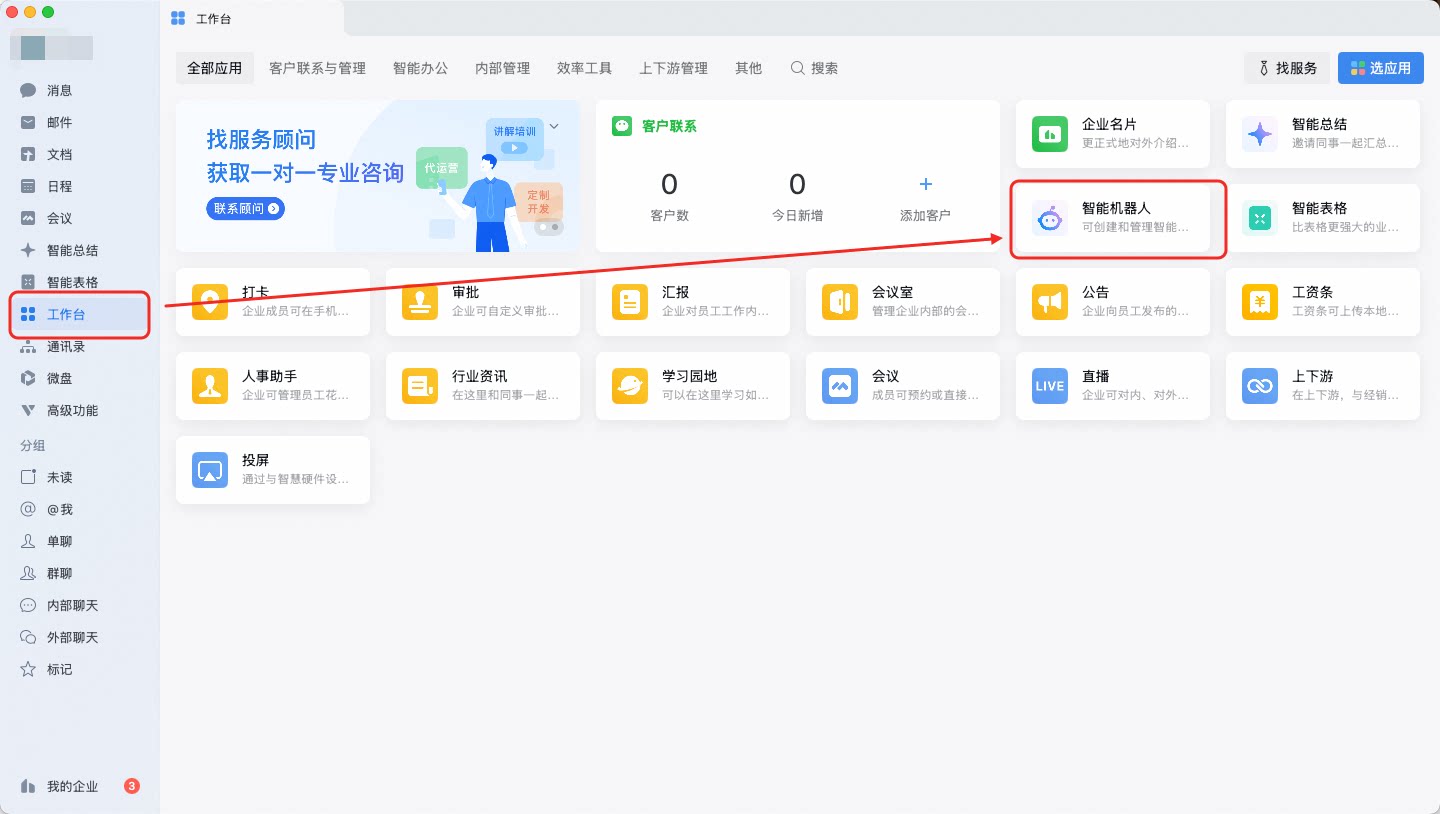
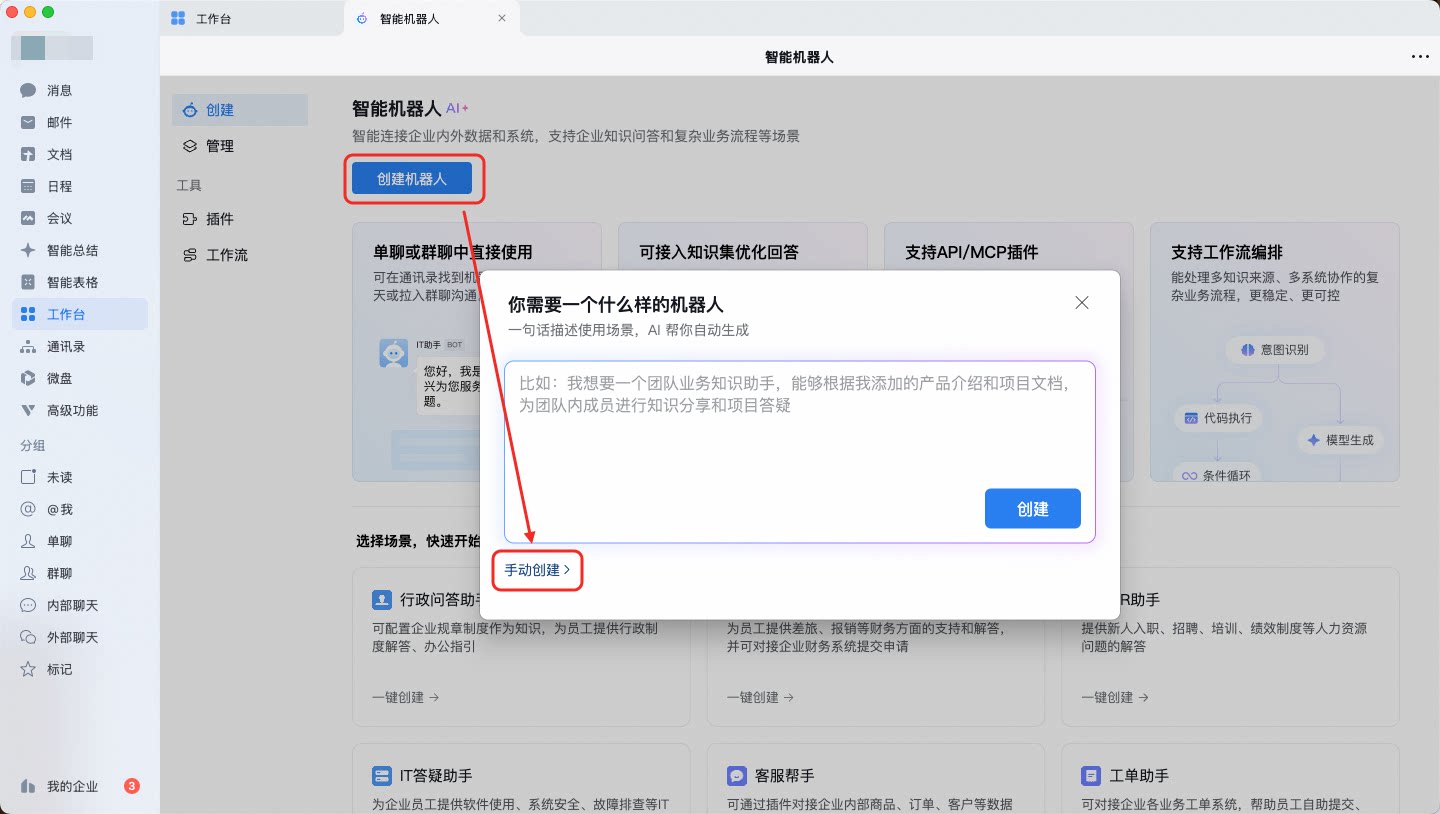
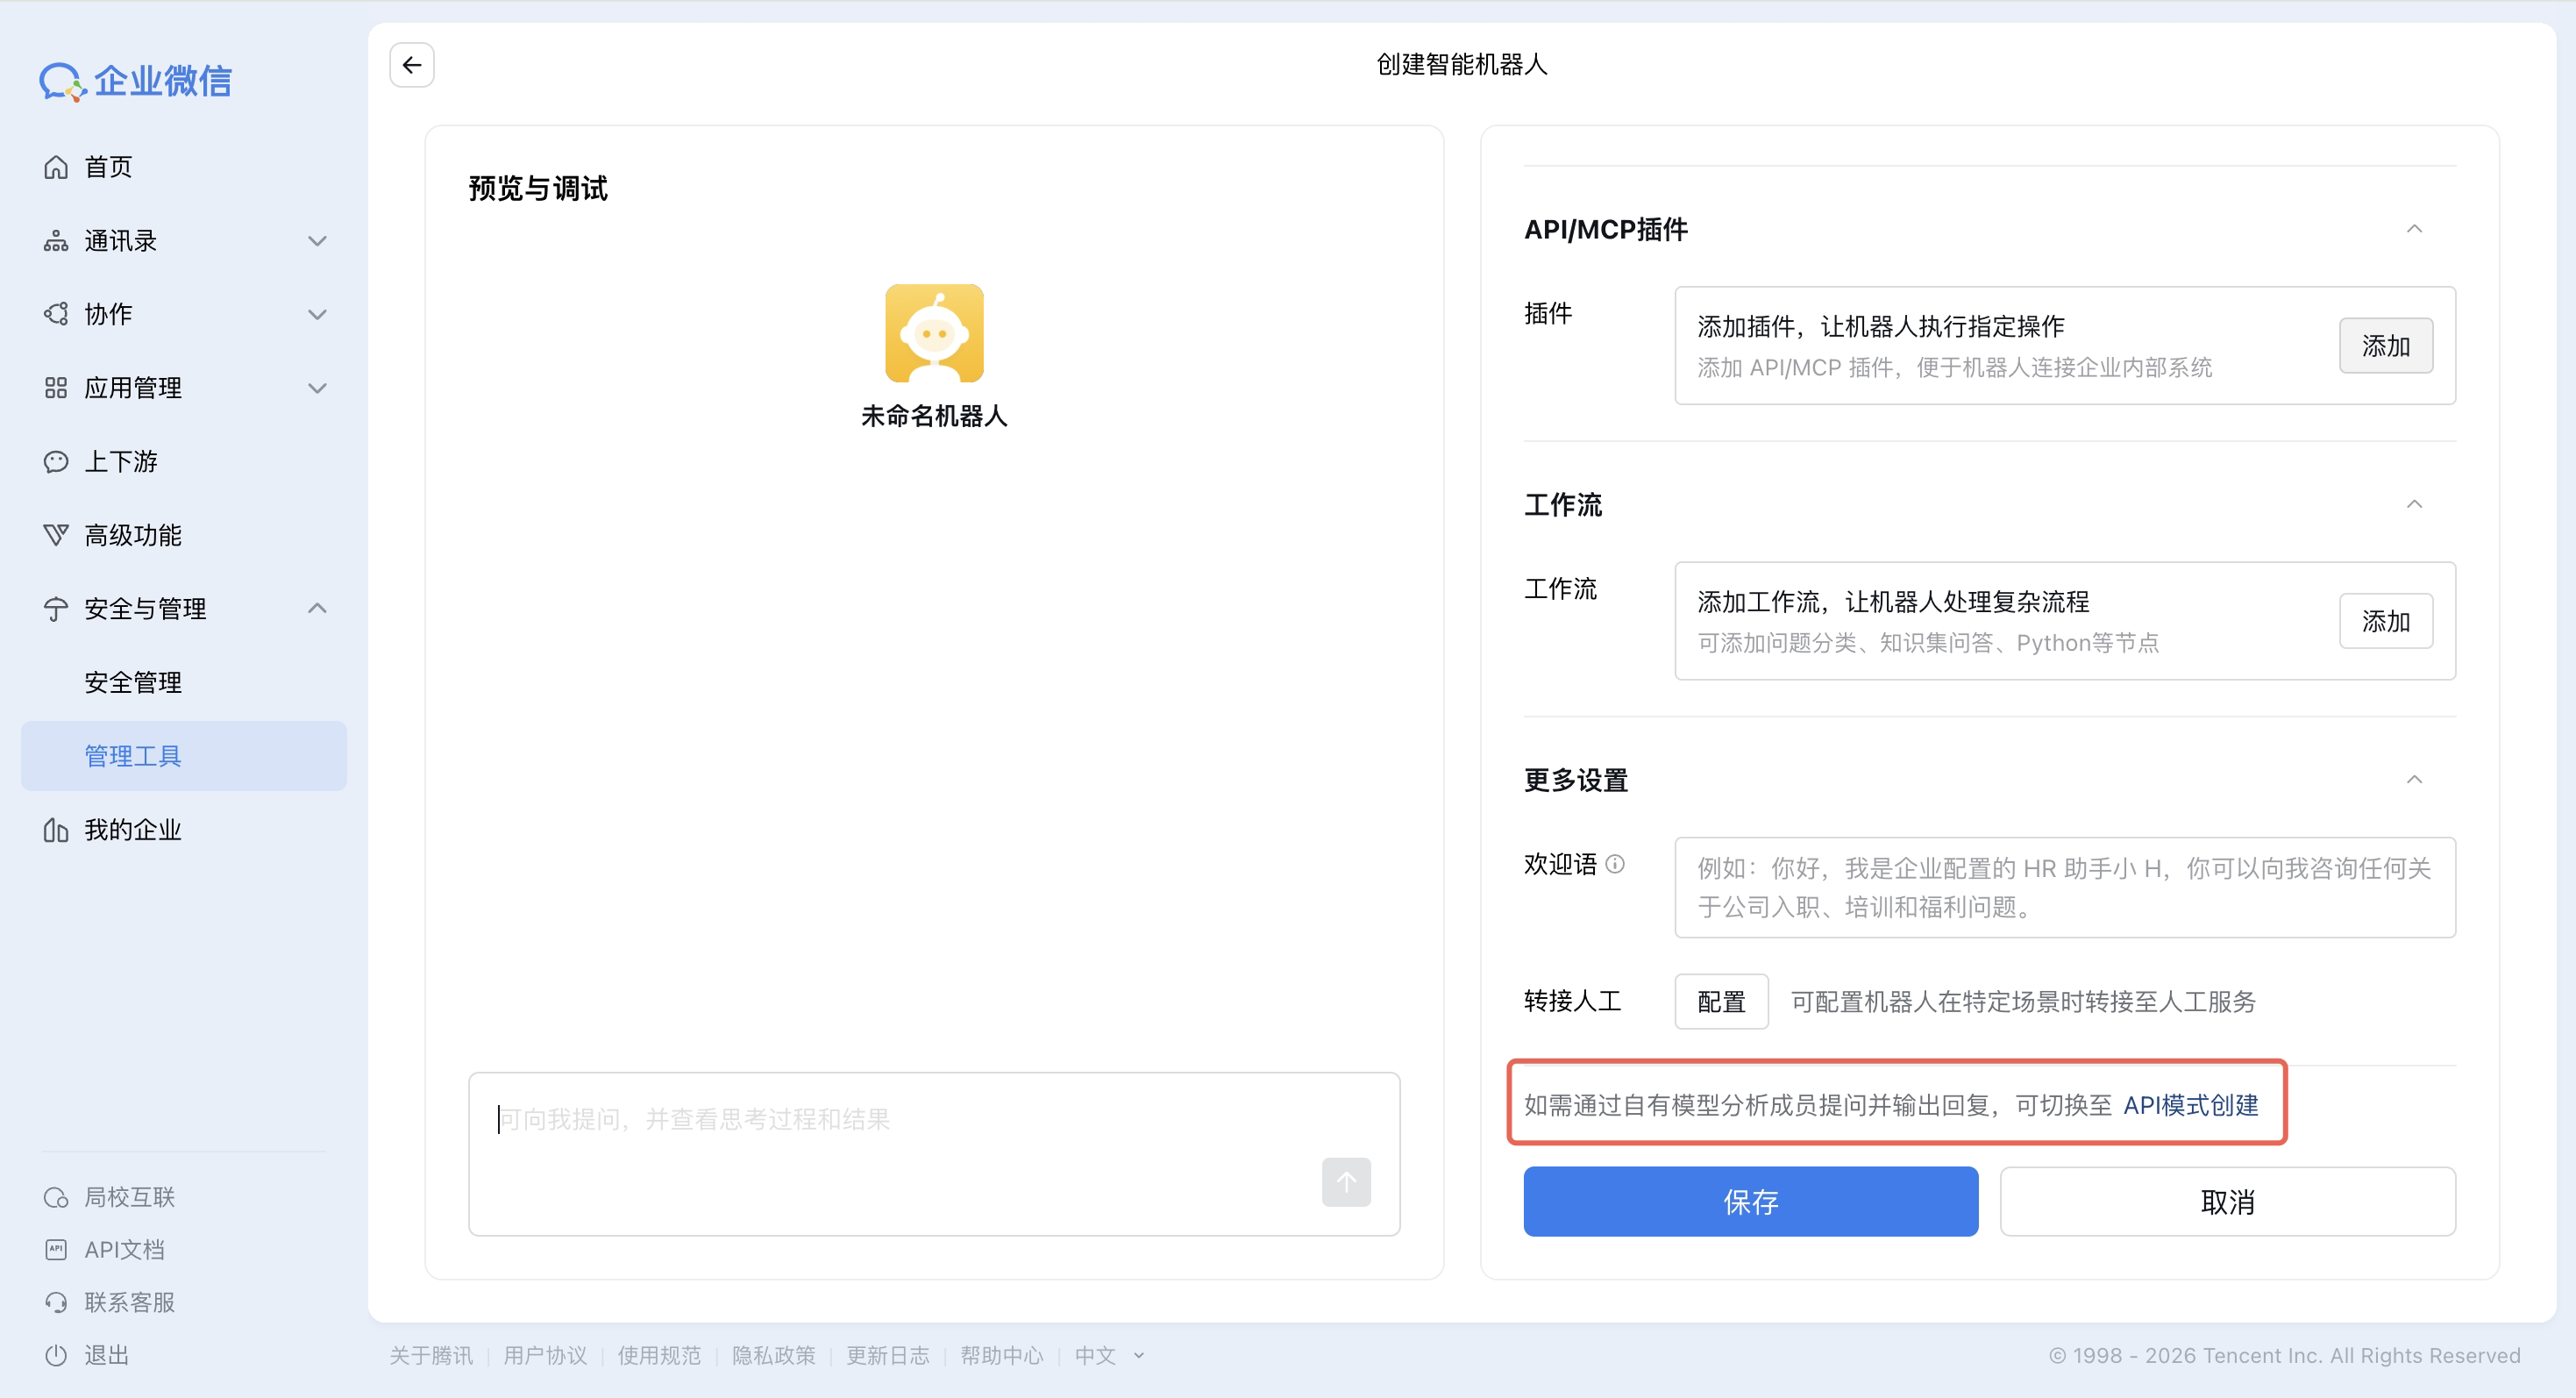
Grab Bot ID and Secret
curl -X POST http://localhost:18088/api/v1/channels \
  -H "Content-Type: application/json" \
  -H "Authorization: Bearer <token>" \
  -d '{
    "name": "WeCom Bot",
    "type": "wecom",
    "agentId": 1,
    "config": {
      "bot_id": "your-bot-id",
      "secret": "your-secret"
    },
    "enabled": true
  }'
Want WeCom to actually run smoothly?
Group multi-user collaboration, quoted messages, appmsg parsing, upload constraints, aibot_respond_msg routing, self-loop detection, TLS retry, platform-level permission locks — every non-obvious optimization and corner case is collected in WeCom Deep Tuning.
Telegram
Long-Polling (default) or Webhook. Long-Polling needs no public IP.
Create bot
- Search @BotFather in Telegram (look for the blue verified badge)
- Send
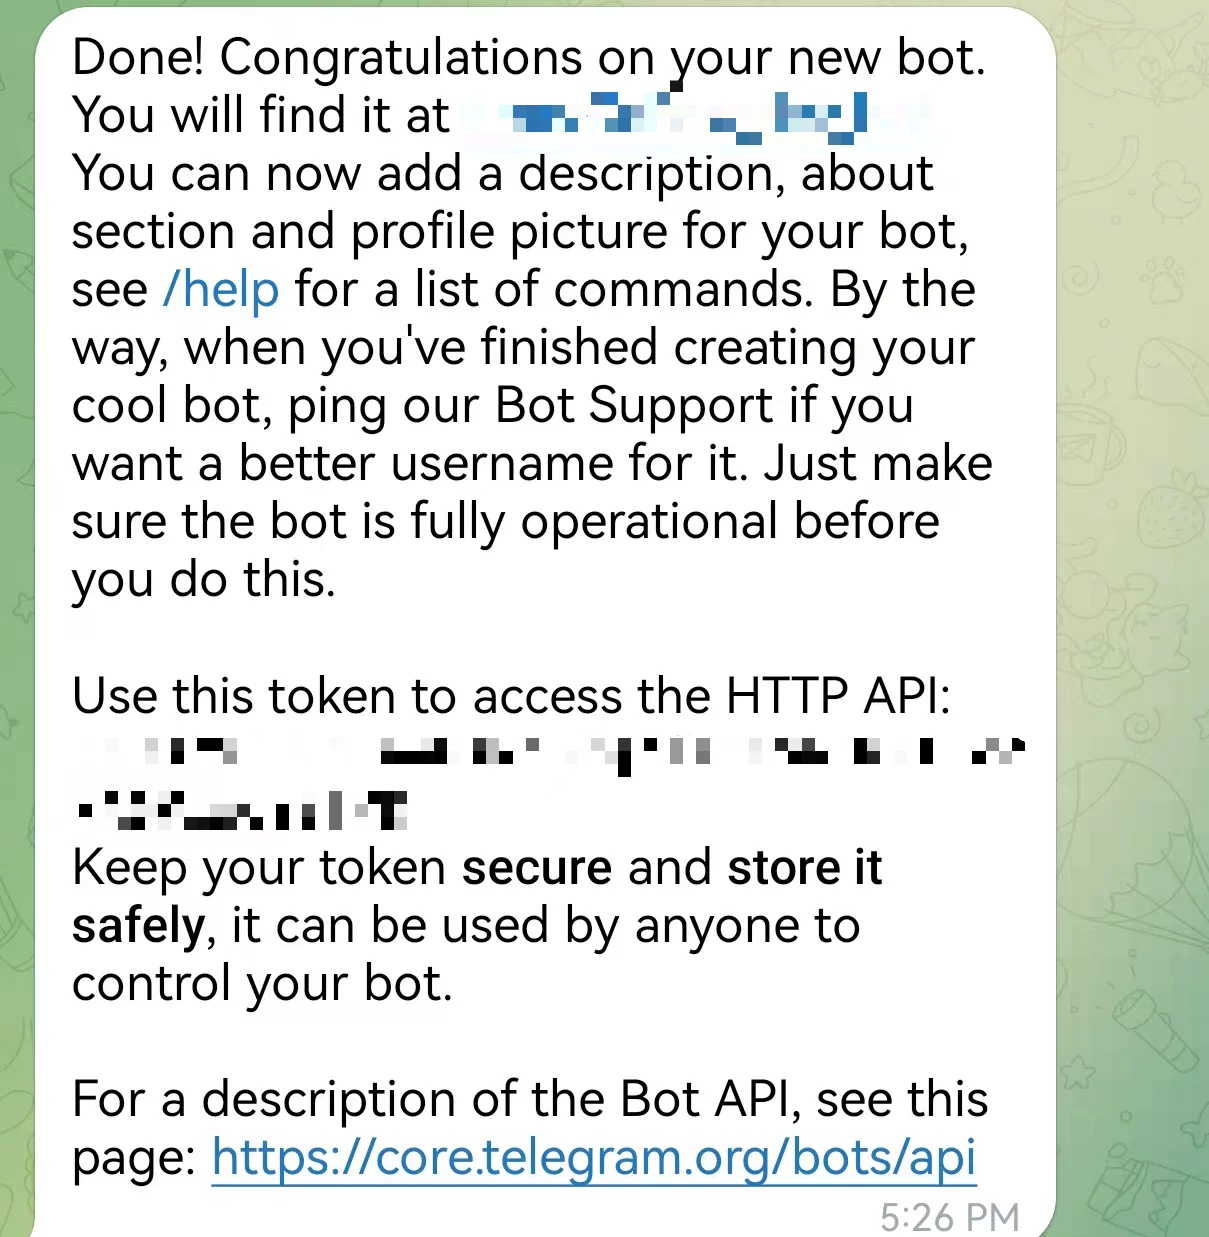
/newbot, follow the prompts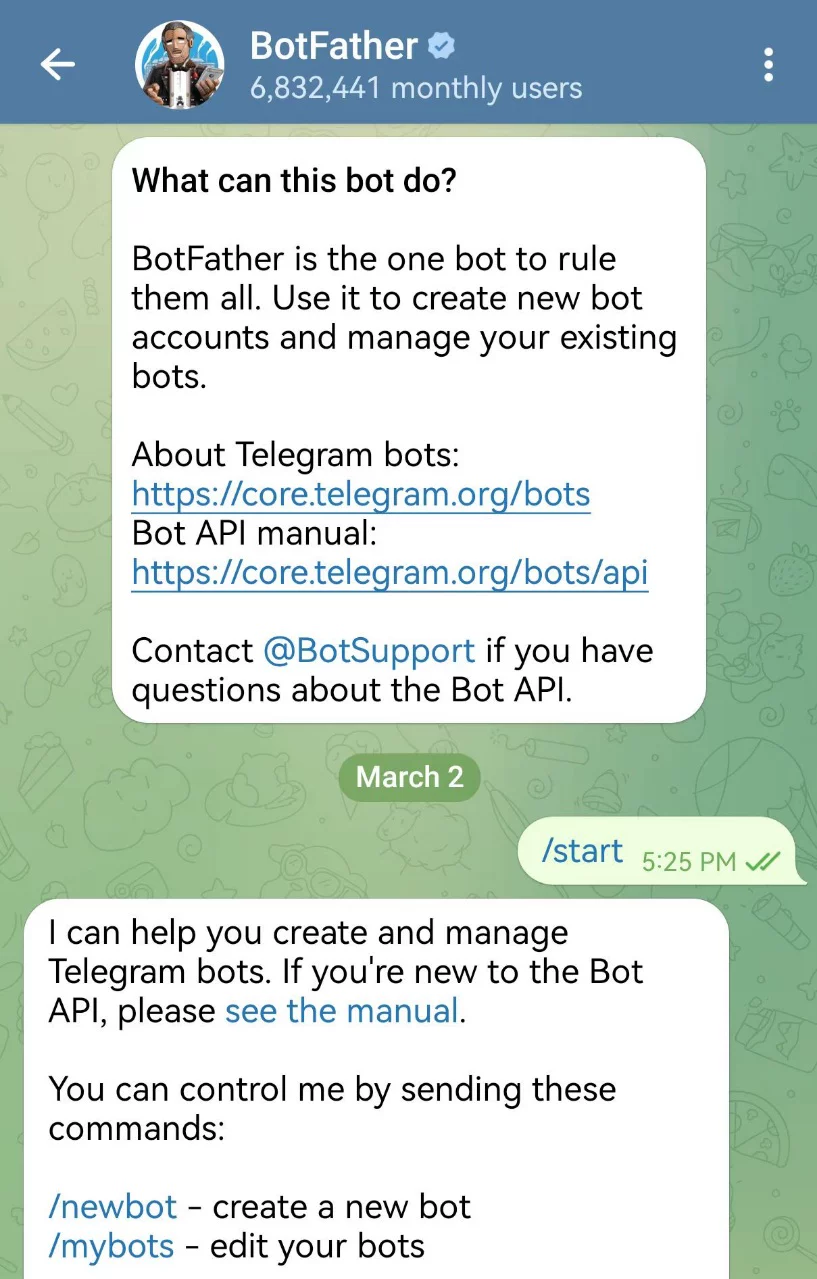
- Copy the Bot Token
Configure
curl -X POST http://localhost:18088/api/v1/channels \
  -H "Content-Type: application/json" \
  -H "Authorization: Bearer <token>" \
  -d '{
    "name": "Telegram Bot",
    "type": "telegram",
    "agentId": 1,
    "config": {
      "bot_token": "123456:ABC-DEF1234ghIkl-zyx57W2v1u123ew11",
      "show_typing": true,
      "polling_timeout": 20
    },
    "enabled": true
  }'
TIP
- Long-Polling has exponential backoff reconnection (2s → 30s) built in
- Typing indicator is refreshed every 4 seconds
- Users in China may need
http_proxyconfigured
Discord
Built on JDA — connects via Gateway WebSocket with automatic reconnection.
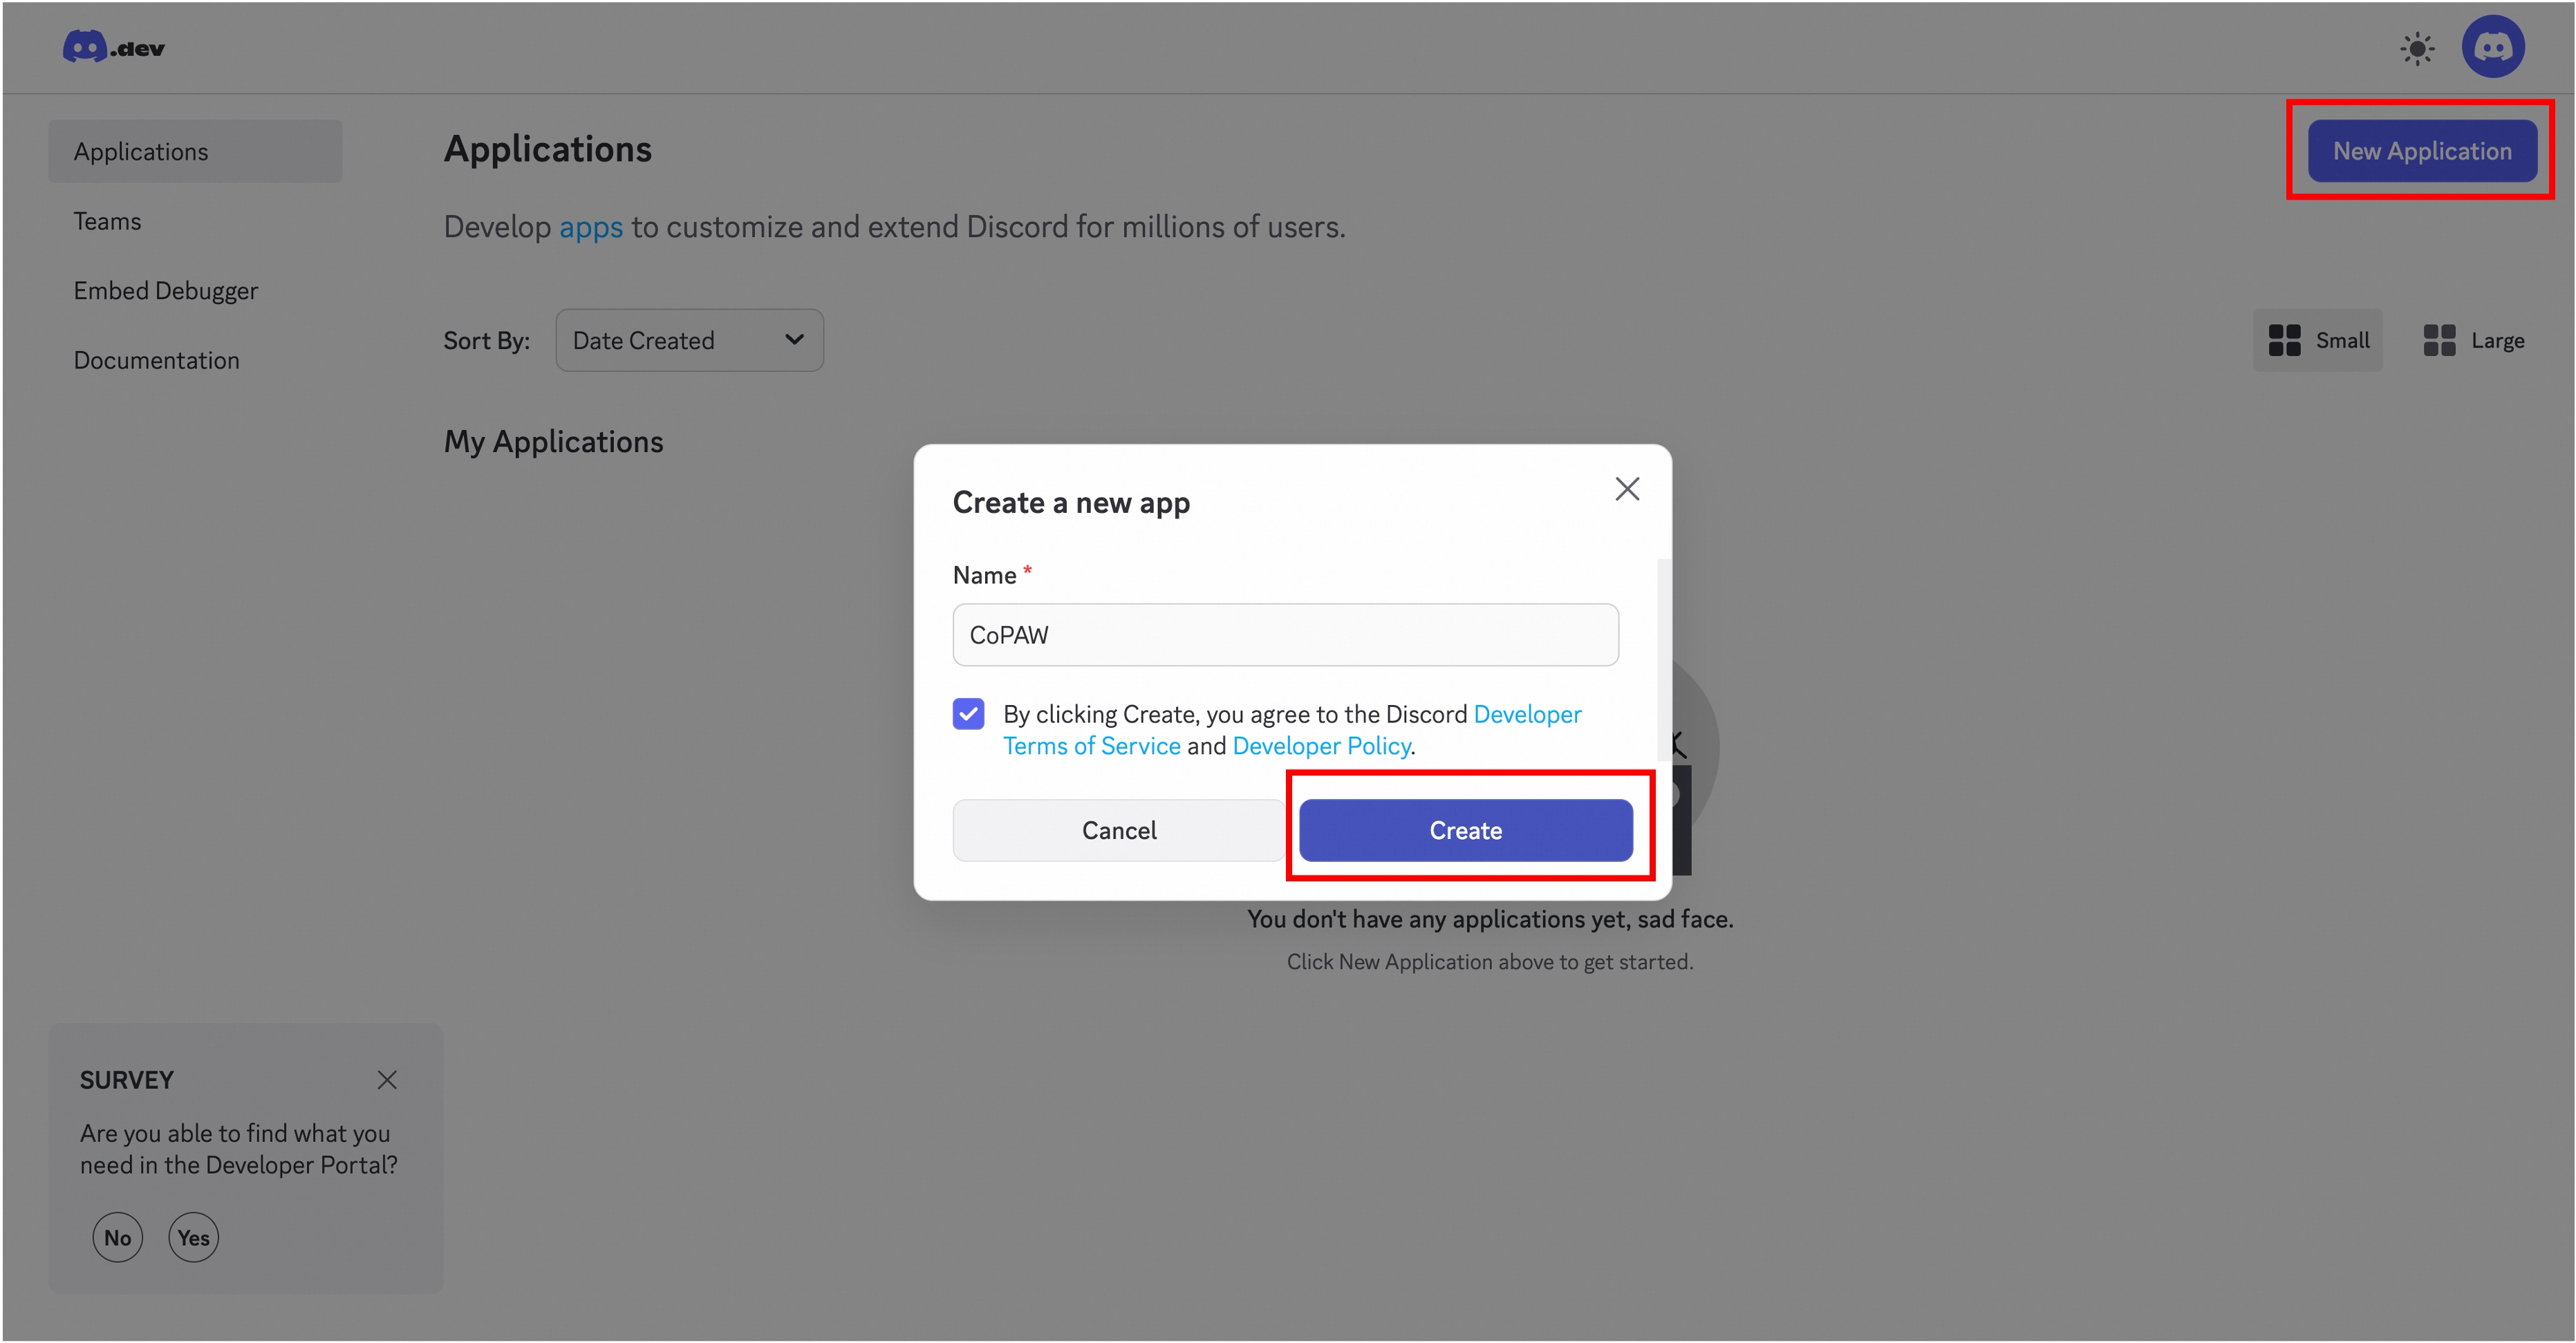
Create bot
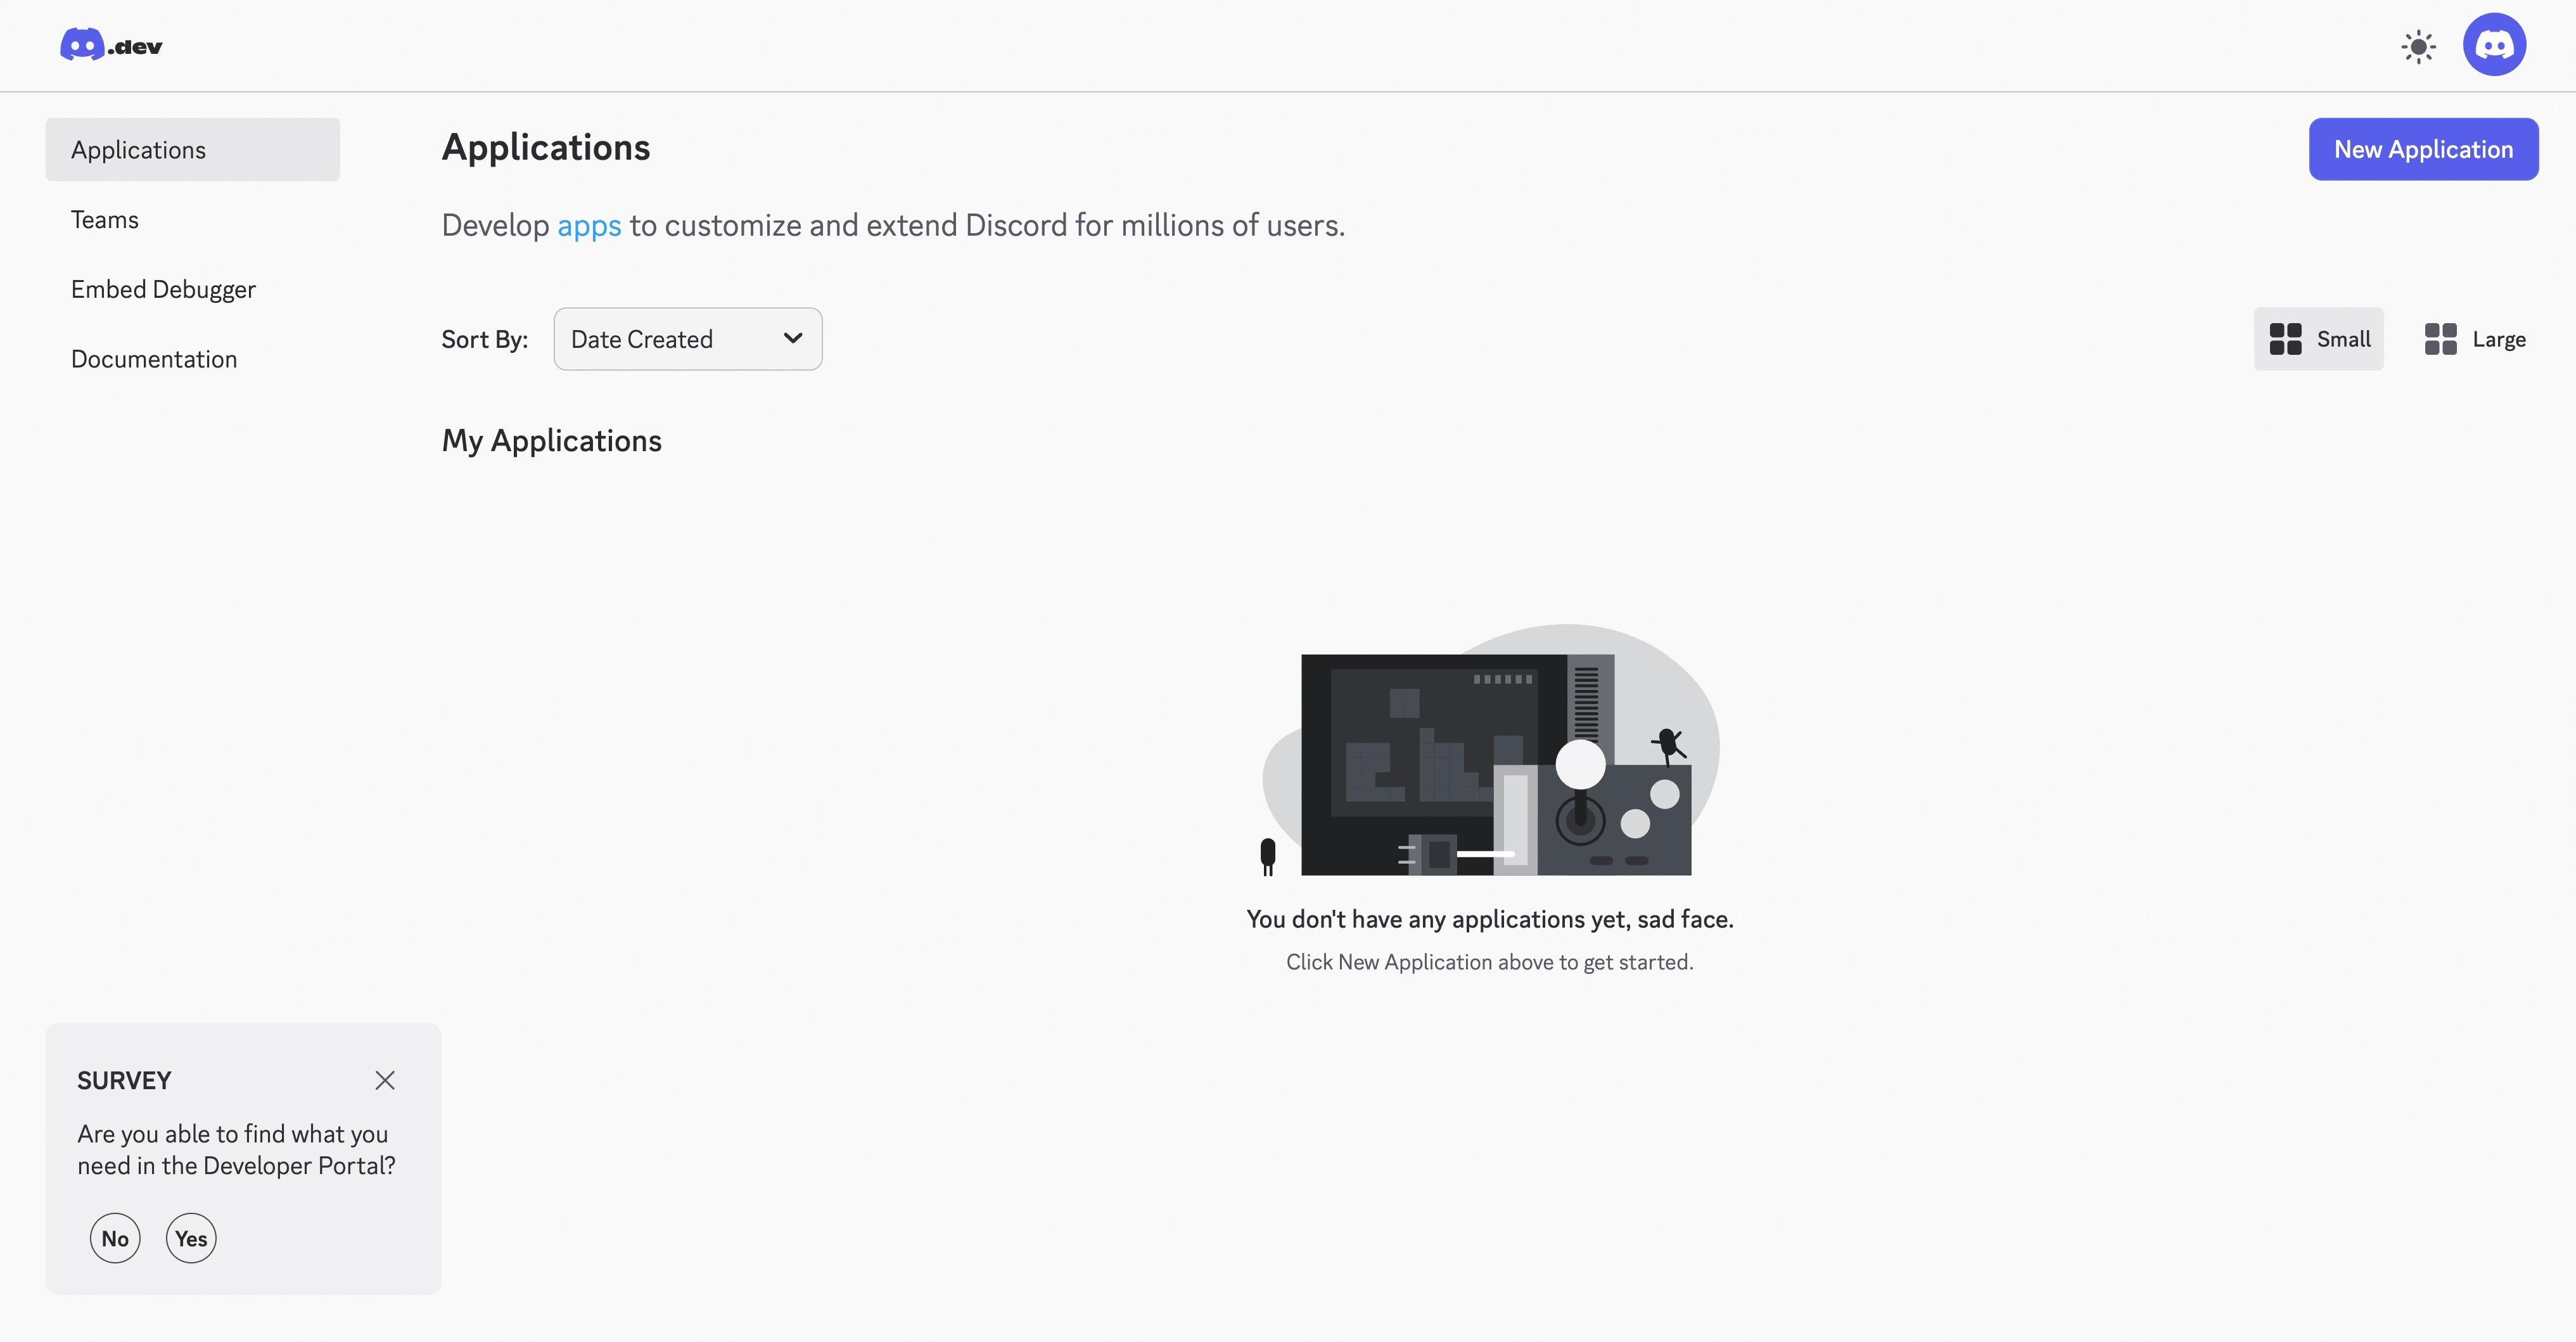
Create Application
Bot → create a Bot, copy the Token
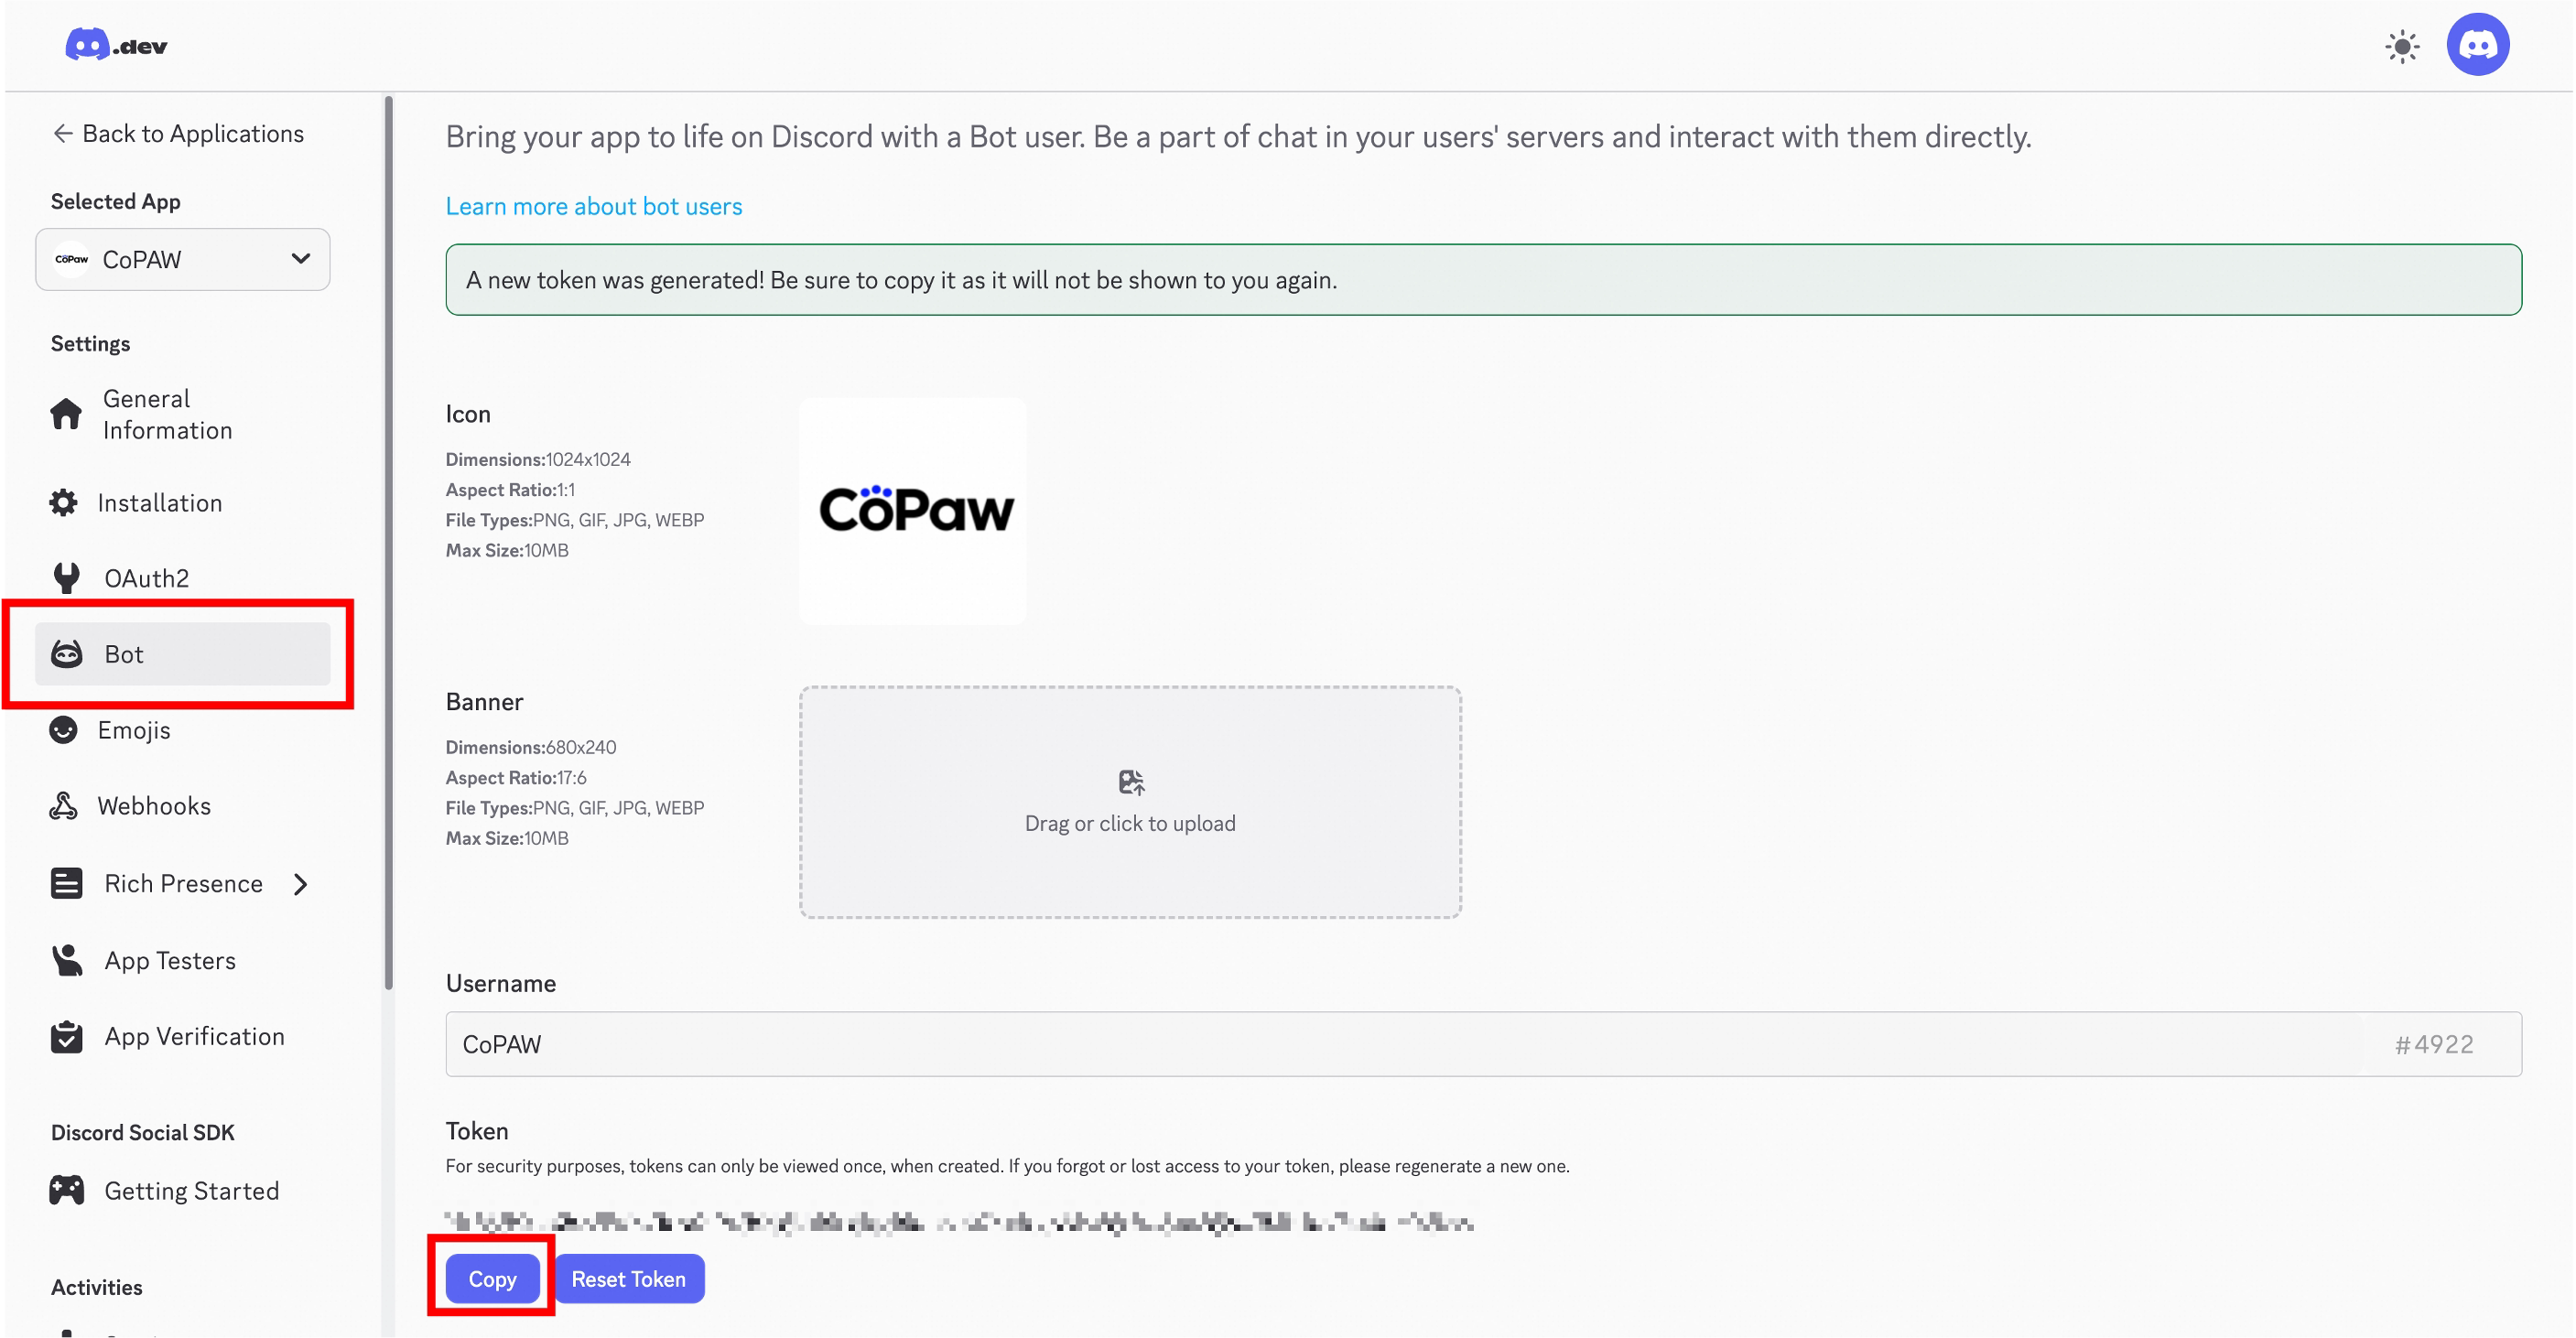
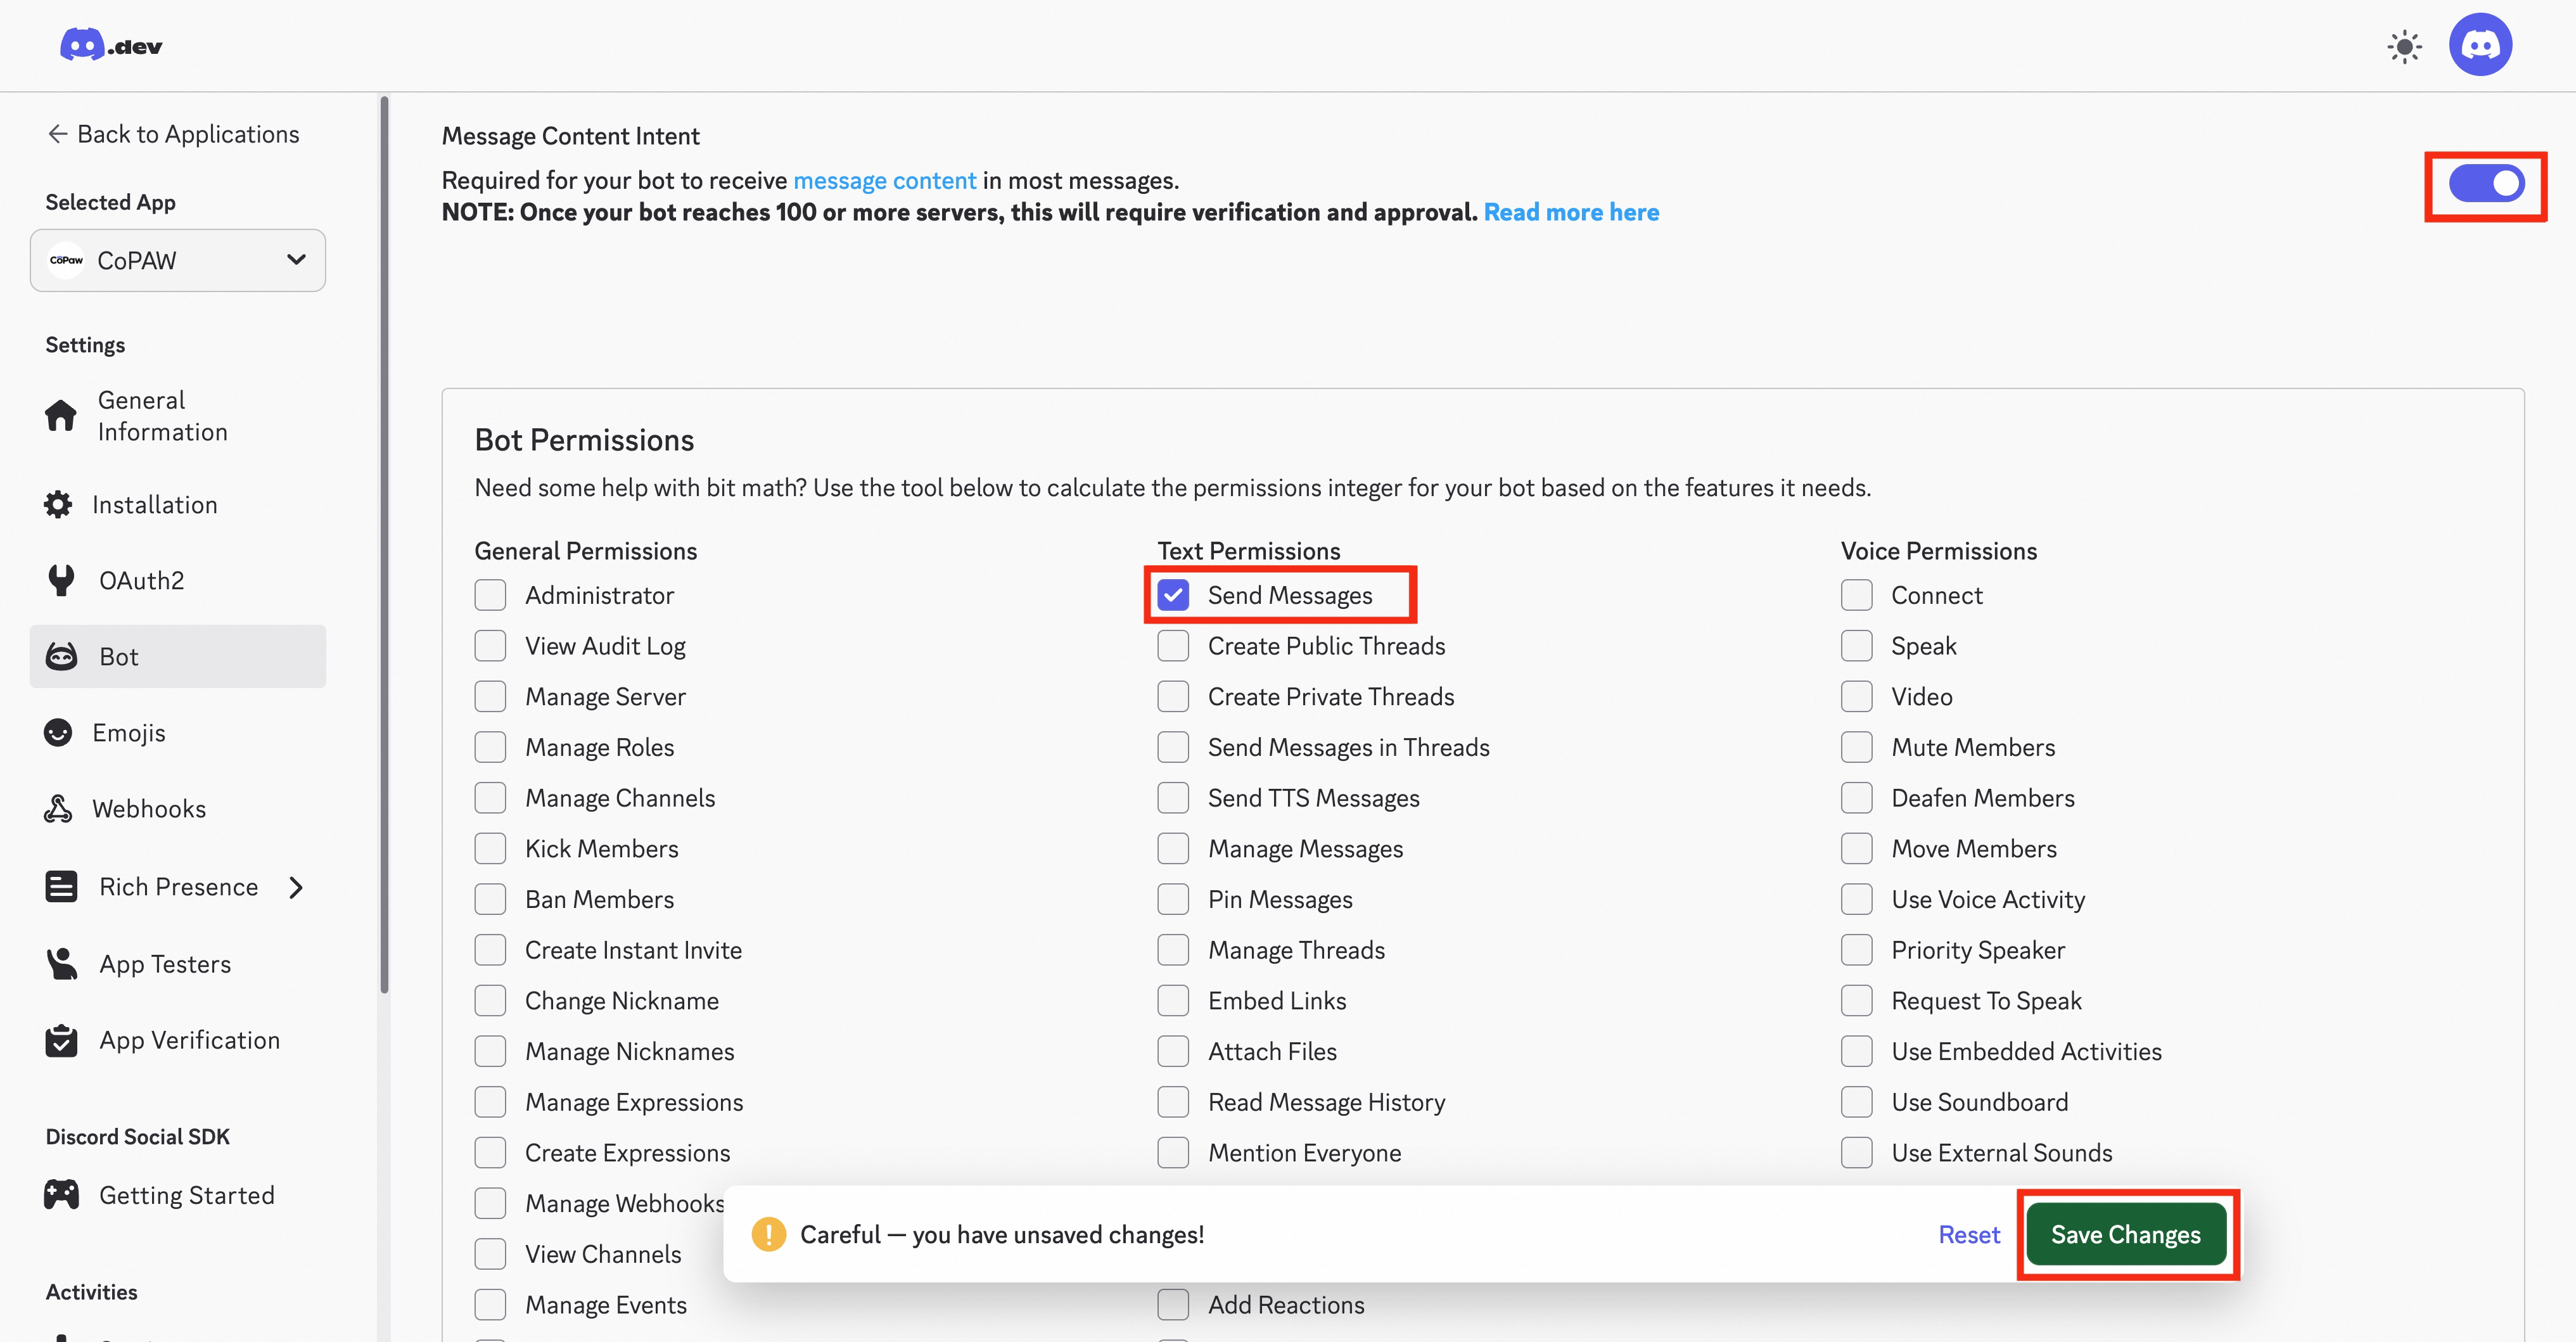
Enable Message Content Intent, grant Send Messages + Attach Files
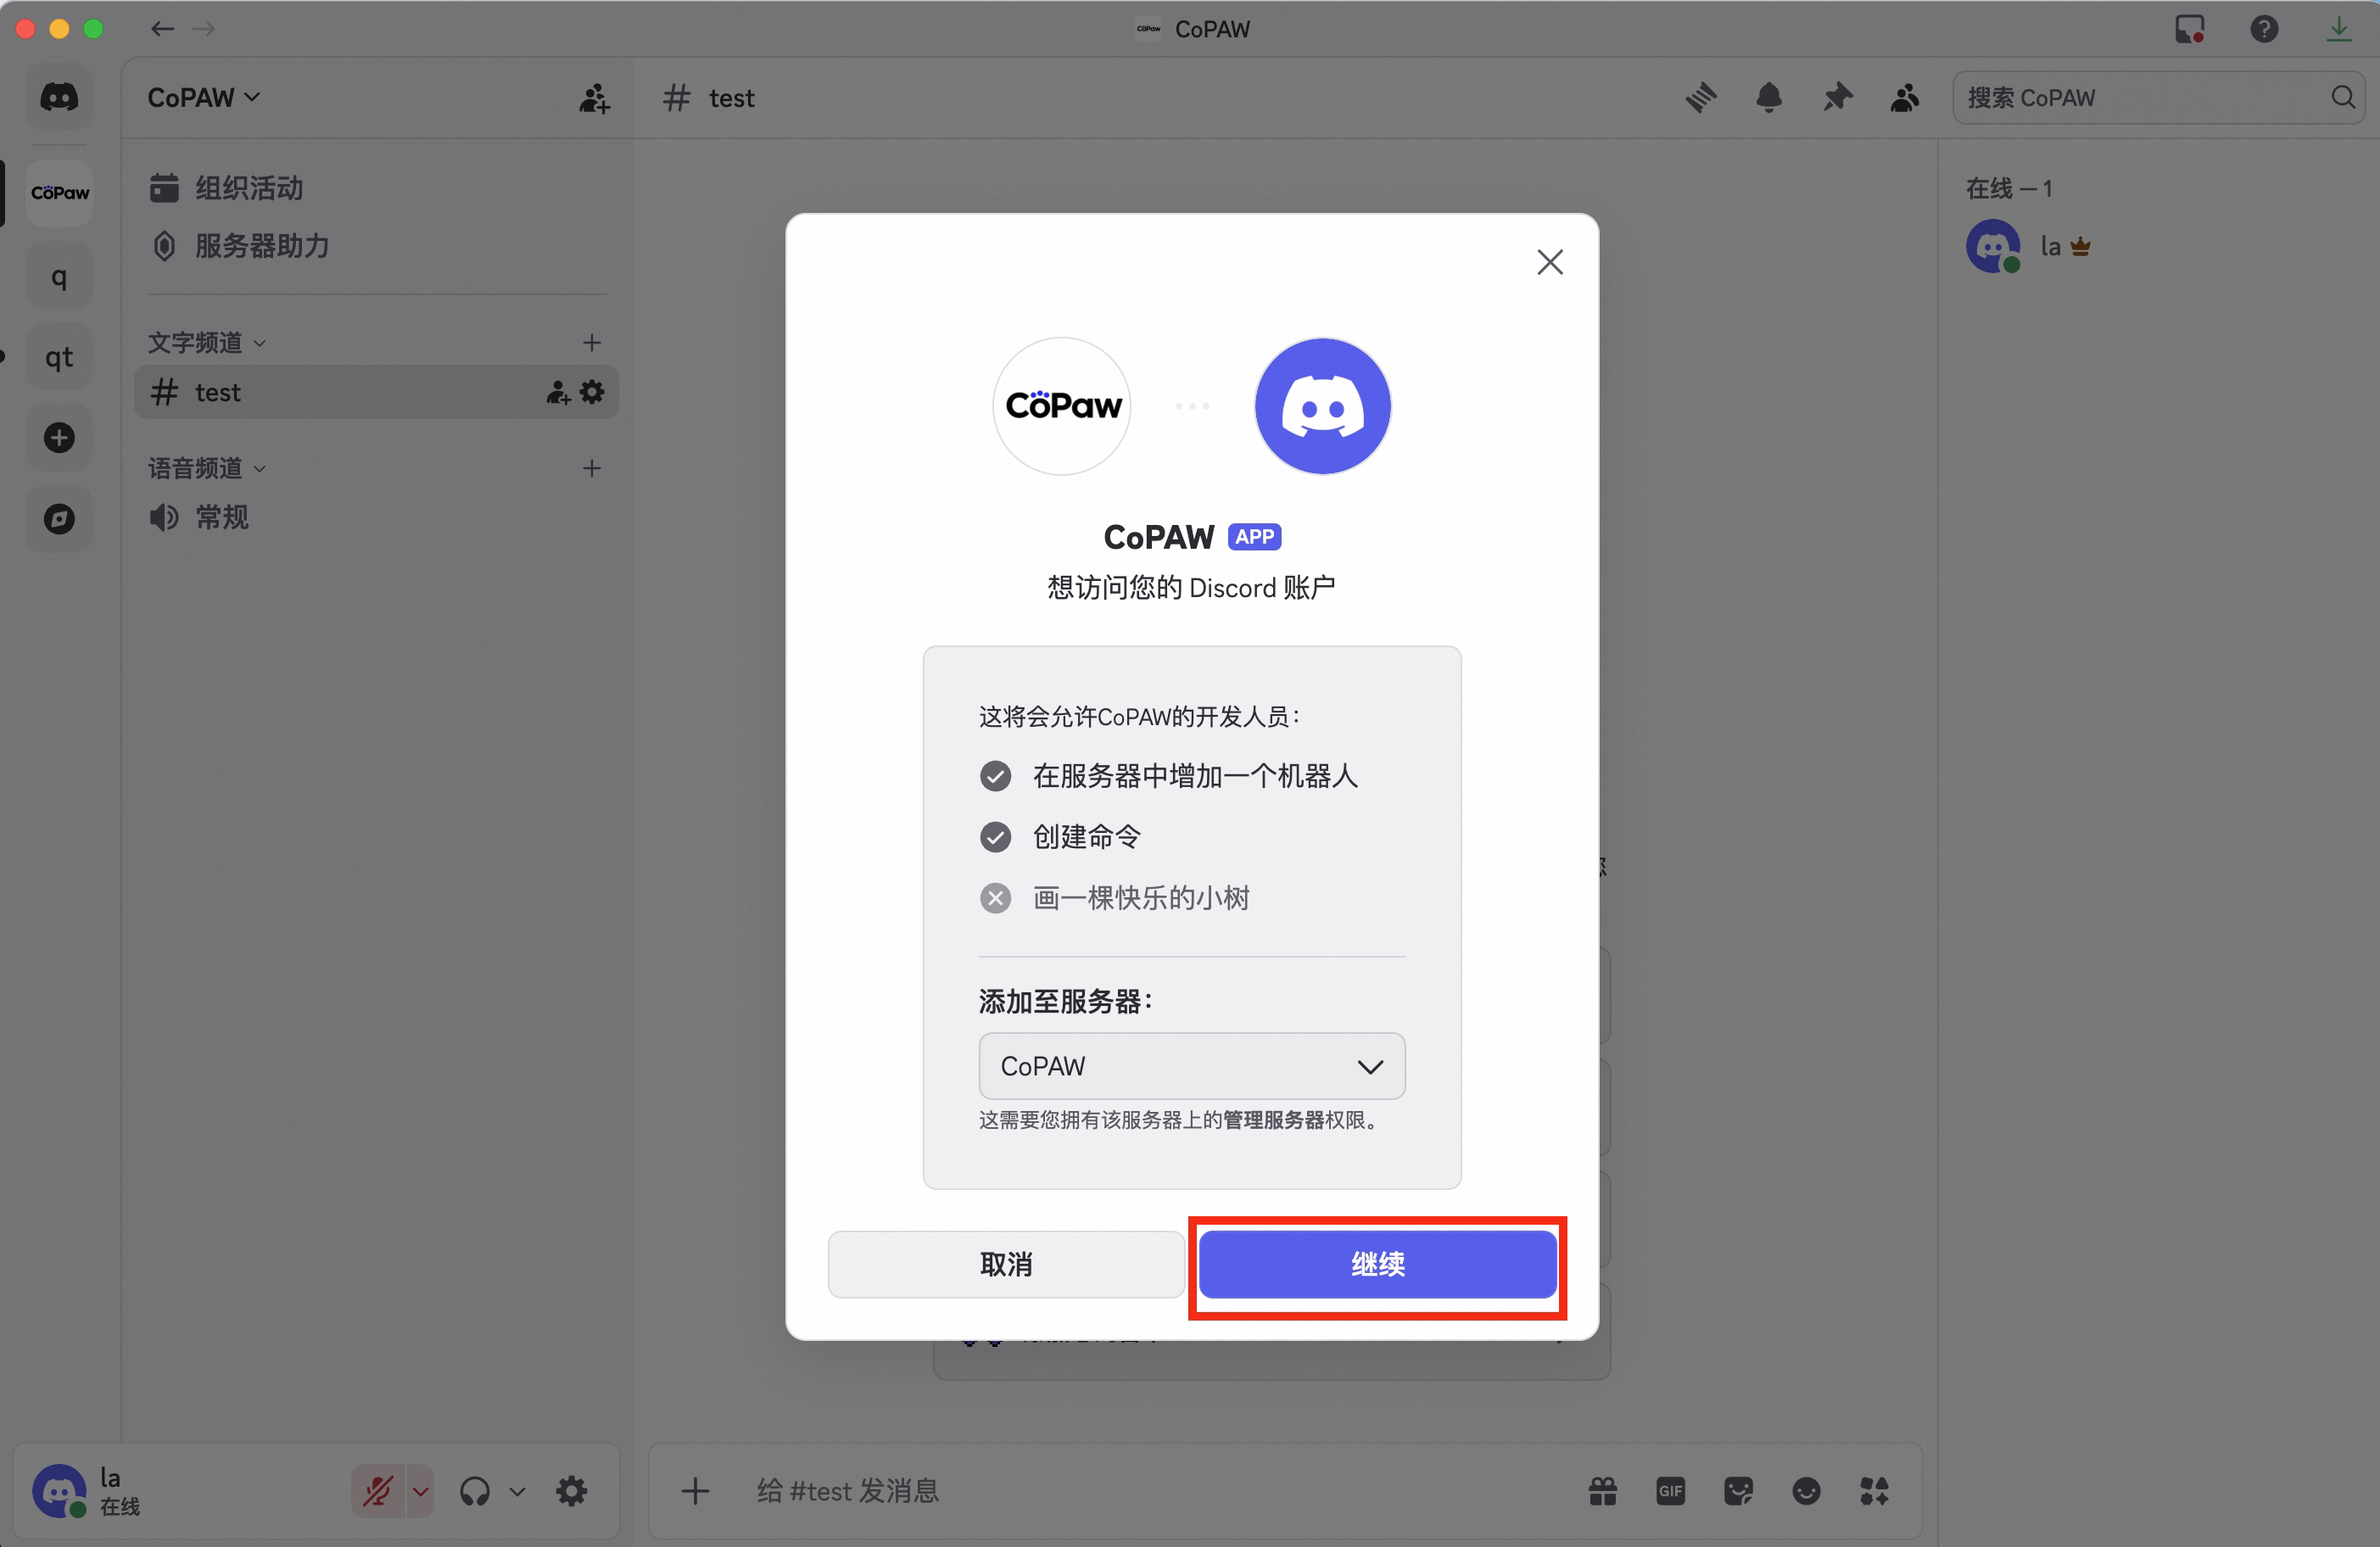
OAuth2 > URL Generator → select
botscope → invite to your server
Configure
curl -X POST http://localhost:18088/api/v1/channels \
  -H "Content-Type: application/json" \
  -H "Authorization: Bearer <token>" \
  -d '{
    "name": "Discord Bot",
    "type": "discord",
    "agentId": 1,
    "config": {
      "bot_token": "your-bot-token",
      "accept_bot_messages": false
    },
    "enabled": true
  }'
TIP
- No Webhook URL or Interactions Endpoint needed — Gateway WebSocket handles everything
- Long replies (over 2000 characters) auto-split while preserving code block integrity
- Message deduplication (LRU cache of 500) prevents duplicate processing during reconnects
QQ
WebSocket / callback modes, on the official bot platform.
One-click QR binding (recommended, v1.4.0+)
Like DingTalk / Feishu, QQ now supports scan-to-bind — no manual copying of AppID / AppSecret from the open platform.
Channels → New → choose type: QQ- In the form, click Bind QQ App via QR — a QR code unfolds
- Scan it with QQ and confirm authorization
- Back in the form, AppID and AppSecret are auto-filled
What's happening under the hood
This goes through the QQ Open Platform Lite portal: MateClaw mints a temporary session and the credentials land in the form via an AES-256-GCM encrypted exchange. The session is valid for 12 minutes and auto-invalidates on expiry. No hand-copied credentials anywhere in the flow.
Manual app creation (fallback)
If the QR flow can't reach QQ on your network:
QQ Open Platform → create a bot application
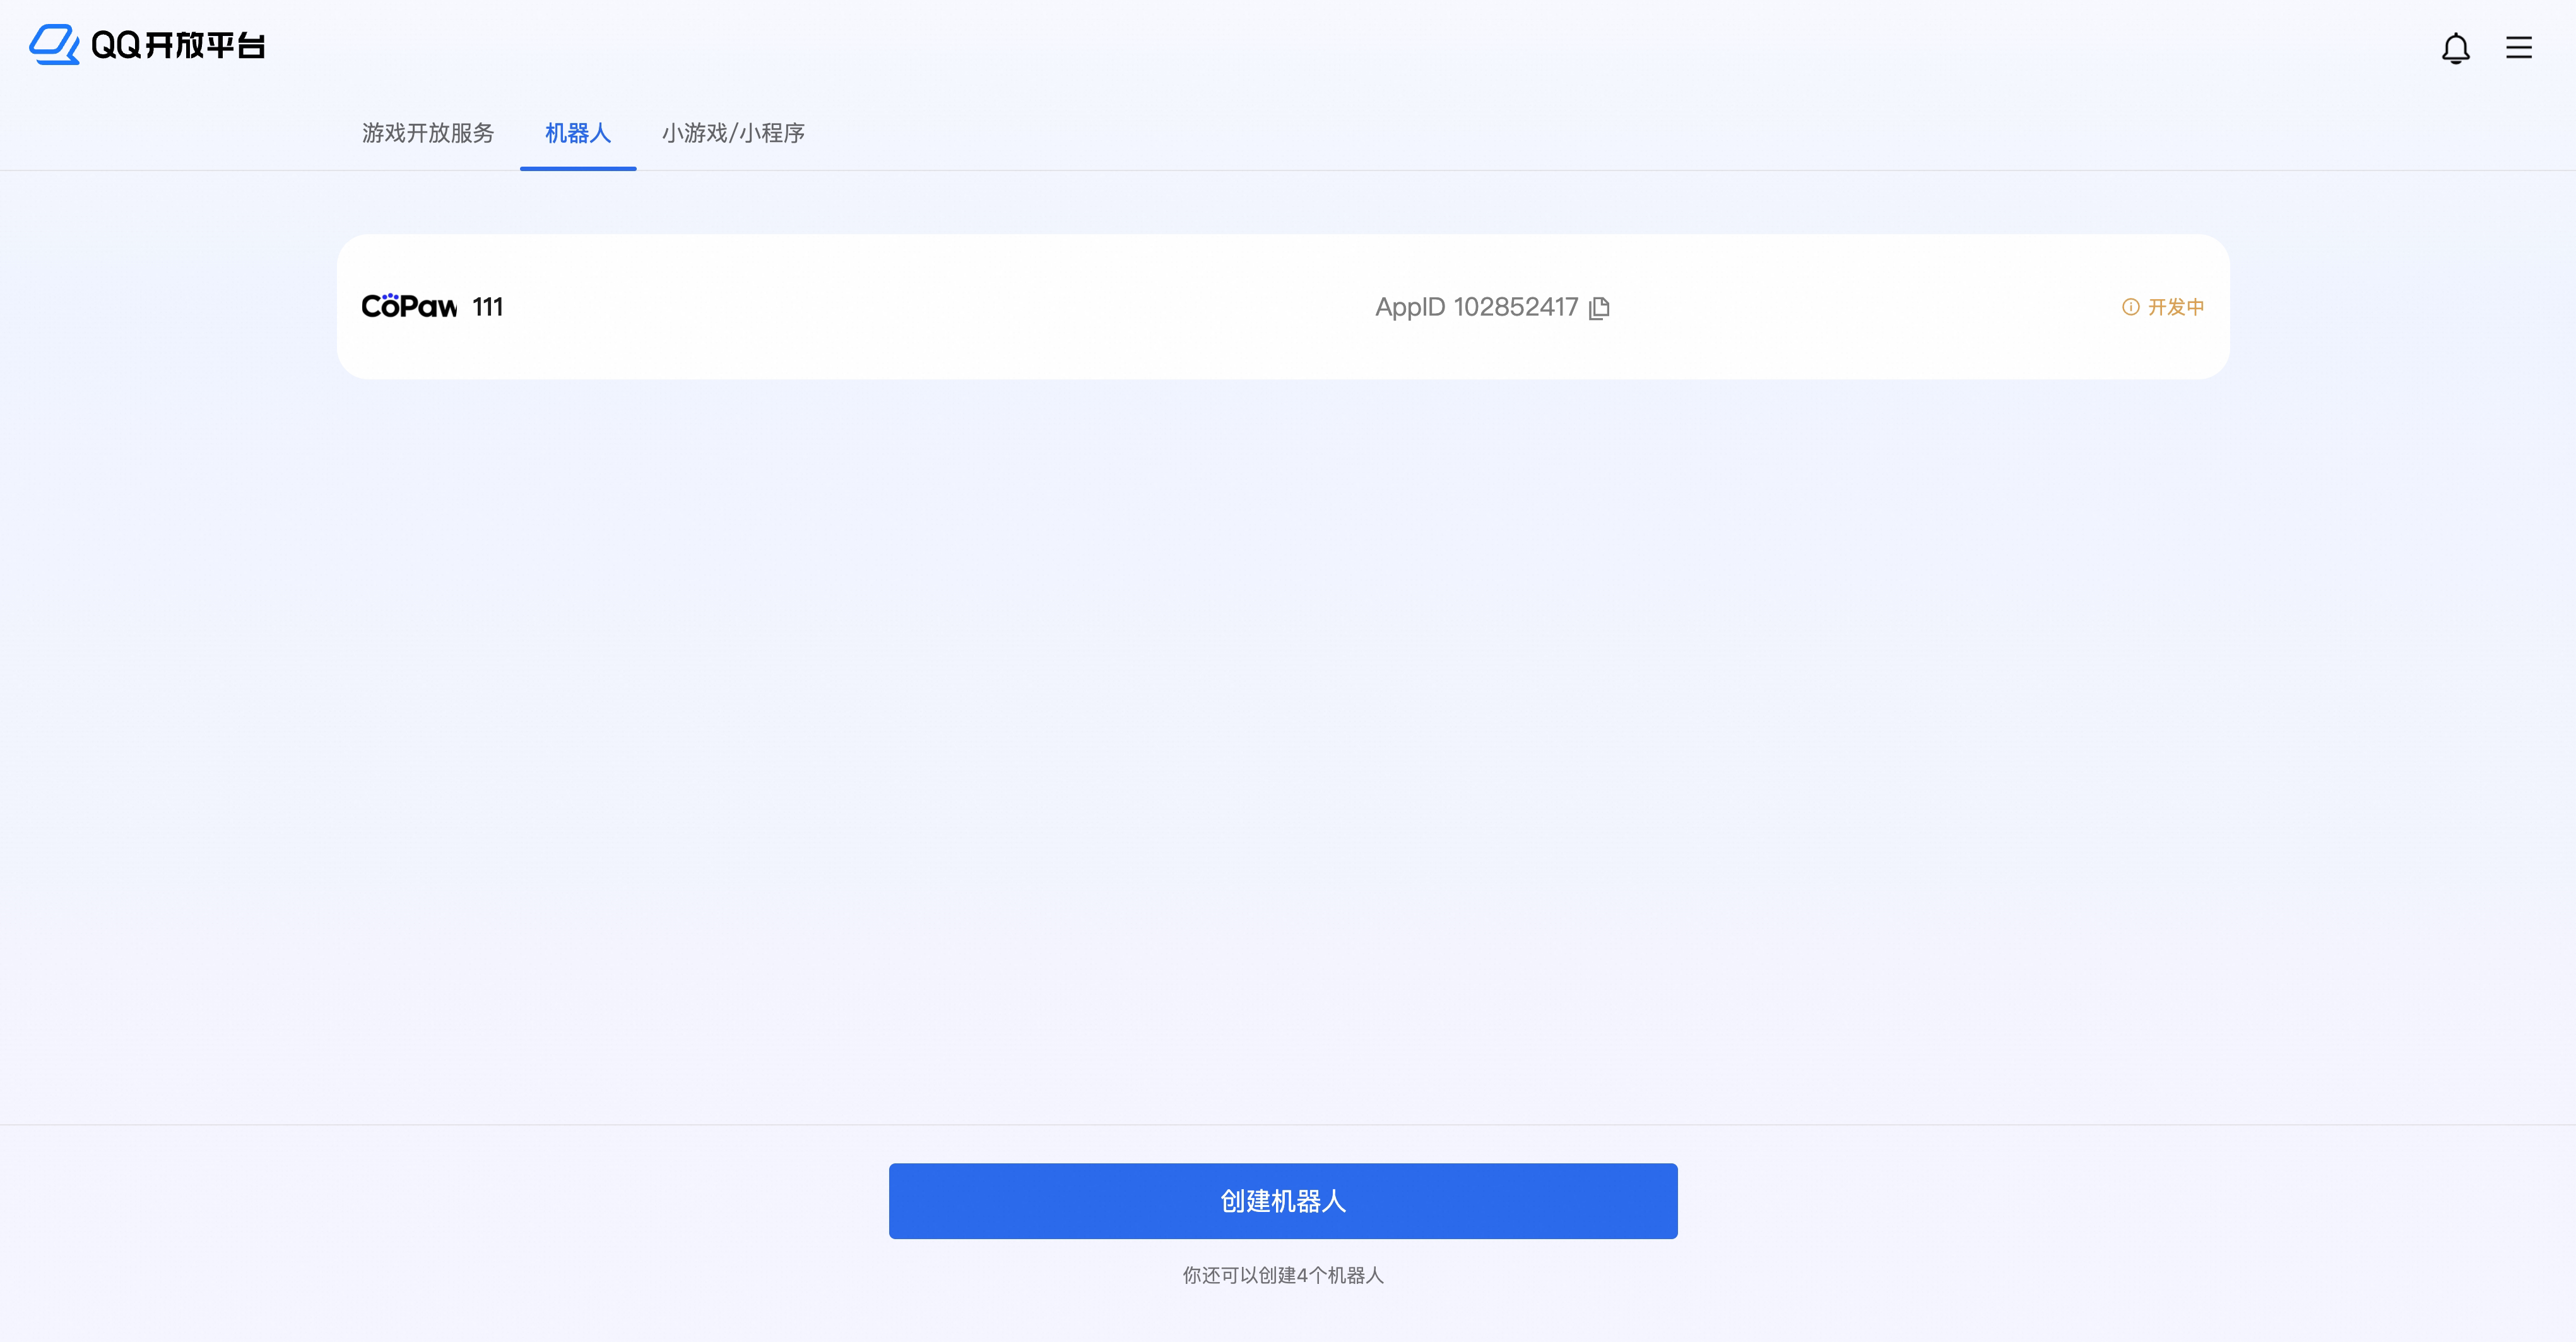
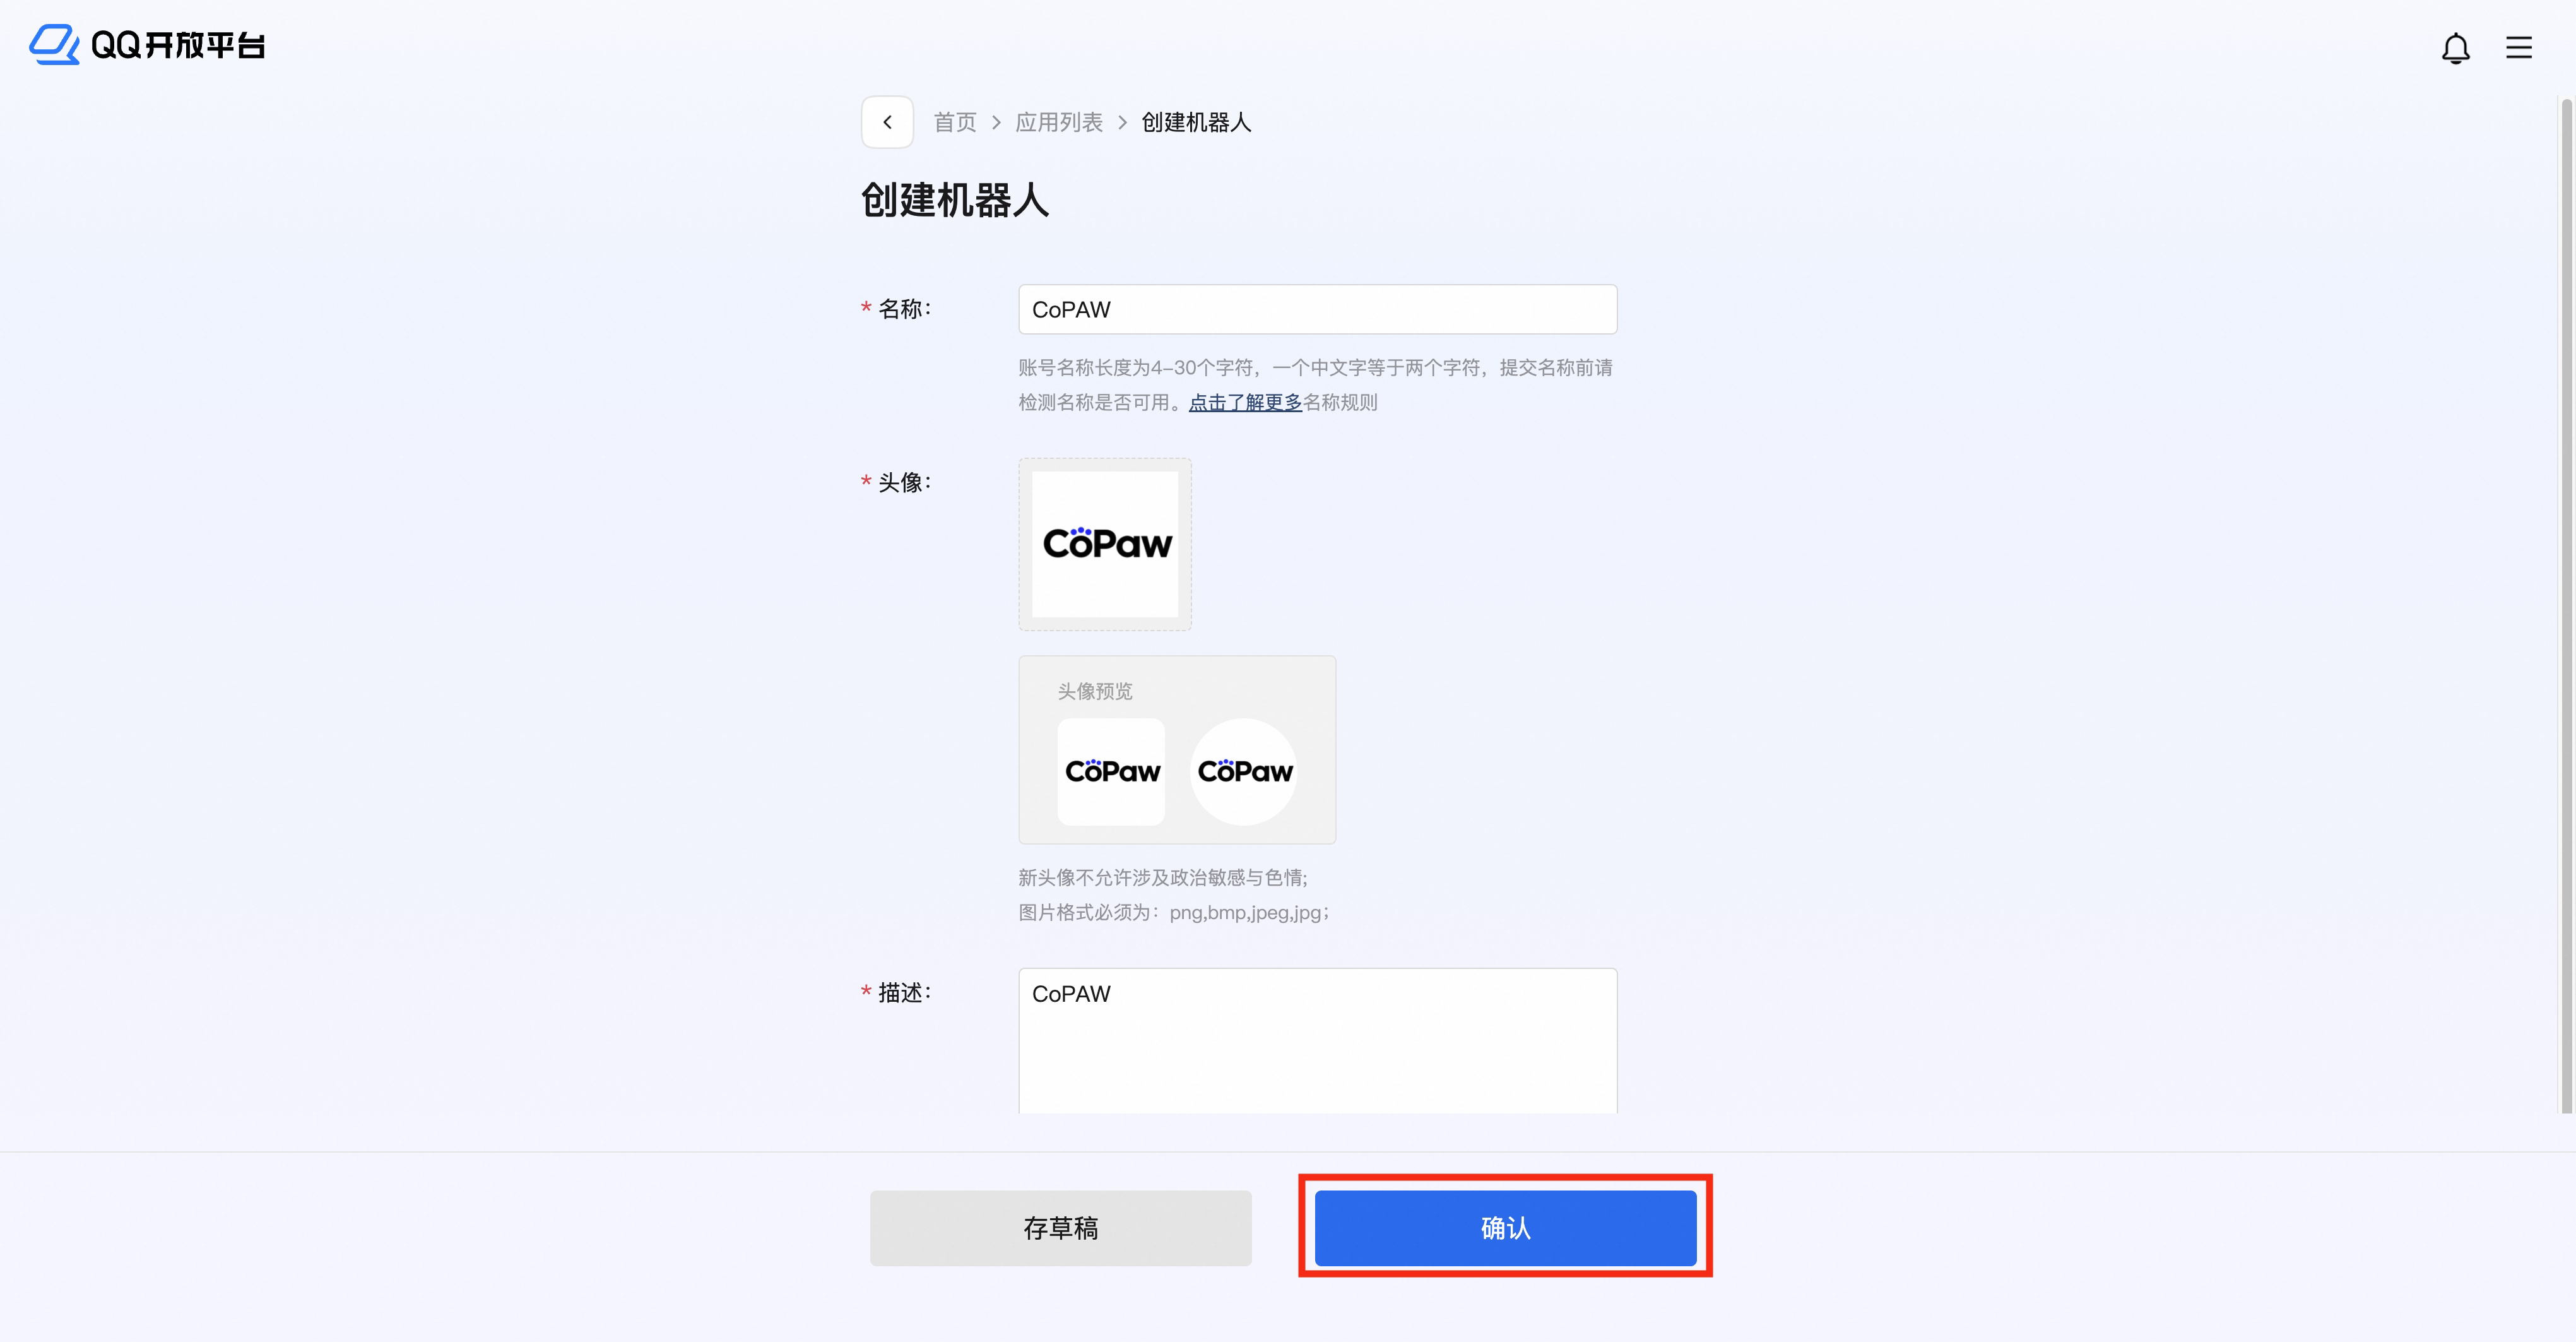
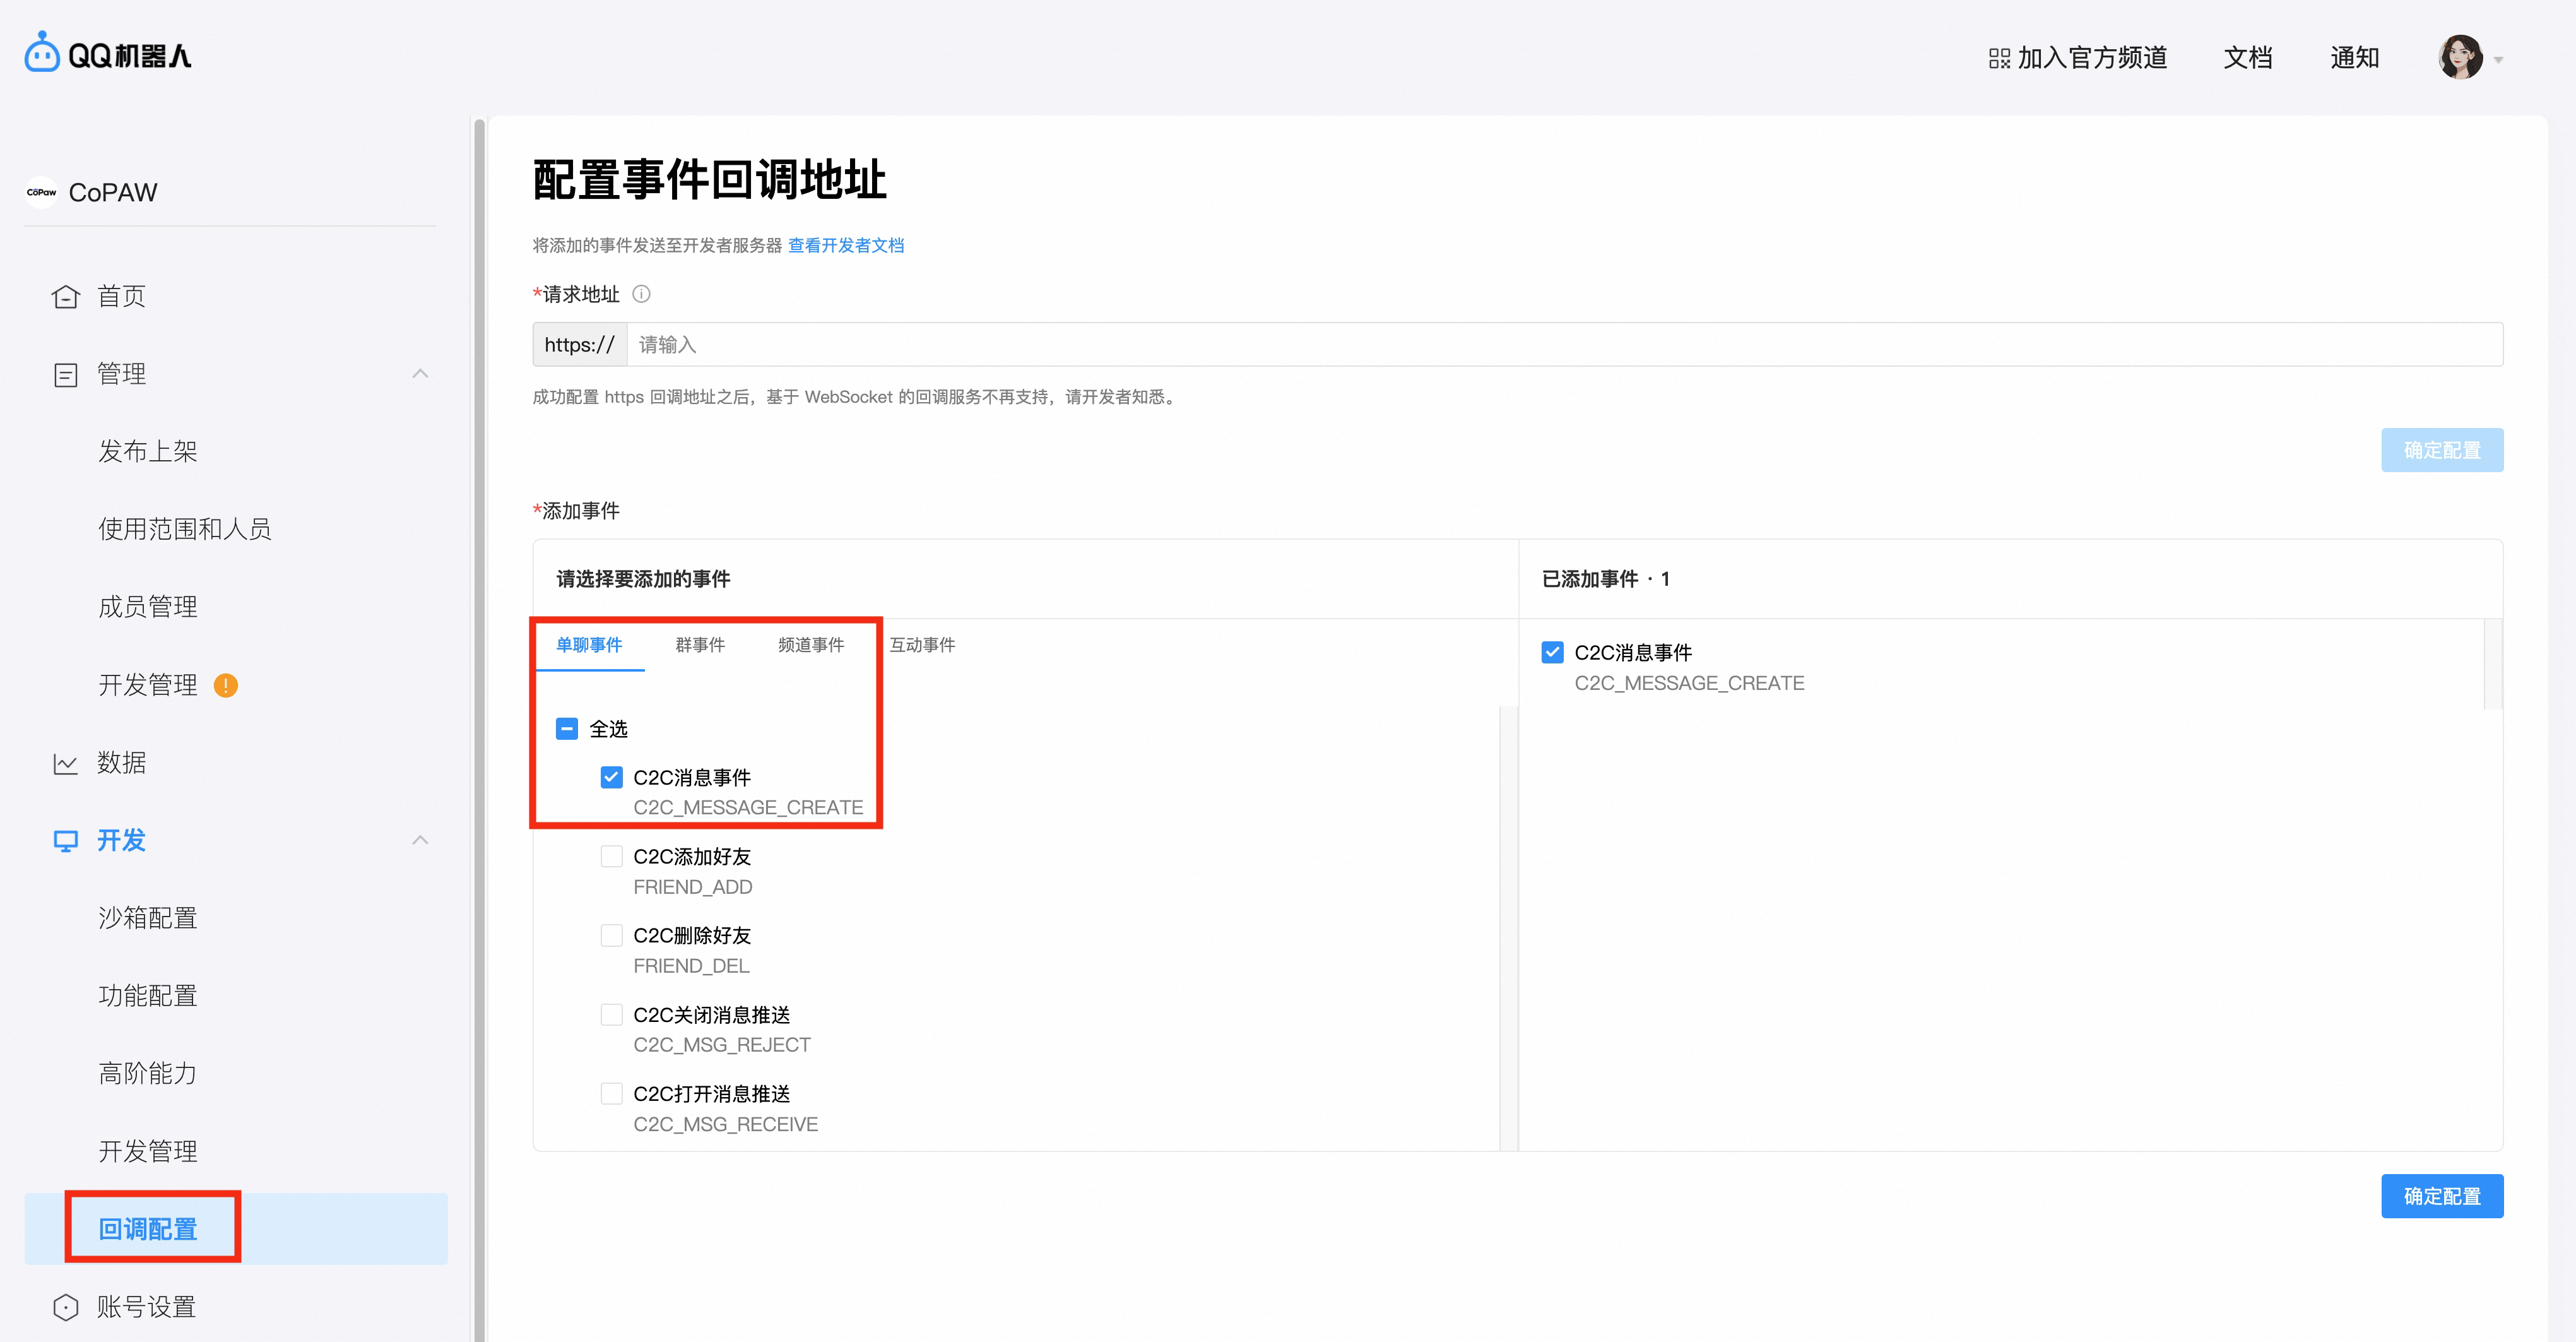
Callback Configuration → enable C2C Message Event and Group Message AT Event
Development Management → grab AppID and AppSecret
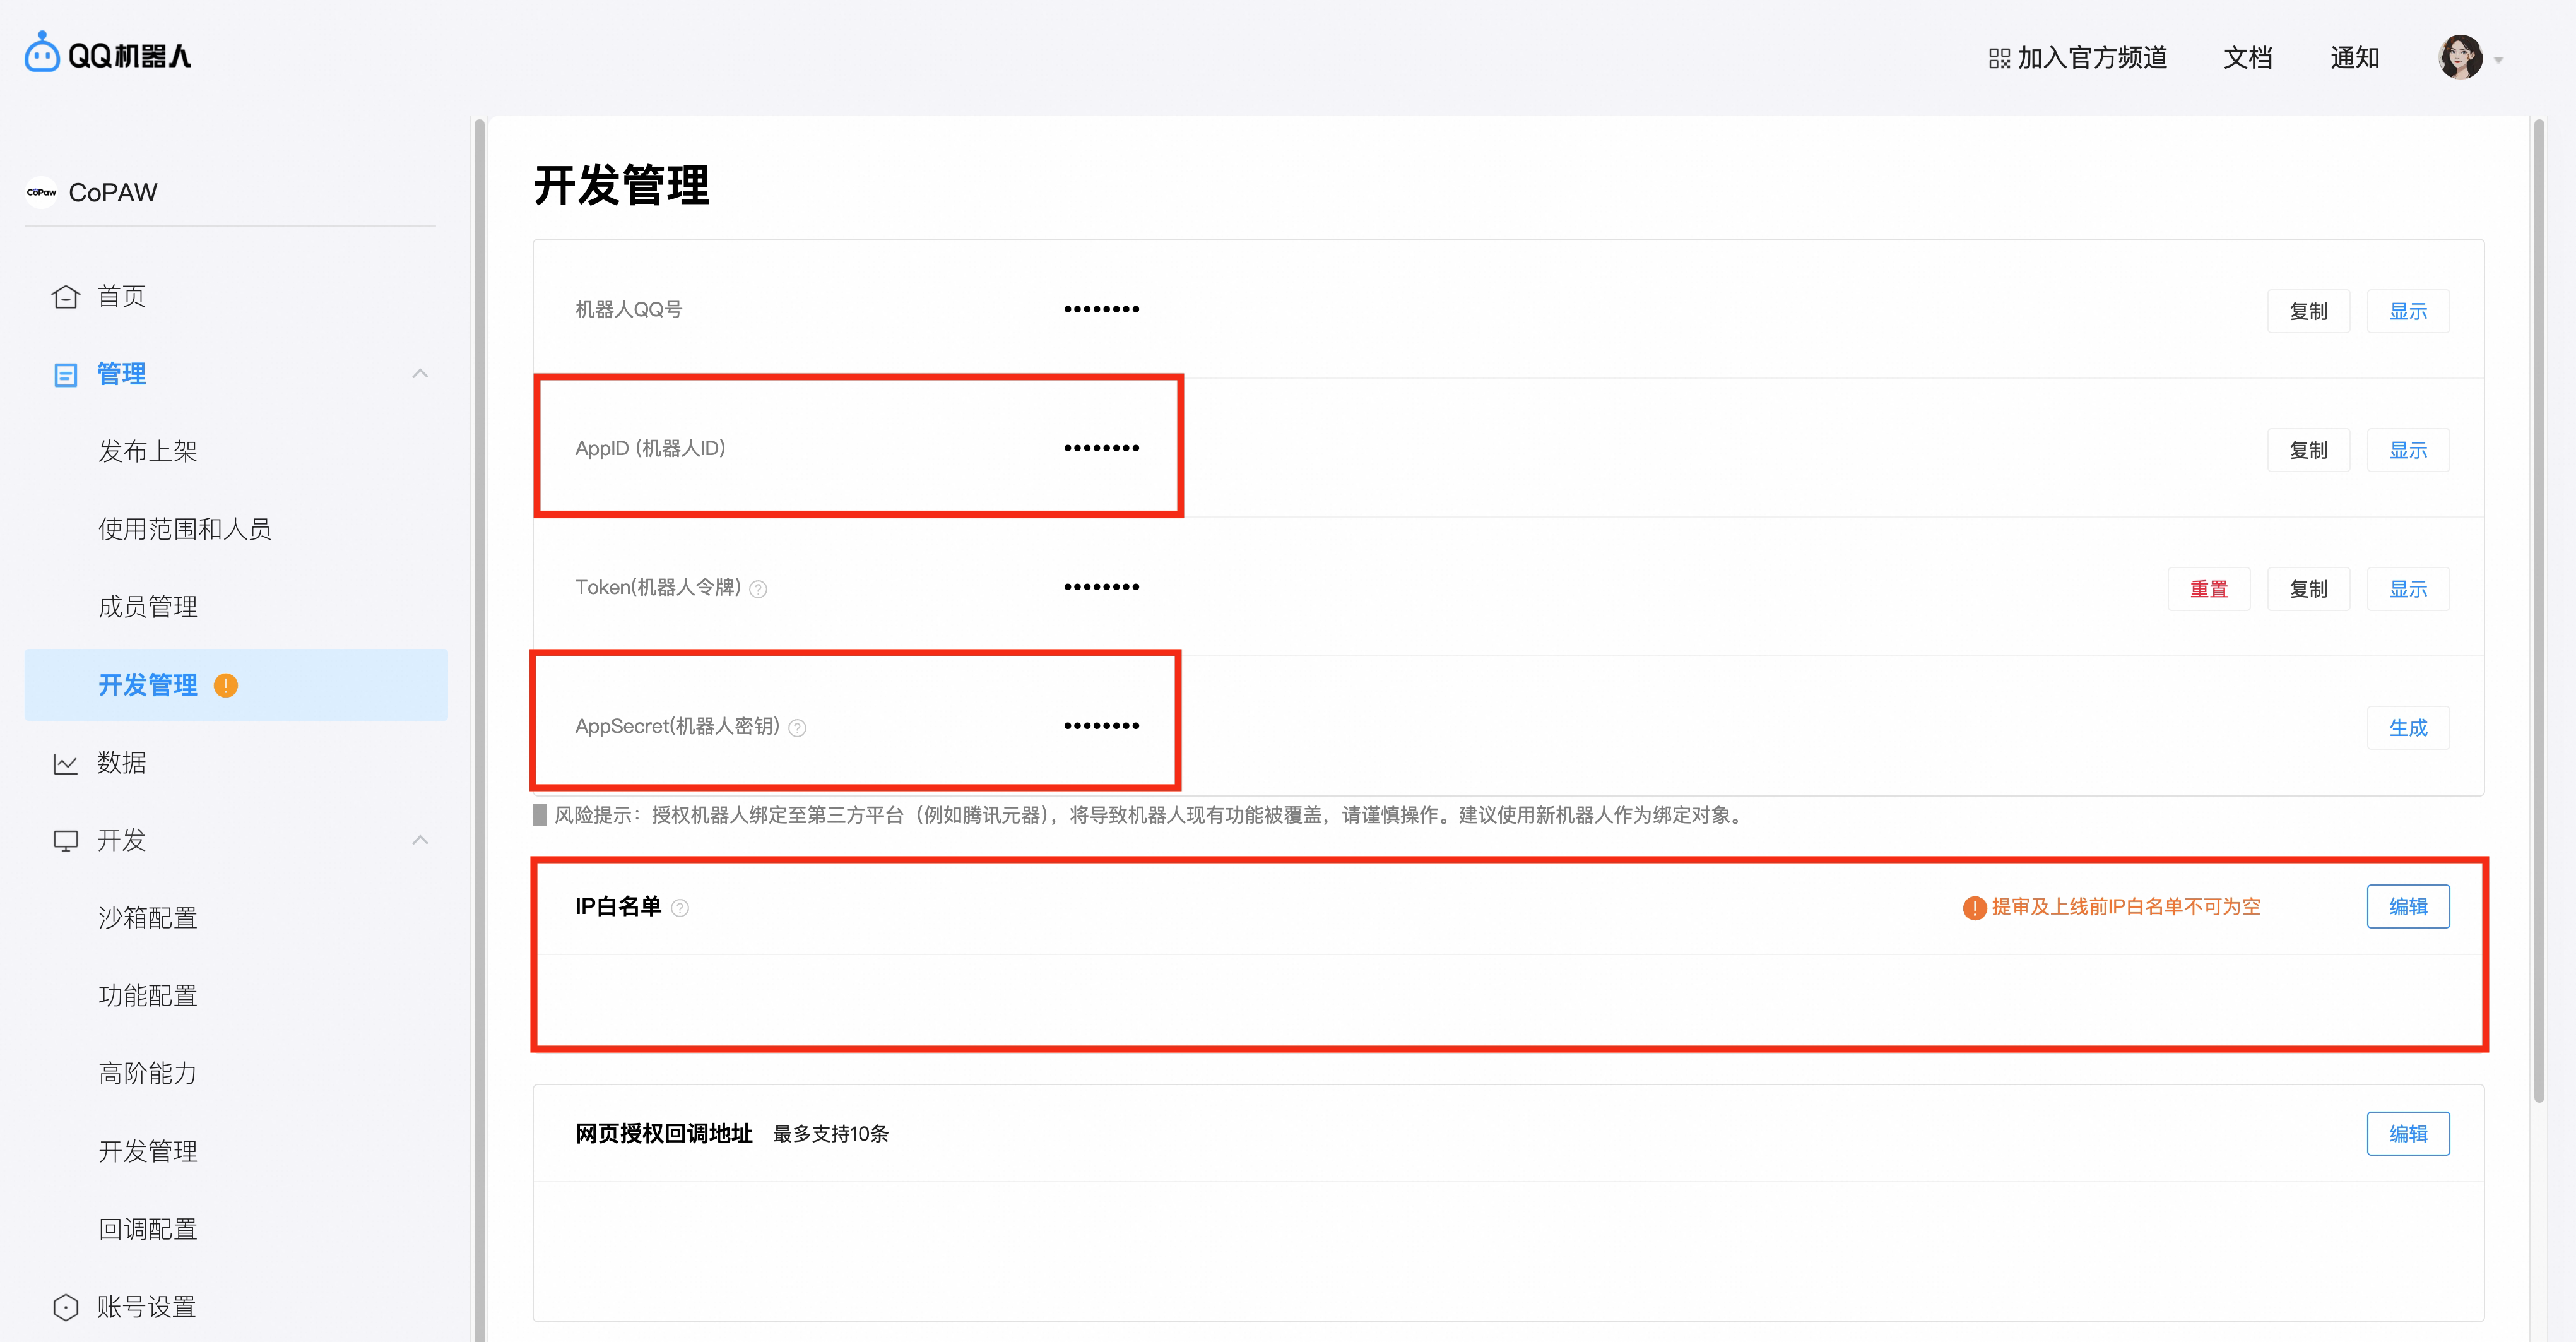
curl -X POST http://localhost:18088/api/v1/channels \
  -H "Content-Type: application/json" \
  -H "Authorization: Bearer <token>" \
  -d '{
    "name": "QQ Bot",
    "type": "qq",
    "agentId": 1,
    "config": {
      "app_id": "your-app-id",
      "client_secret": "your-app-secret"
    },
    "enabled": true
  }'
Slack
Events API (webhook mode) or Socket Mode (no public IP needed).
Create app
- Visit Slack API — Your Apps and create a new app
- Under OAuth & Permissions, grant bot scopes:
chat:write,app_mentions:read,im:history,im:read,im:write,files:write - Install the app to your workspace
- Copy the Bot User OAuth Token (
xoxb-...) - For Socket Mode: under Socket Mode, enable it and generate an App-Level Token with
connections:write(xapp-...) - Subscribe to bot events:
app_mention,message.im
Configure
curl -X POST http://localhost:18088/api/v1/channels \
  -H "Content-Type: application/json" \
  -H "Authorization: Bearer <token>" \
  -d '{
    "name": "Slack Bot",
    "type": "slack",
    "agentId": 1,
    "config": {
      "bot_token": "xoxb-...",
      "app_token": "xapp-..."
    },
    "enabled": true
  }'
Webhook URL (webhook mode): https://your-domain/api/v1/channels/webhook/slack
WeChat Personal (iLink)
WARNING
WeChat Personal Bot (iLink protocol) is in beta. Access must be applied for before use.
- Login — QR code scan on first use; token persists automatically (across restarts)
- Receiving — HTTP long polling
- Sending — Reply via the
sendmessageAPI (text + voice)
Add a WeChat Personal channel in Channel Management, click Get Login QR Code, scan with your phone. Token auto-fills on authorization.
What it survives now
WeChat Personal used to be the flakiest channel. We rebuilt it:
- Watchdog loop — no silent pollers that stop reconnecting
- Jittered exponential backoff — auto-recovery on token expiry and network blips, no crash-and-stay-dead
- Per-account staleness detection — precisely identifies which account connection has gone stale
- Voice transcription with 3 fallback paths — covers WeChat CDN's multiple encryption schemes
curl -X POST http://localhost:18088/api/v1/channels \
  -H "Content-Type: application/json" \
  -H "Authorization: Bearer <token>" \
  -d '{
    "name": "WeChat Personal",
    "type": "weixin",
    "agentId": 1,
    "config": {"bot_token": "your-bot-token"},
    "enabled": true
  }'
WeChat Official Account (publish target, 1.8.0+)
Unlike the nine conversational channels above, the WeChat Official Account (公众号) integration is a one-way publish transport, not an inbound message channel. It's used by Content Studio to push image-text articles into your Official Account draft box.
- Configure the Official Account
app_id/app_secretin Settings — the secret is AES-GCM encrypted at rest (setMATECLAW_SETTING_KEYand back it up). - The WeChat service instance is cached per appId with a persisted access token (WeChat allows one valid token per appId), and the publish chain retries transient errors and translates known error codes into actionable hints (e.g. add the server IP to the Official Account whitelist).
- Publishing is draft-box-first; the optional
publishaction is approval-gated. See Content Studio.
Channel management API
# List
curl http://localhost:18088/api/v1/channels \
  -H "Authorization: Bearer <token>"

# Toggle
curl -X PUT "http://localhost:18088/api/v1/channels/1/toggle?enabled=true" \
  -H "Authorization: Bearer <token>"

# Delete
curl -X DELETE http://localhost:18088/api/v1/channels/1 \
  -H "Authorization: Bearer <token>"

# Health status (all channels)
curl http://localhost:18088/api/v1/channels/health \
  -H "Authorization: Bearer <token>"
Session source tracking
Every channel conversation records where it came from. In the session management view and the chat console, each session shows the corresponding channel icon. Sessions from IM channels belong to the system user.
Voice for every channel
IM channels (WeCom, WeChat, DingTalk) support voice input. Transcription via DashScope or OpenAI Whisper, with multi-path fallback for WeChat's encrypted voice CDN. Voice replies are synthesized via text-to-speech and sent back as audio messages.
Per-conversation model selection (all IM channels)
As of 1.4.0, IM channel conversations remember a per-conversation model, just like web. Each IM conversation seeds a conversation-level model when it's created, and later replies respect that choice rather than always falling back to the agent's default model. See Chat & Messaging for the web-side switching detail. As of 2.0.0 you can also switch right inside the IM with the /model magic command (next section).
Channel magic commands (2.0.0+)
In any IM channel, a message that is entirely a /-prefixed command is intercepted by a unified dispatcher before it reaches the LLM — commands register once and work on every channel, burn no tokens, and respond instantly:
| Command | What it does |
|---|---|
/new | Start a fresh conversation (current context is archived) |
/clear | Clear the current conversation's context (the conversation itself survives; the 1.8-era clear command folds into this framework) |
/status | Show the conversation's state — bound employee, model, whether a task is running |
/stop | Stop the running task — intercepted at the enqueue gate, so it preempts a long task mid-flight |
/model | With no argument, list available models (current pin marked); /model <name> or /model <provider>:<name> switches this conversation's model, effective from the next message; /model reset restores the default. Fuzzy names get suggestion lists |
/help | List all commands with descriptions |
Every command carries Chinese and English aliases (e.g. 清空 / 新会话 / 状态) and is case-insensitive. Matching is two-layered: bare aliases match only as the entire message ("help me write a report" is a normal prompt, not /help); the slash form matches on the first token with arguments passed through (which is how /model qwen-max carries its argument). A normal message that merely contains /stop mid-sentence never misfires. Command confirmations go through the channel's normal render-and-send path, so an already-posted "thinking…" placeholder bubble is properly consumed instead of spinning forever.
Per-stage progress narration on sync IM channels (2.0.0+)
The worst part of long tasks in IM is the "message dropped into a void" feeling. As of 2.0.0, IM channels on the synchronous path (WeCom, WeChat, …) no longer reply with only the final answer:
- each stage narration of the agent's run (what it's doing, which tool it called) arrives as a standalone message — you see the task's footsteps on your phone;
- WeCom goes further with an event-driven progress bubble that updates in place — thinking state, live tool trace and elapsed time roll in real time, and the bubble morphs into the final answer when it arrives (details and tuning in WeCom Deep Tuning);
- the web SSE and sync IM paths share one per-turn stream accumulator, so both sides see identical execution metadata (tool calls, token usage).
Things worth knowing
- Webhook mode needs HTTPS. Production deployments should front MateClaw with Nginx + SSL.
- Long-connection modes need no public IP. Telegram Long-Polling, DingTalk Stream, Feishu WebSocket, Discord Gateway, Slack Socket mode, WeCom Long connection — all run behind NAT.
- One channel, one agent. Different channels can point at different agents.
- Conversation ids are channel-scoped (2.0.0). Conversation id generation now encodes the channel identity — two same-type channels created in different workspaces keep separate conversations even for the same external user, so two workspaces' chats can never bleed into one conversation row.
- Credentials are encrypted at rest in
mate_channel. - China networks often need
http_proxyconfigured for Telegram and Discord.
Next
- Chat & Messaging — message flow, segments, streaming events
- Agents — what's actually answering through each channel
- Configuration — global channel tuning